■
3-8
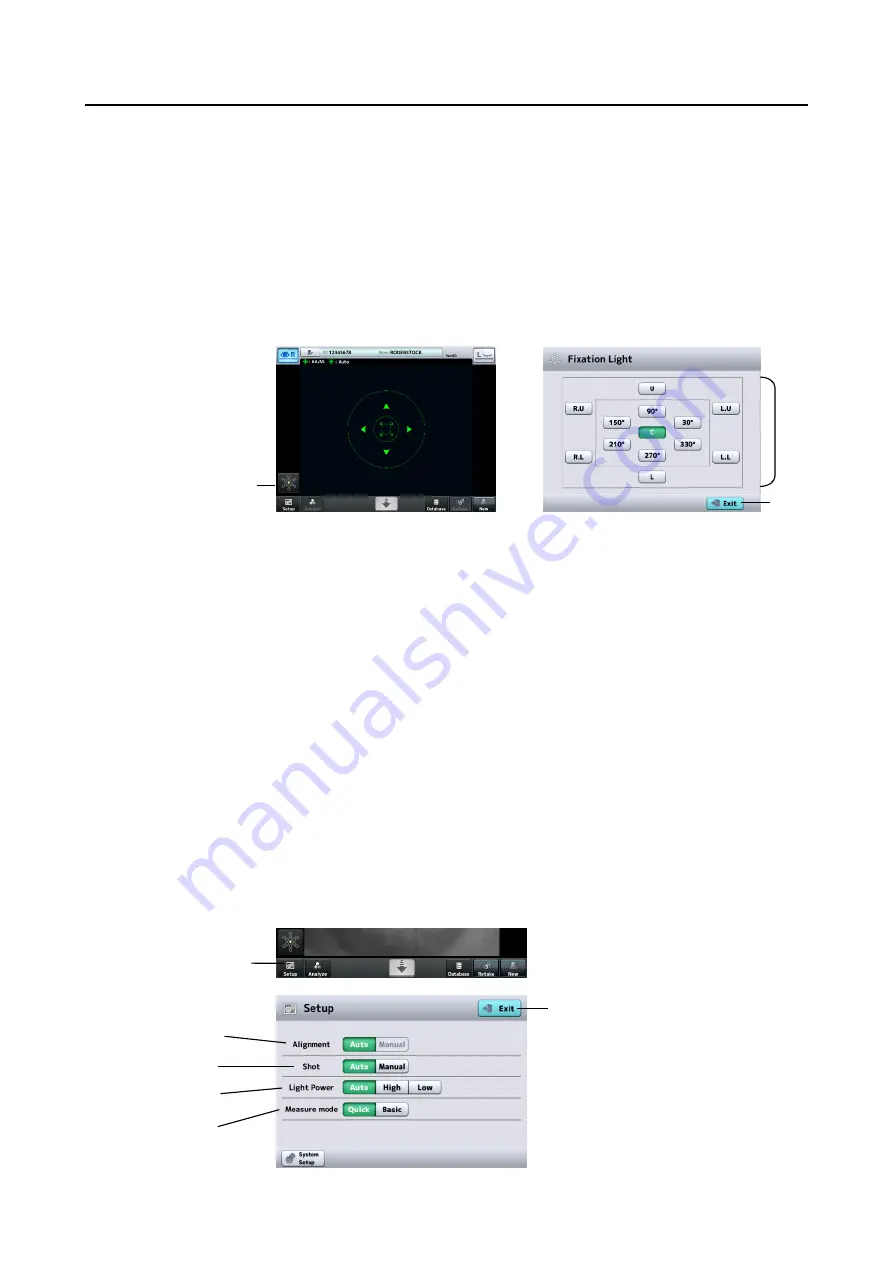
3.2.6 Setting the fixation light position
The Fixation Light to move
the patient’s eye can be turned on in the center, 6
locations in the periphery, and 6 parafovea locations. The center light is
normally used for capturing images, but the peripheral and parafovea
positions are effective when an image cannot be taken with the light in the
center or when capturing an image at optional positions.
1) Touch the fixation light button (1) to display the Fixation Light screen (Fig.
2).
(Fig. 1)
(Fig. 2)
2
)
Touch the appropriate button (2) to select the lighting position.
- Descriptions on each button represent the direction viewed from the
patient.
C : Center, U : Upper, R.U : Upper right, R.L : Lower right,
L : Lower, L.L : Lower left, L.U : Upper left
3
)
Touch the “Exit”
button (3) to close the Fixation Light screen.
- The position of the lit fixation light is shown in orange on the fixation
light button (1) on the capture screen.
3.2.7 Setting capturing conditions
Settings for capturing images can be changed temporarily. The temporary
settings below will revert to the system setup when the
“
New
”
button is
touched.
1
)
Touch the “Setup” button (1) to display the Setup screen (Fig. 2).
(1)
(2)
(3)
(1)
a)
b)
c)
d)
(2)
(Fig.2)
(Fig.1)
Summary of Contents for REM 4000
Page 2: ......
Page 26: ...2 12 This page is intentionally left blank...
Page 33: ...3 7 Fig 1 Fig 2 2 1 3 4...
Page 82: ...3 56 This page is intentionally left blank...
Page 94: ...6 2 This page is intentionally left blank...
Page 101: ......


