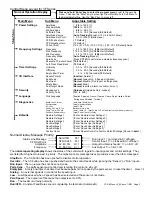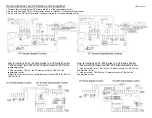
Control Menu Layout for VF Series
Power Settings
Amplitude
[
0.0
to 100.0 ] %
Max Amplitude
[
100.0
to 40.0 ] %
Min Amplitude
[
0.0
to 95.0 ] %
Soft Start Time
[ 0.0 to 10.0 ] Seconds (
0.5
Default)
Amplitude Source
[
Auto Tracking
Manual, 0-10V, 4-20mA, Follow]
Amplitude Set-Point
[ 0.0 to 1250 ] vibration level
CFR Positive Gain
[
7
Default ]
CFR Negative Gain
[ 12 Default ]
Current Limit
[ 10.5 (4.1 VF-3), (12.5, VF-12), (18.0, VF-18) Default] Amps
Frequency Settings
Frequency
[ 5.0 to 180.0 ] Hz (
60.0
Hertz Default)
Max Frequency
[ 15.0 to 180.0 ] Hz (
140.0
Hertz Default)
Min Frequency
[ 5.0 to 170.0 ] Hz (
45.0
Hertz Default)
Frequency Mode
[
Auto Tracking,
Manual ]
Auto Scan
[ Press ENTER to perform an automatic frequency scan ]
Resonate Threshold Level [
15.0
Default ]
Auto Track Dead Band
[
15
Default ]
Timer Settings
On Delay
[ 0.0 to 20.0 ] Seconds (
0.5
Default)
Off Delay
[ 0.0 to 20.0 ] Seconds (
0.5
Default)
Empty Bowl Timer
[ 5 to 255 ] Seconds (
10
Default)
I/O Interface
Sensor Polarity
[
Inverted
, Normal ]
Run Mode
[
Normal
, Always On, 2-Speed, High/Low ]
Run Input
[
Normal
, Disable ] Run Input can be ignored.
Empty Bowl
[
Normal
, Stop ]
Aux Output Mode
[
Normal
, Inverted, Alarm, Inv Alarm, Air Jet ]
Security
Keypad Lock
[
Unlocked
, Amplitude Only, Locked ]
Security Code
[ 000 to 999 ]
Language
Pick Language
[
English, Spanish, French, German, Czech, Dutch, Italian, Polish,
Portuguese, Swedish, Turkish
]
Diagnostics
Board/Load Current
[ data, data ] Board, Amps
Accelerometer
[ data ] signal amplitude
AC Volts
[ data ] Volts
Analog 4-20 mA, 0-10 V
[data, data] mA, Volts
Temp, Temp, PS Volts
[ data ], [ data ] °C, [ data ] Volts
Self Test1/factory reset (factory test only)
Software, Software Vers.
[ data ] Power, [ data ] Display
Defaults
Restore Settings 1
[ ‘Enter’ Restores User Settings 1 ]
Restore Settings 2
[ ‘Enter’ Restores User Settings 2 ]
Restore Settings 3
[ ‘Enter’ Restores User Settings 3 ]
Save Settings 1
[ ‘Enter’ Saves User Settings 1 ]
Save Settings 2
[ ‘Enter’ Saves User Settings 2 ]
Save Settings 3
[ ‘Enter’ Saves User Settings 3]
Factory Reset
[ ‘Enter’ Resets Control to Factory Default Settings (Shown in
bold
) ]
Normal Display Message Priority:
The
normal operating display
shows the status of the control with regard to input signals and control settings. They
are listed from highest to lowest in priority. The highest priority message takes precedence over the other messages.
Stop/Run
- The 1/0 button has been pushed to disable control operation.
Override
- The 1/0 button has been pushed and held so the control feeds while ignoring the “Sensor” or “Run” inputs.
Run Input
- The run jumper has not been not made.
Parts Sens
- The parts sensor and control logic is telling the control to stay off.
Empty/jam
- Empty bowl timer has timed out because parts did not pass by the parts sensor to reset the timer.
Analog
- An external signal is in control of the speed input.
Low
- Low Speed used when 2 speed has been selected and the sensor is not made.
Zero Speed
- The output is off because the output is set to 0.0%.
Run
– The feeder is running normally.
Run/CFR
– Constant Feed Rate sensor is regulating the feed rate (Autotune®).
VF-3-9 Menu v2_02.docx 1/8/21 Page 3
Main Menu
Main Menu
Normal Operation Display
Press and hold ‘Enter’ key to enter the program menu
or get to the security
menu. Then use the “Enter” key to move right from Main Menu to Sub Menu to
the Adjustable Setting. Use the “Back” key to move left.
Adjustable Setting
Sub Menu
Press 1/0
Status Line Message
CFR Set Point
Amplitude
Frequency
Run Input: 1= on /closed & 0= off/open
Sensor Input: 1= on /closed & 0= off/open
Output to vibratory feeder: 1= on & 0= off
Aux Output: 1= on & 0= off
Run/CFR R=1
CFR=024.5
S=1
A= 40.0% O=1
F= 60.0Hz
A=1


