Installation Manual
Alcar
®
H51
6
B2
(red)
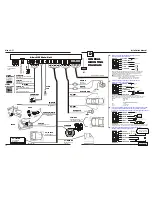
General power supply of the system. Check the 2A fuse and connect to (+) pole of the battery
together with the pink wire (B5).
B3
(purple)
Open collector PNP output, maximum 1A (positive trigger).
The output state is related to the Parameter 0 value in the following way:
Parameter 0 = 1
Parameter 0 = 2
In normal state
GND
+12V
When active
+12V
GND
Generally there are 3 types of siren, which are:
1)
Normal siren, which provides two wires (+) and (GND).
Parameter 0 should be set as 1 and the siren should be connected as follows:
- (+) to B3;
- (GND) to GND;
2)
Back-up siren, with three wires: (+), (GND) and (COMMAND). On the (COMMAND) wire
there should be permanently (+), while the siren is powered ON. Thus, when removing (+) from the
(COMMAND) wire, the siren should sound.
Parameter 0 should be set as 2 and the siren should be connected as follows:
- (+) to (+12V);
- (GND) to GND;
- (COMMAND) to B3.
3)
Back-up siren, with four wires: (+), (GND), (NEG.TRIG) and (POSITIVE TRIG). While the siren
is powered ON, it will sound either when (NEG.TRIG) is connected to GND or when (POSITIVE TRIG)
is connected to (+12V). On the (COMMAND) wire there should be permanently (+),Thus, when
removing (+) from the (COMMAND) wire, the siren will sound.
Parameter 0 might be set either 1 or 2 and the siren should be connected as follows:
- (+)to (+12V);
- (GND) to GND;
- (POSITIVE TRIG) to B3 if Param. 0 is 1;
- (NEG.TRIG) to B3 if Param. 0 is 2;
B4, B6
(gray)
Connect to (+) pole of the signaling lamps left and right respectively.
B5
(pink)
Power supply for the signaling lamps. Check the 10A fuse and connect to (+) pole of the car battery
together with the red wire
(B2).
4.4.3 Cable set C
C1
(orange)
open collector, negative trigger, and maximum 500mA load output for
window
closing
when arming the system. The output is active all the time while the system armed. It
commands an optional module type RB-06.
19
5.9 A
UTOARMING
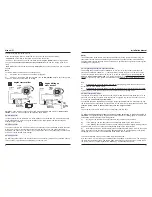
To assure the protection against accidental disarming of the system, if after disarming command,
within 30s there is no door opened or the engine is not turned on, the alarm system will arm
automatically.
This function is permanently active.
5.10 P
ASSIVE
ARMING
/W
ARNING
AT
PASSIVE
ARMING
/T
EMPORARY
DISABLE
OF
PASSIVE
ARMING
If parameter 4
(passive arming- disabled by default) is set enabled, the system will arm passive
after 30s from turning off the engine and the last door closed.
After closing the last door, the system will notify by an optical-acoustical signal (default) or just
optical, for silent disarming.
If the parameter 5 is enabled, the passive arming can temporary disable by opening and closing
twice a door within 5s.
The passive arming is useful since it prevents forgetting the car disarmed.
The passive arming is
made without locking doors.
5.11 R
EMOTE
CONTROLLED
DOORS
LOCK
/
UNLOCK
AND
/
OR
WHEN
SWITCHING
ON/OFF
THE
ENGINE
If the car is provided with central door lock the system will lock the doors when arming and unlock
the doors when disarming
(according to the value of parameter 6).
Also, the system can unlock the doors when turning the engine off
(see parameter 7) or lock the
doors when turning the engine on
(see parameter 8).
5.12 D
UAL
MODE
This referrs to the possibility of triggering the alarm by the ultrasonic sensor only if within 15s are
activated at least two sensor types (ultr proximity or ultr shock).
That means that if parameter 14 (Dual mode) is enabled the alarm triggering by the ultrasonic sensor
can only be done if the interior detection was preceded or succeeded within 15s by another sensor
triggering (shock or proximity).
It is strongly recommended to use dual mode only when the system is provided with all sensors
type (shock, ultrasonic and proximity). This mode is useful under these circumstances because it
prevents false alarms. Enabling/disabling this mode is made by enabling/disabling parameter 14.
It is not recommended
to use the dual mode if the system is not provided with proximity sensor.
5.13 A
LARM
MEMORY
INDICATION
If while armed at least an alarm was recorded, after disarming and opening the door, the system will
indicate by the state LED the type of the sensor that triggered the alarm, as follows:
1 blink
- shock sensor
2 blinks
- ultrasonic sensor
3 blinks
- contact key (attempt to start the engine)
4 blinks
- door contacts
5 blinks - hood, trunk contacts
After starting the engine the alarm memory will be reset and the LED will turn off.


