Preparing for Use
R&S
®
SMU200A
13
Quick Start Guide 1007.9822.62 ─ 13
HELP
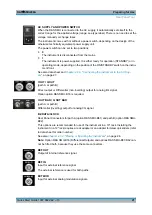
Displays context-sensitive help text.
2.1.2 Standby LEDs and Standby Key
The standby LEDs and the ON/STANDBY key are located in the bottom left corner of the
front panel.
The ON/STANDBY key toggles the instrument between standby and ready state (indi-
cated by the standby LEDs).
The standby LEDs indicate the instrument states as follow:
●
the green LED (left) is on when the instrument is ready for operation,
●
the yellow LED (right) is on in the standby mode.
See also
chapter 2.3.4.1, "Standby and Ready state"
2.1.3 Display
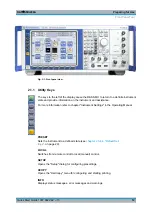
The display clearly shows all main settings and signal generator states.
The display is divided into the following sections:
●
Frequency and level display with info line
–
Frequency and level settings containing offset and peak envelope power (PEP).
In two-path instruments, frequency, level and PEP are displayed in two lines.
–
Status messages
–
Brief error messages.
To access an window with detailed information for a message, use the INFO key.
●
Block diagram
The block diagram shows the current configuration and the signal flow in the gener-
ator with the aid of function blocks containing an on/off switch. Selecting a function
block opens a list of associated setting menus. Active menus, info windows and
graphs are displayed on top of the block diagram. The block diagram can be displayed
in the foreground anytime with the
●
"Winbar" with labelled softkeys
Open menus are indicated by a labelled button in the "Winbar". The buttons determine
the softkey functions for front-panel control. When a button or softkey is pressed, the
associated menu is displayed either in the foreground or minimized in the "Winbar".
If required, the WINBAR is covered by a row of buttons to which menu-specific func-
tions of the active menu are assigned. By pressing the WINBAR key, the "Winbar"
can be displayed in the foreground again. This allows the user to toggle between the
button and softkey functions.
Front Panel Tour
Summary of Contents for 1141.2005.02
Page 27: ......
Page 74: ...Preparing for Use R S SMU200A 57 Quick Start Guide 1007 9822 62 13 LXI Configuration ...
Page 75: ......
Page 95: ......
Page 135: ......
Page 141: ......
Page 144: ...Index R S SMU200A 127 Quick Start Guide 1007 9822 62 13 Winbar 89 Windows XP 33 access 34 ...

