Preparing for Use
R&S
®
SMU200A
26
Quick Start Guide 1007.9822.62 ─ 13
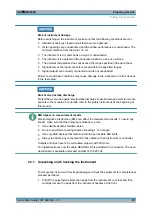
2. Pull off the corrugated cardboard cover that protects the rear of the instrument.
3. Carefully unthread the corrugated cardboard cover at the front that protects the
instrument handles and remove it.
4. Check the equipment for completeness using the delivery note and the accessory
lists for the various items.
5. Check the instrument for any damage. If there is damage, immediately contact the
carrier who delivered the instrument. Make sure not to discard the box and packing
material.
Packing material
Retain the original packing material. If the instrument needs to be transported or shipped
at a later date, you can use the material to prevent control elements and connectors from
being damaged.
2.3.2 Placing or Mounting the Instrument
The R&S SMU is designed for use under laboratory conditions, either on a bench top or
in a rack using a rack adapter kit (order number see data sheet).
Bench Top Operation
If the R&S SMU is operated on a bench top, the surface should be flat. The instrument
can be used in horizontal position, standing on its feet, or with the support feet on the
bottom extended.
Risk of injury
The feet may fold in if they are not folded out completely or if the instrument is shifted.
Fold the feet completely in or completely out to ensure stability of the instrument and
personal safety. To avoid injuries, never shift the instrument when its feet are folded out.
When the instrument is standing on its folded-out feet, do not work under the instrument
and do not put anything under it, otherwise injuries or material damage could occur.
The feet may break if they are overloaded. The overall load on the folded-out feet must
not exceed 500 N.
Rackmounting
The R&S SMU can be installed in a rack using a rack adapter kit (Order No. see data
sheet). The installation instructions are part of the adapter kit.
Putting into Operation
Summary of Contents for 1141.2005.02
Page 27: ......
Page 74: ...Preparing for Use R S SMU200A 57 Quick Start Guide 1007 9822 62 13 LXI Configuration ...
Page 75: ......
Page 95: ......
Page 135: ......
Page 141: ......
Page 144: ...Index R S SMU200A 127 Quick Start Guide 1007 9822 62 13 Winbar 89 Windows XP 33 access 34 ...

