Instrument Tour
R&S
®
HMP Series
24
Getting Started 1178.6791.02 ─ 02
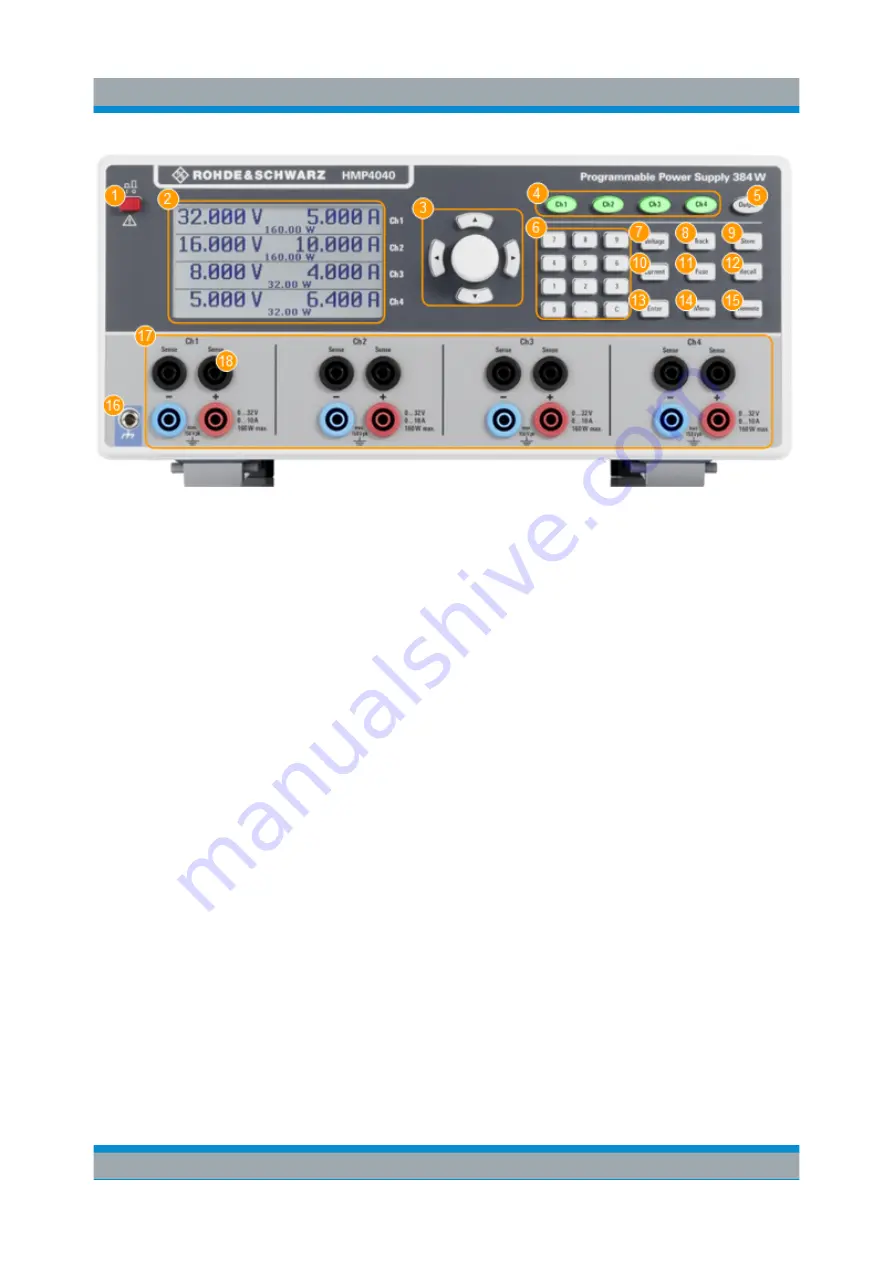
Figure 5-2: Front view of the R&S
HMP4040
1 = Power key: Turning the instrument on and off
2 = Display (LCD): Parameter display
3 = Arrow keys and Rotary knob: Navigating on the display, setting and confirming the parame-
ters
4 = Ch1, Ch2, Ch3, Ch4 keys: Selecting Channels
5 = Output key: Turning on or off the selected channels
6 = Keypad keys: Setting the nominal values
7 = Voltage key: Setting the output voltage
8 = Track key: Activating the tracking function
9 = Store key: Saving a measurement configuration
10 = Current key: Setting the current limit
11 = Fuse key: Activating the electronic fuse function
12 = Recall key: Loading a saved measurement configuration
13 = Enter key: Confirming values via keypad
14 = Menu key: Accessing the list of functions
15 = Remote key: Switching between manual and external control
16 = Ground socket: Reference potential connection (connected to protective earth)
17 = Ch1, Ch2, Ch3, Ch4 sockets: Output channels; 0 V to 32 V / 5 A
18 = Sense sockets (2 x per channel): Compensating the lead resistances
5.3
Rear Panel Views of the R&S
HMP2030 and the
R&S
HMP2020
The interface for remote control varies depending on the equipped option.
Rear Panel Views of the R&S
HMP2030 and the R&S
HMP2020


