R&S OSP
Getting Started
R&S OSP Panel Functions
Quick Start Guide 1505.3896.62 - 14
38
To register the R&S OSP proceed as follows:
16. Connect the instrument via LAN with the computer, where the OSP Panel is
running (see
chapter 3.3.1
17. Start the OSP Panel, set the correct IP address, and select Connect to device.
18. Select
>Configure >System
in the OSP Panel.
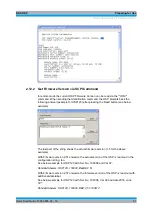
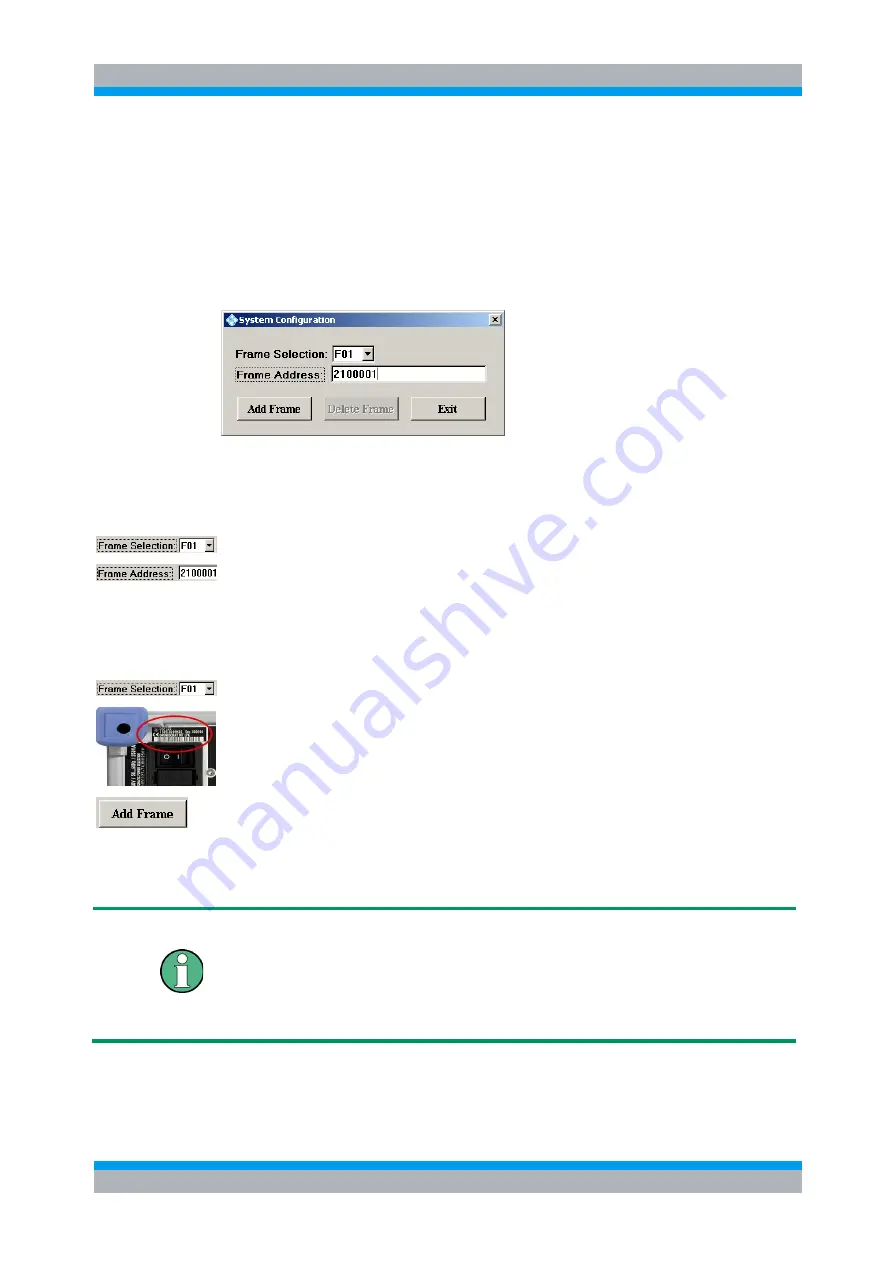
The following dialog allows to register the R&S OSP:
The OSP device which is connected to the LAN network is recommended to be defined
as device F01 indicating the first OSP device connected with this IP address. Up to 9
instruments can be connected to the same IP address. They are distinguished by
different frame numbers from F01 to F09.
19. Use the drop-down list to set the device number to F01.
20. Type in the device address
The OSP address is composed out of the OSP version (last digit of the OSP part
number) and the OSP serial number (6 digit number): The information of the OSP
version and the serial number can be found on the serial number label above the
mains switch on the OSP’s rear side:
Use the drop-down list to set the device number to F01.
Version (OSP120): xxxx.xxxxK02
Serial Number:
100001
The above example results in OSP address
2100001
21. Pressing the Add Frame button sends a corresponding command to the
R&S OSP and the information is stored on the OSP flash memory.
The next time the OSP Panel is started and connected to the R&S OSP, the correct
device information is read back from the OSP flash memory and all available
R&S OSP modules are listed correctly.
Configuration changes
Whenever the configuration has changed by adding or removing OSP150 extension
units, you must repeat registration. For this purpose, remove all frames except the first
one (F01), and insert them if required as new ones.
See also in the operating manual for extensions with an OSP150.
Summary of Contents for OSP-B011
Page 132: ......

