background image

Chapter 3 

Installation

5300.9677.72

- 3.4 -

EN-4

1

Equipment Supplied

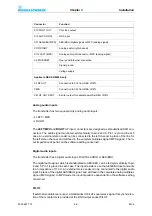
The equipment supplied with an R&S SR8000 transmitter includes the following items: 

– 1 R&S SR8000
– 1 manual (CD)
– Safety instructions

Optional

– Power cable
– Printed manual

Please check that the above items are included in the equipment supplied.

Summary of Contents for SR8000 Series

Page 1: ...nual R S SR8000 FM Transmitter VHF Solid State Low Power All activities connected with installing starting up operating maintaining troubleshooting and servicing the described system must be carried out by specialist technicians only Printed in Germany ...

Page 2: ...sons with the right to grant permission Infringements will result in legal action for damages All rights reserved for patenting or utility model registration R S is a registered trademark of Rohde Schwarz GmbH Co KG Brand names are trademarks of the respective proprietors ROHDE SCHWARZ GmbH Co KG D 12557 Berlin Wendenschlossstraße 168 Tel 030 65891 122 Int 493065891 122 Fax 030 65891 221 Int 49306...

Page 3: ......

Page 4: ...TTE Directive when used for its intended purpose Gesundheit und Sicherheit gemäß 3 1 1 Artikel 3 1 a Health and safety requirements pursuant to 3 1 1 Article 3 1 a Schutzanforderungen in Bezug auf die elektromagn Verträglichkeit 3 1 2 Artikel 3 1 b Protection requirements concerning electromagnetic compatibility 3 1 2 Article 3 1 b Maßnahmen zur effizienten Nutzung des Funkfrequenzspektrums Measur...

Page 5: ...ant provisions of the FTEG Article 3 of the R TTE Directive when used for its intended purpose Gesundheit und Sicherheit gemäß 3 1 1 Artikel 3 1 a Health and safety requirements pursuant to 3 1 1 Article 3 1 a Schutzanforderungen in Bezug auf die elektromagn Verträglichkeit 3 1 2 Artikel 3 1 b Protection requirements concerning electromagnetic compatibility 3 1 2 Article 3 1 b Maßnahmen zur effizi...

Page 6: ...5300 9677 72 0 3 EN 4 R S SR8000 CONTENTS SAFETY INSTRUCTIONS 1 DESIGN AND FUNCTION 2 INSTALLATION 3 PUTTING INTO OPERATION 4 OPERATION 5 MAINTENANCE 6 TROUBLESHOOTING 7 SERVICING 8 APPENDIX 9 ...

Page 7: ...5300 9677 72 0 4 EN 4 ...

Page 8: ...Broadcasting Division 5300 9677 72 1 1 EN 4 Printed in Germany CHAPTER 1 SAFETY ...

Page 9: ......

Page 10: ...zards from High Energy Circuits 8 4 3 Hazards from RF Radiation 9 4 3 1 Obligation to Instruct Personnel 9 4 3 2 Antenna Connector 9 4 3 3 RF Shielding 9 4 3 4 Rules of Conduct for Transmitter Operation 10 4 3 5 Rules of Conduct for Working on Open Transmitters 10 4 4 Risk of Lightning Strike 10 4 5 Fire Risk 11 4 6 Hazards from Beryllium Oxide BeO Ceramics 11 4 6 1 Rules of Conduct for Working wi...

Page 11: ...ant to a particular manual are included for the sake of form but left blank Safety All skilled personnel working with a transmitter or its components have a duty to read the associated manuals and to follow the safety measures described in the Safety section and at appropriate points in the manual The transmitter and the individual components of the transmitter must be used in accordance with the ...

Page 12: ...for instance with regard to the following Crushing hazard when working beneath suspended loads Fall hazards when working on ladders Risk of injury when lifting heavy loads Personal protective equipment PPE must be used when installations or repairs are be ing carried out Depending on the type of work it may be necessary to wear protective clothing such as hard hats safety gloves eye protection etc...

Page 13: ...d their add on equipment must be operated under the responsibility of qualified technicians only All legal provisions must be observed as a prerequisite for operating radio equipment and systems The operator or its representative is responsible for compliance with these guide lines In addition they must ensure that the training of the operating staff satisfies the coun try specific requirements Th...

Page 14: ...om the power supply As a matter of principle replacement fuses must comply with the specifications on the instrument labeling Motor protection switches and automatic line fuses in those parts of a transmitter system that can be accessed by users must be tripped If their response range is adjustable the ex factory setting must not be altered If settings are changed inadvertently the correct values ...

Page 15: ...ng live components it is forbidden to operate the equipment with its doors open or when front panels or plug in modules have been removed etc While the transmitter is being operated live for the purpose of internal measurements or repairs the workplace must be labeled to show a warning about the imminent risks in accordance with the basic rules of electrical engineering Take suitable precautions t...

Page 16: ...tter or equipment Operators are only authorized to adjust and operate the equip ment after successful completion of the respective instruction sessions and after the re sults have been placed on record High energy RF circuits inside the transmitter or equipment are routed via conventional re movable RF connectors e g type N Depending on the output power of the transmitter the output ports of the e...

Page 17: ...ase note that the antenna cable can feed energy from operational transmit ters that are connected to the same antenna via an RF diplexer Do not open any modules while the transmitter is operational 4 3 5 Rules of Conduct for Working on Open Transmitters Dangerous levels of RF will be radiated if a transmitter is turned on after it has been opened and covers and shielding with general warning label...

Page 18: ...o ensure that no flammable ma terials are stored in or attached to the area below or above the cable entry point Materials used to close openings to adjoining rooms must be flame retardant Always wear the appropriate personal protective equipment e g self contained breath ing apparatus with air bottle even when flames are small or not evident Use only suitable fire extinguishers e g CO2 extinguish...

Page 19: ...ist the circuit diagram and the transmitter The electric parts list contains the following description The following warning appears in the circuit diagram In the transmitter every module that contains parts made from BeO ceramics is identified by a warning sign and a label 4 6 3 Measures for Dealing with Breakage and Disposing of Waste Where breakage mechanical or electrical destruction has produ...

Page 20: ...regulations Devices containing BeO ceramics that have been unsoldered must be disposed of in the same manner All the manufacturers of parts containing BeO ceramics who are known to Rohde Schwarz offer to take back faulty parts without charge Berylliumoxid Staub Beryllium oxide dust Hazard symbol skull and crossbones ...

Page 21: ...5300 9677 72 1 14 EN 4 Chapter1 Safety ...

Page 22: ...Broadcasting Division 5300 9677 72 2 1 EN 4 Printed in Germany CHAPTER 2 DESIGN AND FUNCTION ...

Page 23: ......

Page 24: ...ns Separate Amplifier 17 1 3 Elements on the Front Panel 17 1 3 1 Input Screen 17 1 3 2 Function Keys and Displays Base Unit 18 1 3 3 Displays Separate Amplifier 19 2 Specifications 21 2 1 Protection of Electrical System 22 2 1 1 Power Failure 22 2 1 2 Power Supply Fault R S SR8010 23 2 1 3 Power Supply Fault R S SR8025 SR8050 SR8100 23 2 1 4 Power Supply Fault R S SR8130 24 2 1 5 Power Supply Fau...

Page 25: ...ng on the configuration individual transmitters are available in different power classes from 100 W to 2500 W This chapter describes the transmitter s design and the functions of its components Fig 1 Transmitter R S SR8010 Fig 2 Transmitters R S SR8025 SR8050 SR8100 SR8130 Name Power SR8010 100 W SR8025 250 W SR8050 500 W SR8100 1000 W SR8130 1300 W SR8250A 2500 W 2 x 1250 W ...

Page 26: ...wing modules Mainboard with instrument interfaces amplifier control unit functional hardware of the parallel remote control interface Amplifier with 100 250 500 or 1000 W 1300 W Exciter board with computer kernel display keypad interfaces Black and white 1 4 VGA LC display on the transmitter front panel with a resolution of 320 x 240 pixels Power supplies depending on the instrument type Fan ...

Page 27: ...Chapter2 Design and Function 5300 9677 72 2 6 EN 4 Fig 4 R S SR8000 block diagram ...

Page 28: ...gn and Function 5300 9677 72 2 7 EN 4 Fig 5 View inside of the R S SR8010 transmitter 1 Amplifier 2 Exciter board 3 Mainboard 4 Intake lattice front 5 Fans 2x 6 AC supply input 7 Power supply beneath intake lattice ...

Page 29: ...Chapter2 Design and Function 5300 9677 72 2 8 EN 4 Fig 6 View inside the R S SR8025 SR8050 transmitter amplifier side 1 Amplifier 2 Preamplifier cover 3 Harmonics filter cover 4 Fans 2x ...

Page 30: ...Chapter2 Design and Function 5300 9677 72 2 9 EN 4 Fig 7 View inside the R S SR8100 SR8130 transmitter amplifier side 1 Amplifier 2 Preamplifier cover 3 Harmonics filter cover 4 Fans 2x ...

Page 31: ...ion 5300 9677 72 2 10 EN 4 Fig 8 View inside of the R S SR8025 SR8050 SR8100 transmitter exciter side 1 Exciter board 2 Mainboard 3 Fans 2x 4 AC supply input 5 Power supply unit for output stage 6 Power supply unit for exciter ...

Page 32: ...t of the R S SR8250A transmitter contains the following modules Coupler complete with absorber Processor board including instrument controller Absorber board Amplifier with 1300 W 2 power supply units for amplifier 1 power supply unit for instrument controller 2 fans Amplifier side the R S VU813 acts as an R S SR8130 see illustration View inside the R S SR8100 SR8130 transmitter amplifier side The...

Page 33: ...lifier coupler side 1 Combiner 2 Processor board 3 Absorber board 4 Fans 2x 5 AC supply input 6 Power supply unit for output stage 2x 7 Power supply unit for instrument controller 1 2 Connections 1 2 1 Rear Panel Connections Base Unit Fig 11 Connections on rear panel of R S SR8010 transmitter ...

Page 34: ...ion X2 RF OUT Antenna connector X31 X32 Fan connections 1 and 2 X23A Code coding plug X23B INTERLOCK RF carrier loop pin 1 9 X22A Parallel remote control interface X8 1 PPS Input for 1PPS reference 1PPS 1 pulse per second for output signal synchronization optional X9 10 MHz Input for 10 MHz reference for output signal synchronization optional X5 GPS ANT Connection for GPS antenna optional X14 AUX2...

Page 35: ...se The input resistance on the AES EBU input amounts to an impedance of 110 Ω An external stereo coder can be connected to the digital audio input in place of the digital AES EBU signal and will feed in the complete analog multiplex signal MPX signal In MPX mode the input impedance dependent on the software setting concerned PILOT If external modulators are used a standardized 19 kHz squarewave si...

Page 36: ... panel of R S VU813 amplifier Connectors Connector Function X31 X32 Fan connections 1 and 2 X24 CAN bus connector for external modules X22 Connection to X22B from R S SR8130 X11 Coupler input Connection to X2 RF output signal from the internal amplifier X10 Coupler input Connection to X2 from R S SR8130 RF output signal from the R S SR8130 X12 RF OUT Coupler output Antenna connector X61 RF IN SPLI...

Page 37: ...Base Unit Fig 15 Front panel connections left R S SR8010 right R S SR8025 SR8050 SR8100 SR8130 Connectors Connector Function ETHERNET RJ 45 connector to local detached operation using PC TEST Test output preconfigured using MPX RF MONITOR RF monitor output from the onboard amplifier ...

Page 38: ...ation on the transmitter includes all the main information calls for the most impor tant system parameters and their settings complete with intuitive graphical menus The transmitter is operated via display menus using control keys and cursor keys Fig 17 Transmitter display input screen Connector Function RF MON COMBINER RF monitor output for the coupler output signal RF MON AMPLIFIER RF monitor ou...

Page 39: ...ion from menu BACK Cancel an entered value if not confirmed with OK go back one step in menu HOME Return from menu tree to system overview FUNCTION Call a context menu for current menu entry OK Confirm an entry or selection STATUS Display the system logbook when activated from system overview display the status screen for a system component when activated after selecting a system component from th...

Page 40: ... off ON Switch transmission operation on LED shows green OFF Switch off transmission operation LED shows yellow no power from transmitter Display Meaning RF RF present at transmitter output green LED LED goes off if power drops below configured threshold SUPPLY CCU Transmitter control unit power supply OK green LED LED goes off if power supply fails WARNING General warning from transmitter yellow ...

Page 41: ...al communication LED off No supply to processor board RF IN FAIL RF input level on internal amplifier below threshold LED shows yellow POWER FAIL No supply voltage available for the internal amplifier LED shows red REFLECTION Reflection in the RF output from the internal amplifier has exceeded a threshold LED shows red TEMP FAIL Overtemperature in instrument LED shows red ABSORBER FAIL Power too h...

Page 42: ...050 25 kg R S SR8100 26 kg R S SR8130 31 kg R S SR8250A 62 kg 2 x 31 kg Frequency range 87 5 MHz to 108 MHz RF connector R S SR8010 N female R S SR8025 SR8050 7 16 female R S SR8100 SR8130 7 16 female R S SR8250A 7 16 female Voltage supply 100 240 V 50 60 Hz 220 240 V 50 60 Hz for R S SR8100 Operation remote control interfaces B W display VGA Built in parallel remote control interface relay optoco...

Page 43: ... power supplies for the output stage module together with a single phase auxiliary power supply for the exciter board and mainboard modules R S VU813 The instrument has two single phase main power supplies for the output stage module together with a single phase auxiliary power supply for the instrument controller In the event of a power failure a distinction is made between a short interruption o...

Page 44: ...power supply unit with current limited output All lines car rying AC supply voltage and high current are covered to prevent accidental contact double insulation sheathed conductor shrink on sleeve If primary side components fail the integrated primary fuses respond in the line filter Trans fer of primary side overcurrent to the secondary side is prevented by potential isolation of the power supply...

Page 45: ...e at the auxiliary power supply output can be as high as 10 A and as high as 70 A at the output from the am plifier power supplies Fault Protection mechanism Function Damage between line filter and power supply unit Protected by primary fuses Primary fuse trips Damage to power supply unit Protected by primary fuses Primary fuse trips Damage between amplifier power supply unit and ampli fier board ...

Page 46: ...Protection mechanism Function Damage between AC supply input and power supply unit Protected by primary fuse Primary fuse trips Damage to power supply unit Protected by primary fuse Primary fuse trips Damage between amplifier power supplies and amplifier board Current limited by amplifier power sup plies Current limited Overload caused by instru ment controller Current limited by auxiliary power s...

Page 47: ...ntil the VSWR value has dropped below 1 45 again hysteresis 2 1 7 Protection against Overvoltages from the Antenna Cable An inductance to ground is located in the output of each amplifier This inductance diverts overvoltages The solution comes under lightning protection category III and cannot be used as the only lightning protection device for the antenna Note The transmitter is intended for use ...

Page 48: ...o overtemperature at the RF amplifiers and their power supply The following mechanisms to protect against overtemperature exist Fault Protection mechanism Function R S SR8010 Weight 10 kg None R S SR8025 SR8050 Weight 25 kg None R S SR8100 Weight 26 kg None R S SR8130 VU813 Weight 31 kg None Rotating fan Cover grid Cover Fault Protection mechanism Function Overtemperature at the amplifier heat sin...

Page 49: ...Chapter2 Design and Function 5300 9677 72 2 28 EN 4 ...

Page 50: ...Broadcasting Division 5300 9677 72 3 1 EN 4 Printed in Germany CHAPTER 3 INSTALLATION ...

Page 51: ......

Page 52: ... 2 1 AC Power Supply 5 2 1 1 Connecting Transmitter Ground 5 2 1 2 AC Supply 6 2 2 Rear Panel Connections 6 2 3 Rear Panel Connections Separate Amplifier 9 2 4 R S SR8250A Connecting Standalone Instruments 10 2 5 Front Panel Connections 11 2 6 Front Panel Connections Separate Amplifier 12 ...

Page 53: ...pment Supplied The equipment supplied with an R S SR8000 transmitter includes the following items 1 R S SR8000 1 manual CD Safety instructions Optional Power cable Printed manual Please check that the above items are included in the equipment supplied ...

Page 54: ...external ground conductor to the grounding bolt Fig 1 Ground connection on rear panel of R S SR8010 transmitter Fig 2 Ground connection on rear panel of R S SR8025 SR8050 SR8100 transmitter ATTENTION Do not connect any devices to the AC supply until all cabling has been completed ATTENTION For safety reasons the transmitter must be connected to the station s main ground termi nal ...

Page 55: ... are operated by means of a low power device connecting cable The current carrying capacity is 10 A The R S SR8130 transmitter and the R S VU813 amplifier are operated by means of a special 2 5 mm2 connecting cable The current carrying capacity must be adjusted to suit local regulations Install appropriate fuses to protect the installation 2 2 Rear Panel Connections Fig 4 Connections on rear panel...

Page 56: ...2 RF OUT Antenna connector X31 X32 Fan connections 1 and 2 X23A Code coding plug X23B INTERLOCK RF carrier loop pin 1 9 X22A Parallel remote control interface X8 1 PPS Input for 1PPS reference 1PPS 1 pulse per second for output signal synchronization optional X9 10 MHz Input for 10 MHz reference for output signal synchronization optional X5 GPS ANT Connection for GPS antenna optional X14 AUX2 Data...

Page 57: ...he input resistance on the AES EBU input amounts to an impedance of 110 Ω An external stereo coder can be connected to the digital audio input in place of the digital AES EBU signal and will feed in the complete analog multiplex signal MPX signal In MPX mode the input impedance dependent on the software setting concerned PILOT If external modulators are used a standardized 19 kHz squarewave signal...

Page 58: ... of R S VU813 amplifier Connectors Connector Function X31 X32 Fan connections 1 and 2 X24 CAN bus connector for external modules X22 Connection to X22B from R S SR8130 X11 Coupler input Connection to X2 RF output signal from the internal amplifier X10 Coupler input Connection to X2 from R S SR8130 RF output signal from the R S SR8130 X12 RF OUT Coupler output Antenna connector X61 RF IN SPLIT Conn...

Page 59: ...eaning of connection 1 X61 RF OUT SPLIT X61 RF IN SPLIT RF cable from exciter power splitter to R S VU813 signal input 2 X22B X22 Control cable to amplifier control unit 3 X2 RF OUT X10 RF cable from R S SR8130 ampli fier output to coupler 4 X2 X11 RF cable from R S VU813 amplifier output to coupler ATTENTION To ensure that the system operates correctly only the original cables supplied should be ...

Page 60: ... Fig 9 Front panel connections left R S SR8010 right R S SR8025 SR8050 SR8100 SR8130 Connectors Connector Function ETHERNET RJ 45 connector to local detached operation using PC TEST Test output preconfigured using MPX RF MONITOR RF monitor output from the onboard amplifier ...

Page 61: ...ont Panel Connections Separate Amplifier Fig 10 Connections on front panel of R S VU813 amplifier Connectors Connector Function RF MON COMBINER RF monitor output for the coupler output signal RF MON AMPLIFIER RF monitor output from the onboard amplifier ...

Page 62: ...Broadcasting Division 5300 9677 72 4 1 EN 4 Printed in Germany CHAPTER 4 PUTTING INTO OPERATION ...

Page 63: ......

Page 64: ...t Tone and Preemphasis 12 2 3 3 Setting the Nominal Deviation Configuring the Limiter 13 2 3 3 1 Deviation and MPX Limiters 15 2 3 4 Setting the Audio Parameters 16 2 3 4 1 Setting Input Impedances for Analog AUDIO 16 2 3 4 2 Entering Settings for Digital Audio 17 2 3 4 3 Setting the Parameters for the AUX inputs incl RDS 18 2 3 5 Setting the Transmission Frequency 19 2 4 Entering Output Stage Set...

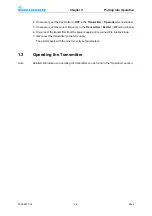
Page 65: ...ter matrix or antenna Connections for interlock circuits Set up the following jumpers connections on the transmitter connectors The name of the connector concerned is located on the rear panel Interlock circuit for exciter RF blanking X23B 1 9 Check that all screws and nuts are securely fastened especially those on the transmitter RF output 1 2 Requirements Checking transmission frequency and oper...

Page 66: ...rect frequency in the Transmitter Exciter RF menu window 6 Disconnect the transmitter from the power supply and reconnect the interlock loop 7 Reconnect the transmitter to the AC supply The exciter boots with the most recently set parameters 1 3 Operating the Transmitter Note Detailed information on operating the transmitter can be found in the Operation section ...

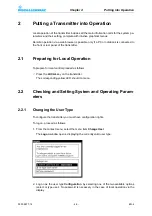
Page 67: ...tion To prepare for local control proceed as follows Press the LOCAL key on the transmitter The corresponding yellow LED should come on 2 2 Checking and Setting System and Operating Param eters 2 2 1 Changing the User Type To configure the transmitter you must have configuration rights To log on proceed as follows 1 From the context menu select the menu item Change User The Logon window opens disp...

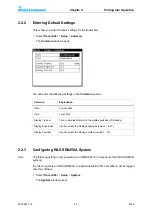
Page 68: ...owing setting is only possible on an R S SR8130 component of the R S SR8250A system In order to operate an R S SR8250A the separate R S VU813 amplifier must be logged onto the software 1 Select Transmitter Setup System The System window opens Selection Explanation Date Current date Time Local time Display Timeout Time in minutes after which the display switches off standby Display Brightness Used ...

Page 69: ...ed 2 2 4 Configuring Transmitter Standby and Remote Control Inter face In the System menu window you can configure an existing standby system and the parallel remote control interface Select Transmitter Setup System The System window opens You can enter the following settings in the System window Selection Description Transmitter ID User definable ID e g name of the transmitter Model Must be set t...

Page 70: ...e transmitter number in a 1 1 or n 1 standby system Parallel IO Used to activate deactivate the parallel remote control interface of the transmitter ParIO Inhibit Status For local mode the messages from the parallel remote control interface of the transmitter are activated deactivated Additional Amplifier Operation with without separate R S VU813 amplifier R S SR8130 only The present switch positi...

Page 71: ...under Selection The table below explains the adjustable parameters Rear Ethernet Manual settings should only be made in the offline mode context menu Edit Offline and then activated with Submit Changes context menu a IP Address IP address Subnet mask Subnet mask Gateway Entry of a gateway address assigned by the network administrator a If the transmitter is configured for use in 1 1 or n 1 standby...

Page 72: ...nd right is operating normally but the other feed is subject to interference Not OK Channel 1 has failed completely Channel 2 Secondary For setting the audio input and stereo mode for channel 2 b Possible selections AF Mono L AF Mono R AF Mono L R 2 AF Stereo AES Mono L AES Mono R AES Mono L R 2 AES Stereo MPX Inp2 MPX Inp3 Not used State Status of channel 2 secondary audio input standby OK Channe...

Page 73: ...ch over to the standby transmitter This is good practice when for example in the case of a 1 1 standby there are two separate MPX feeds In this case transmitter A can be switched permanently to MPX Inp2 and transmitter B can be switched permanently to MPX Inp3 In this case the indicated selection is Ch 1 Report Type Warning The active channel creates only the warning No Input Fault The active chan...

Page 74: ...tting 7 kHz Active Pilot tone Switches the pilot tone on and off active only in stereo mode the pilot tone is always off in mono mode Preemphasis Selection of the signal preemphasis 50 µs default setting or 75 µs Active Preemphasis For switching preemphasis on or off with MPX mode still inactive Display Description Actual Modulation Displays the current modulation format setting the modulation for...

Page 75: ...ossible selections default setting ON ON Switches the deviation limiter on OFF Switches the deviation limiter off Clipper Only Only the MPX peak clipper is active MPX Power Threshold Sets the threshold for automatic MPX power limitation Value range 5 0 through 5 0 dBr default setting 0 dBr MPX Power Active Switches the MPX power limiter on or off default ON Display a a Measurement results are upda...

Page 76: ... reduces the total harmonic distortion if the input signal is permanently over large It is also possible to use external sound processors since the audio signal is not affected in the event of transient out of limit conditions and the clipper ensures compliance with lo cal regulations The external processor then ensures that the MPX signal is always below the threshold Note In MPX mode input 2 or ...

Page 77: ...Analog Audio window opens 2 Set the parameters as shown in the table below Setting item Description Impedance Selection of the input impedance possible settings 600 Ohm 2 kOhm Level Setting the nominal input amplitude Value range analog 6 dBu through 12 dBu default setting 6 dBu Value range MPX 1 dBu through 16 dBu default setting 6 dBu Threshold Setting for the input amplitude threshold for monit...

Page 78: ...igital Level For setting the nominal digital input amplitude 0 dBFS corresponds to full scale amplitude of the digital signal Value range 12 dBFS to 0 dBFS default setting 9 dBFS Threshold For setting the threshold of the digital input amplitude for monitoring The setting can be made in two ways as a percentage of the nominal input amplitude with the value range 2 to 80 default setting 5 as an abs...

Page 79: ...ing 14 dBu Deviation For setting the frequency deviation caused by the nominal input level Value range 2 kHz to 10 kHz default setting 4 kHz Active For activating the corresponding input Selection ON OFF Threshold For setting the input amplitude threshold for monitoring Percentage value range 2 to 80 default setting 5 Absolute value range in dBu the system uses the percentage value the absolute va...

Page 80: ...utput level of 7 dBm to 13 dBm at a nominal power of 97 5 MHz into 50 Ω The frequency response is 6 dB octave 1 Select Transmitter Exciter RF The RF Radio Frequency window opens 2 Set the required frequency using the cursor keys and confirm with OK The smallest frequency step size is limited to 10 kHz by the software 2 4 Entering Output Stage Settings 2 4 1 Setting Output Power Thresholds 1 Select...

Page 81: ... fault thresholds 4 Change the percentage at Ref Voltage in increments of 1 until the desired power Forward Power is approximately reached measured via built in checkpoint or exter nal measuring instrument For fine adjustment of the power setting you can change the percentage under Ref Voltage in 0 1 increments Display setting item Description Forward Power Present forward power of the transmitter...

Page 82: ...ower Present forward power of the transmitter Reflected Power Present reflected power of the transmitter VSWR VSWR voltage standing wave ratio Nominal Power The variable nominal power forms the initial value for warning and fault thresholds The actual power setting is entered via Ref Voltage Ref Voltage Adjusting the reference voltage changes the output power Actual Ref Voltage Present value of th...

Page 83: ...asurement data for every quality parameter This means that on site com pliance testing is only necessary at the customer s request 3 1 Checking the Status Displays 3 1 1 Checking the Transmitter Status Display 1 Select Transmitter Status The Status window opens 2 Check the status of the warning and error indicators If a transmitter is ready to operate no warnings or errors will be signaled 3 1 2 C...

Page 84: ...ngs or errors will be signaled 3 Select Transmitter Exciter Status Exciter FM Board The Status Exciter FM Board window opens 4 Select Transmitter Exciter Status Analog Status The Status Analog Status window opens 5 Check the status of the warning and error indicators 6 Select Transmitter Exciter Status Digital Status The Status Digital Status window opens ...

Page 85: ...s The Output Stage Status window opens Note The available displays depend on whether the system has a separate amplifier right hand menu window or not lefthand menu window 2 Check the status of the warning and error indicators If no warnings or errors are sig naled the transmitter is ready to operate 3 2 Clearing Event Memories The transmitter has four event memories Summary Status Warning Fault ...

Page 86: ...4 These event memories should be cleared before the transmitter starts broadcasting 1 Select Transmitter Logbook Summary The Logbook Summary window opens 2 Select the Clear Logbook command in the context menu The entries in all event memories are deleted ...

Page 87: ...ith NetCCU800 IP addresses of operational and standby transmitters If you make use of the option under Setup System in the R S SR8000 menu to set the Tx Mode to 1 1 or N 1 the IP address of the hindmost Ethernet interface is fixed in accor dance with the Tx Reserve parameter Please make sure that the same value is used for the IP address of the transmitter con cerned in the NSU menus Tx Setup Tx A...

Page 88: ...Broadcasting Division 5300 9677 71 5 1 EN 4 Printed in Germany CHAPTER 5 OPERATION ...

Page 89: ......

Page 90: ...sions 22 2 Transmitter Menus 24 2 1 Overview of Menus 24 2 2 Status Menu Window 26 2 3 Operation Menu Window 27 2 4 Logbook Menu 28 2 4 1 Summary Menu Window 29 2 4 2 Logbook Context Menu 29 2 5 Setup Menu 30 2 5 1 Setup Common Menu Window 30 2 5 2 Setup System Menu Window 31 2 5 3 Setup Ethernet Menu Window 31 2 5 4 Setup RS232 Menu Window 32 2 5 5 Setup SNMP Menu 33 2 5 5 1 Setup SNMP General Me...

Page 91: ...iter Input Data Input Menu Window 50 2 7 2 4 Exciter Input Automatic Input Menu Window 51 2 7 3 Exciter Modulation Menu Window 54 2 7 4 Exciter Deviation Limiter Menu Window 55 2 7 4 1 Deviation and MPX Limiters 57 2 7 5 Exciter RF Menu Window 58 2 7 6 Exciter Static Delay Menu Window 59 2 7 6 1 Static Delay Function Applications 60 2 8 Output Stage Menu 61 2 8 1 Output Stage Status Menu Window 61...

Page 92: ... the transmitter Authorizations define which parameters and configurations you are allowed to change Menu levels maximum three allow you to access the parameters you can select 1 1 1 Authorizations Various authorization levels protect against nondeliberate access of critical system settings from the home menu When you start local operation your user ID is Operation by default Note The User Adminis...

Page 93: ... the web browser Read only authorization Config Engl Authorization to set basic transmitter parameters e g setup this ID also changes the menu language to English irrespective of the preset lan guage e g Chinese Superuser a Authorization to configure create and delete user profiles and to display and delete active sessions no authorization for setting transmitter parameters see Query ATTENTION Ple...

Page 94: ...re allocated as follows W in the box on the left a warning exists F in the box in the middle a fault exists RF in the box on the right the transmitter output power is OK Transmitter set to Local or Remote mode The three boxes in the exciter diagram are allocated as follows When a warning exists W is displayed in the box on the left When a fault exists F is displayed in the box in the middle When c...

Page 95: ...y Meaning function MENU Access to menu operation activation from system overview call a context menu activation from menu BACK Cancel an entered value if not confirmed with OK go back one step in menu HOME Return from menu tree to system overview FUNCTION Call a context menu for current menu entry OK Confirm an entry or selection STATUS Display the system logbook when activated from system overvie...

Page 96: ...e menu contains additional submenus no arrow direct access to a menu window 3 Using the cursor keys up down left right select a menu from the left right side of the window and confirm with OK If additional submenus are available the higher level menus are shown in the left hand window and the lower level menus are shown in the right hand window 4 Using the cursor keys up down select another menu o...

Page 97: ...n from the Help windows you can also use BACK to cancel an entered value as long as you have not already con firmed it with OK Use the HOMEkey to exit the menu structure and return to the system overview 1 2 1 2 Selecting and Editing Entries Selecting entries 1 Select the entry using the cursor keys up down 2 Confirm the selection with OK Your selection is saved and displayed in the menu window 3 ...

Page 98: ...or keys and then con firm with the OKkey The selected character appears in the entry line or To delete characters in the entry line select Del char using the cursor keys and then confirm with the OKkey The characters in the entry line are deleted one by one from right to left 2 To save changes current entry in the entry line select Enter text using the cursor keys and then confirm with the OKkey T...

Page 99: ... item Open Opens a menu menu window alternative to the OK key Edit Used to edit a menu item alternative to the OK key Edit Offline Used to edit a menu item offline changes are only saved when Submit Changes context menu is selected Submit Changes Saves changes made offline Edit Online Used to edit a menu item online standard setting which can only be changed by selecting Edit Offline Enter Text In...

Page 100: ...ossover cable attached to the Ethernet socket on the front panel of the instrument Fig 3 Ethernet link using a crossover cable connection or Connect the transmitter to your network with the aid of an RJ 45 1 1 cable attached to the X6 Ethernet socket on the rear panel of the instrument Fig 4 Link to a network using an RJ 45 1 1 cable connection Entering IP address at transmitter Before you can use...

Page 101: ...d The next section uses Microsoft Internet Explorer to explain how you can check whether these conditions have been met or what changes you need to make Note Please note that the settings described here need not match your current browser version one hundred percent All necessary changes and settings can be found in the Tools Internet Options menu of your Internet Explorer Checking and adapting se...

Page 102: ...our browser 2 Enter the same IP address as you entered at the transmitter The login screen appears The following standard authorizations will be available to you 3 Log on using the ID you require and confirm with OK The corresponding entry screen appears ID Authorization Password Configuration Allows you to set basic transmitter parameters e g setup 1234 Maintenance Allows you to perform maintenan...

Page 103: ...splay and navigation through the transmitter menus 4 Display showing menu selected in Navigator 5 Control panel elements for navigating the menu system and for displaying and editing the menu entries System Overview The System Overview window provides an overview showing the current status of the transmitter and its components Measure Values The current forward power and reflected power are displa...

Page 104: ...the menus of all system components You can open the individual folders and menus by double clicking with the mouse The selected menus are displayed in the System Overview menu window 1 Folder 2 Menu Menu window The menu window shows the menu selected in the Navigator window ...

Page 105: ...dit mode and confirming settings corresponds to enter key on the keyboard 3 Corresponds to up and down cursor keys see 1 4 Used for quickly switching between menu items for quickly accessing editable values and for quickly entering numeric values 5 Usually used to move one level back in the menu structure also used to cancel settings that have not yet been confirmed with OK 6 Return to home menu 7...

Page 106: ...n the user administration facility are provided that no password is required also valid for menu access via local operation The ID Superuser with the factory set password 1234 gives you extensive user adminis tration rights 1 Log on as Superuser 2 Select User Administration in the Navigator window The processing options and a list of existing users are displayed Display Meaning Select Selects the ...

Page 107: ...etion of user profiles ID Authorization Password Configuration Allows you to set basic transmitter parameters e g setup 1234 Maintenance Allows you to perform maintenance tasks e g software update 1234 Operation Allows you to make settings that directly affect transmitter operation 1234 Query Read only authorization 1234 Guest Read only authorization see Query 1234 Config Engl Same as Configuratio...

Page 108: ...Name User ID case sensitive Password Must be at least 6 characters in length case sensitive Retype password Enter the password again case sensitive Web browser The user ID permits menu access via the web browser Front panel The user ID permits menu access via the keys and display of the transmitter Access right Used to select a factory set authorization level Is admin The user also has user admini...

Page 109: ...eting users 1 Select the required user 2 Select Delete selected user The user is deleted 1 4 2 Closing Active Sessions If you are logged on as Superuser you can view detailed information on logged on users and close active sessions 1 After logging on select Show session list 2 Select the session the user that you want to close 3 Select Delete selected session The selected session is closed ...

Page 110: ...Chapter5 Operation 5300 9677 71 5 23 EN 4 4 Return to the previous browser window by clicking Show user list ...

Page 111: ...s the Exciter and Output Stage menus You are logged on by default under the authorization ID Operation You can log on under a different authorization ID using Change User Note You can change your authorization ID in any menu window using the context menu 2 1 Overview of Menus Menu structure of transmitter Level 1 Level 2 Level 3 Status Operation Logbook Summary ...

Page 112: ...ystem Ethernet RS232 SNMP General Manager Alarmsinks BitBus Device Info Device Exciter FM Board Mainboard Boot Flash Processor Board Exciter a Status Overview Exciter FM Board Analog Status Digital Status Input Analog Audio Digital Audio Data Input Menu structure of transmitter ...

Page 113: ...ded into the following three parts from top left to bottom right General fault local mode Exciter status messages Output stage status messages amplifier Automatic Input Modulation Deviation Limiter RF Static Delay Outputstage a Status Measurements Combiner Internal Amp External Amp Setup Limits Parameter Set a You can also call the menu windows of the exciter and output stage directly from the mai...

Page 114: ...ower is not OK Exc Warn There is an exciter sum warning Ost Sum Warn There is an output stage sum warning Temperature Ok Device temperature is OK W Device temperature is not OK Local Mode Gray Remote operation the transmitter parameters can only be changed via remote control On Local operation the transmitter parameters can only be changed locally Interlock Gray RF interlock loop closed On RF inte...

Page 115: ...ou can call Logbook entries via the Summary Status Warning and Fault windows The structure of the four windows is identical Entry display Description Operation Mode Setting for the operating status of the transmitter On Off TX Sum Fault There is a general transmitter fault TX Sum Warning There is a general transmitter warning Reset on program off In the ON switch position a Reset Fault is automati...

Page 116: ...aning 2 4 2 Logbook Context Menu Additional context functions are available in the menu windows for the complete logbook and the partial logbooks Column Explanation No Consecutive number of entry Message Message Time Time at which the message was received Date Date on which the message was received Arrow direc tion Explanation Up The event has just occurred Down The event is no longer current or r...

Page 117: ...t possible to clear individual entries When you clear the complete logbook the partial logbooks are also cleared Restore logbook Restores the cleared entries in the current logbook When you restore the complete logbook the partial logbooks are also restored Selection Explanation Date Current date Time Local time Display Timeout Time in minutes after which the display switches off standby Display B...

Page 118: ...he transmitter Model Must be set to Transmitter Tx Mode Used to set a standby system if available a Standalone single transmitter 1 1 1 1 standby system n 1 n 1 standby system a With 1 1 and n 1 systems the IP address of the rear Ethernet interface is set to a fixed value Tx Reserve A1 to A8 B used to select the transmitter number in a 1 1 or n 1 standby system Parallel IO Used to activate deactiv...

Page 119: ...e X41 in the RS232 menu window Note RS232 functionality requires a special internal hardware option Selection Description Front Ethernet IP Address IP address Subnet mask Subnet mask Rear Ethernet Manual settings should only be made in the offline mode context menu Edit Offline and then activated with Submit Changes context menu a a If the transmitter is configured for use in 1 1 or n 1 standby sy...

Page 120: ...use the General menu window to set the UDP port for SET GET and to activate message suppression for Local mode Function Description Baud rate For setting the baud rate as required from 4800 to 115200 When using Bitbus 19200 Data bits Number of data bits of the serial interface 5 to 8 Stop bits Number of stop bits of the serial interface 1 1 5 2 Parity For setting the parity none odd even ...

Page 121: ...d excep tion trap for Local Mode Default setting Off If OIDs are polled with message suppression active the return value is 0 undefined In this operating state SNMP commands SET are not executed but simply confirmed When the Remote mode is reactivated all stored alarms are sent once The polling of OIDs again returns current values Max not transmitted Number of alarms to be stored if message suppre...

Page 122: ...sed to select one of 5 alarm sinks for configuration Enable Used to activate On or deactivate Off a selected alarm sink The Off setting is used for configuration purposes and for testing IP Address IP address of the alarm sink to which alarms are to be sent Port UDP port for the SNMP alarms Default setting 162 Alarm Version SNMP version in which the alarm is to be sent v1 Trap or v2c Trap Traps ar...

Page 123: ... Switches BitBus communication on and off Remote Interface For choosing the remote control interface for BitBus communication Ethernet for X6 RS232 for X41 TCP Port Selects the port for the BitBus communication via Ethernet Checksum Switches CRC secured transmission on off The same setting must be made for the recipient of BitBus messages Display Description Connected On Indicates that a BitBus co...

Page 124: ...the exciter board Display Explanation Part Number Stock number Variant Device variant Product index Product modification index Serial Number Serial number Product Date Date of production SW FW Number Stock number of the software firmware package SW FW Version Version number of the software firmware package FPGA FW Version Version number of the FPGA firmware for your information only the FPGA firmw...

Page 125: ...t the hardware and software of the transmitter mainboard Display Explanation Part Number Stock number Variant Device variant Product index Product modification index Serial Number Serial number Production Date Date of production Operating hours Number of operating hours Power up cycles Number of times device has been switched on off ...

Page 126: ...Model Device or module model Product index Product modification index Serial Number Serial number Production Date Date of production SW FW Number Software firmware stock number SW FW Version Software firmware version Display Explanation Bootload Number Stock number of the boot loader Bootload Version Version of the boot loader Bootprog Number Stock number of the boot program Bootprog Version Versi...

Page 127: ... enter modulation specific settings 2 7 1 Exciter Status Menu 2 7 1 1 Exciter Status Overview Menu Window In the Status Overview menu window you can call up general status information and thus identify erroneous system states Display Description Part Number Stock number Model Device or module model Product index Product modification index Serial Number Serial number Production Date Date of product...

Page 128: ...ing normally Warning At least one monitored parameter is outside the tolerance the device is however still functioning in compliance with the specifications Error At least one monitored parameter is outside the tolerance the device is no longer functioning correctly Audio Ch1 Status of channel 1 primary audio input the input type is set in the Input Automatic Input menu window OK Channel 1 is func...

Page 129: ...Local or remote operation No Remote operation the parameters for the exciter can only be read out on the display and via the web browser Yes Local operation the parameters for the exciter can both be read out and set full access on the display and via the web browser Interlock No RF interlock loop closed Yes RF interlock loop not closed Mute Internal deactivation of the RF output of the exciter No...

Page 130: ... display corresponds to the NO INPUT LED on the front panel of the exciter OK the channel is functioning correctly Warning the channel is faulty no switchover Error the channel is faulty switchover to a different exciter if neces sary Deviation Displays the peak deviation in kHz at the output during the last second Mod Power Displays the modulation power in dBr at the output during the last sec on...

Page 131: ... CRC check performed when the EPROM was read out detected a fault the device may not be functioning correctly and should be replaced Main PLL UPC PLL CLK PLL Status of the PLLs on the RF section Locked Unlocked If a PLL remains permanently unlocked the RF section is faulty CF Card Indicates whether the files were read correctly from the internal CF card No Error No fault Error The data on the CF c...

Page 132: ...Explanation Nominal Status display for the set nominal input amplitude Current Display of the peak value for the input amplitude during the last second expressed in percentage and dBu terms Status Display of the current status the possibilities are as follows OFF The input is not active OK Input is active and input amplitude is OK Clipped Input is active and input amplitude is too high A D convert...

Page 133: ...he input amplitude is below the monitoring threshold Display Explanation Sample Rate Indicates the detected sample rate for the audio signal the receiver can decode signals with sample rates between 32 kHz and 192 kHz per channel Preemphasis Indicates whether the receiver has detected a preemphasis in the AES data stream This information is obtained from the status bits in the AES channel Audio In...

Page 134: ...ulty and switchover takes place if neces sary Ch State CRC Indicates whether the receiver has detected CRC errors in the status bits of the AES channel Parity Biphase Indicates whether the receiver has detected an error in the AES EBU frame The following states are possible Off The input is not active OK The input is active and there are no errors Parity or Biphase Error The input is active but a ...

Page 135: ...u Value range MPX 1 dBu through 16 dBu default setting 6 dBu Threshold Setting for the input amplitude threshold for monitoring The setting can be entered in two ways as a percentage of the nominal input amplitude in the value range 2 through 80 default setting 5 as an absolute value in dBu in a value range dependent on the absolute level corresponding to input as a percentage Display Description ...

Page 136: ...disappears when the timer reaches the set On Time Note Brief peaks up to 50 ms are suppressed by the control logic i e the signal must be above or below the threshold for at least 50 ms for the corresponding timer to be started or stopped This prevents undesired indications from being triggered by brief signal peaks Note By nature any monitoring of analog signals must be based on the current input...

Page 137: ...o this selection no Clipped warn ing will be generated We therefore do not recommend this setting Current digital input amplitude The digital signal amplitude is monitored in the same manner as the analog inputs see the section Signal Monitoring at Analog Inputs 2 7 2 3 Exciter Input Data Input Menu Window In the Data Input menu window you can set parameters for the AUX inputs Threshold For settin...

Page 138: ...tion For setting the frequency deviation caused by the nominal input level Value range 2 kHz to 10 kHz default setting 4 kHz Active For activating the corresponding input Selection ON OFF Threshold For setting the input amplitude threshold for monitoring Percentage value range 2 to 80 default setting 5 Absolute value range in dBu the system uses the percentage value the absolute value is converted...

Page 139: ...y For setting the audio input and stereo mode for channel 1 a Possible selections AF Mono L AF Mono R AF Mono L R 2 AF Stereo AES Mono L AES Mono R AES Mono L R 2 AES Stereo MPX Inp2 MPX Inp3 State Status of channel 1 primary audio input OK Channel 1 is operating normally One Ch Not OK In the case of modulation with stereo or with mono L R this status is displayed if only one of the two feeds for ...

Page 140: ...1 Ch 1 is OK switch to Ch 1 2 Ch 2 is OK switch to Ch 2 3 In Ch 1 there is one channel OK switch to Ch 1 4 In Ch 2 there is one channel OK switch to Ch 2 5 Switch to Ch 1 State Displays the active channel Ch 1 or Ch 2 Error Reporting For setting the behavior if the active channel is faulty By default only the warning No Input is created It may however be preferred that the transmitter should gener...

Page 141: ...rrent AF input for the stereo coder and set a number of additional parameters for the integrated stereo coder Fail Delay For setting a time interval after which in the event of a No Input warn ing the No Input fault message also has to be generated Only active when Report Type is set to Fault a Since switchovers are allowed for certain combinations only the number of options offered for selection ...

Page 142: ...tone Switches the pilot tone on and off active only in stereo mode the pilot tone is always off in mono mode Preemphasis Selection of the signal preemphasis 50 µs default setting or 75 µs Active Preemphasis For switching preemphasis on or off with MPX mode still inactive Display Description Actual Modulation Displays the current modulation format setting the modulation format is defined in the Inp...

Page 143: ...es the deviation limiter on OFF Switches the deviation limiter off Clipper Only Only the MPX peak clipper is active MPX Power Threshold Sets the threshold for automatic MPX power limitation Value range 5 0 through 5 0 dBr default setting 0 dBr MPX Power Active Switches the MPX power limiter on or off default ON Display a a Measurement results are updated once a second Description Actual Deviation ...

Page 144: ...es the total harmonic distortion if the input signal is permanently over large It is also possible to use external sound processors since the audio signal is not affected in the event of transient out of limit conditions and the clipper ensures compliance with lo cal regulations The external processor then ensures that the MPX signal is always below the threshold Note In MPX mode input 2 or input ...

Page 145: ...ternal the built in TCXO is used default setting External PPS one pulse per second from an external source optional b External 10 MHz a 10 MHz clock from an external source optional c External AES the AES EBU signal clock a Alternately overwrites the corresponding setting in the Exciter Static Delay menu window b Can only be used when the SR8000 B2 External Reference option is installed c Can only...

Page 146: ... signal is present Not OK the reference signal is not present or is defective Ext Ref Locked Displays the lock in status of the oscillator reference Options Off the internal TCXO is used Locked the reference signal is locked in and being used Not Locked the reference signal is not locked in and is not being used Setting item Description Pilot Sync Source Selected Setting the source for synchronizi...

Page 147: ...an only be used when the SR8000 B2 External Reference option is installed e Normal step size 13 706 ns f 0 0 100 360 1 19 kHz the normal step size is 13 7 ns approx 0 026 If the phase reference signal and the audio data both come from the AES signal you have the same delay time The phase refer ence signal arrives in each exciter together with the same audio sample and therefore the position of the...

Page 148: ...Status Menu Window You can use the Status menu window to monitor the status of the output stage In the case of transmitters with an additional external amplifier system R S SR8250A the menu win dow provides separate displays for the internal amplifier and the separate amplifier as well as for the absorber Without separate amplifier Display Description Op Mode Status of the transmission operation F...

Page 149: ...n the internal external amplifier and on the coupler output reduced output power when SWR too high Temperature Transmitter temperature is OK Int Amp Status RF In Status of the RF input signal Reflection W Antenna reflected power above the hardware limit Temperature Ok Internal amplifier temperature is OK Comms Output stage communication status Power Supply Ok Internal amplifier power supply is OK ...

Page 150: ...dow The Internal Amp menu window displays the measured values for the internal amplifier Comms Output stage communication status Power Supply Ok External amplifier power supply is OK Display Description Forward Power Present output power at the antenna output Reflected Power Present reflected power at the antenna output VSWR VSWR voltage standing wave ratio at the antenna output Absorber Tempera t...

Page 151: ...for the first output stage transistor Transistor 2 Current for the second output stage transistor a a This transistor current is only displayed for the highest powered transmitter models Transistor 3 Current for the third output stage transistor a Transistor 4 Current for the fourth output stage transistor a Voltage DC Supply Output voltage of power supply DC Supply Control Control voltage for the...

Page 152: ...tput power Reflected Power Present reflected power VSWR VSWR voltage standing wave ratio Temperature Temperature at the amplifier heat sink Current Driver Current for the driver transistor Transistor 1 Current for the first output stage transistor Transistor 2 Current for the second output stage transistor Transistor 3 Current for the third output stage transistor Transistor 4 Current for the four...

Page 153: ...ription Forward Power Present forward power of the transmitter Reflected Power Present reflected power of the transmitter VSWR VSWR voltage standing wave ratio Nominal Power The variable nominal power forms the initial value for warning and fault thresholds The actual power setting is entered via Ref Voltage Ref Voltage Adjusting the reference voltage changes the output power Actual Ref Voltage Pr...

Page 154: ...ing environments e g frequency A vs frequency B Moreover parameter sets are also used for operating an N 1 transmitter system Display setting item Description Forward Power Present forward power of the transmitter Nominal Power Nominal power of the transmitter cannot be modified Actual Ref Voltage Present value of the reference Voltage RF Warning Limit Warning threshold for the forward power refer...

Page 155: ...py To Selecting a memory location to which you wish to copy the parameter set selected i e copied above This procedure should only be carried out in Offline mode context menu Edit offline Having completed the procedure implement any changes via the context menu Submit changes State Procedure State Display showing the status of the action that is being carried out Ready Loading Saving Copying Subde...

Page 156: ...ad This reloads the parameter set selected at Load as the current parame ter set current values are overwritten Resave This saves the current parameter set again at the memory location selected at Save the values already stored at this memory location are overwritten Recopy This is a repetition of the Copy From Copy To procedure The values at the memory location to which the copied parameter set i...

Page 157: ...Chapter5 Operation 5300 9677 71 5 70 EN 4 ...

Page 158: ...Broadcasting Division 5300 9677 72 6 1 EN 4 Printed in Germany CHAPTER 6 MAINTENANCE ...

Page 159: ......

Page 160: ...Chapter6 Maintenance 5300 9677 72 6 3 EN 4 CONTENTS 1 Software Update 4 1 1 Requirements 4 1 2 Procedure 4 1 2 1 On Rebooting 7 1 2 2 Checking New Software Version 7 ...

Page 161: ...te program was developed for carrying out updates of various Rohde Schwarz products It therefore provides some functions which are not relevant to the R S SR8000 product family The following description is therefore confined to the steps needed for the present purpose 1 Switch on the transmitter and the PC 2 Deactivate the energy saving option of the network card in the PC Proceed as follows a Fro...

Page 162: ...677 72 6 5 EN 4 4 Double click on the icon to start the update process The start window of the R S Software Distributor will open 5 Select Remote Installation and confirm with Next The available software updates will be displayed ...

Page 163: ...isted Note If the search fails try disabling all firewalls between the PC and transmitters 7 Select the desired transmitter from the list by enabling its check box 8 Click Install to start the update The R S Software Distributor copies the update to the transmitter The update is then unpacked on the transmitter The progress of these procedures can be followed in the State column Finally the mes sa...

Page 164: ... loader is updated This takes about 30 sec onds During this procedure the transmitter does not respond to any commands either from the keyboard or the browser The transmitter then updates the individual software and hardware components This pro cedure is completed in around 4 minutes and the system overview is then displayed It takes about a further 15 minutes for the web interface cache memory to...

Page 165: ...Chapter6 Maintenance 5300 9677 72 6 8 EN 4 Note The software version number can also be found on the browser login page ...

Page 166: ...Broadcasting Division 5300 9677 72 7 1 EN 4 Printed in Germany CHAPTER 7 TROUBLESHOOTING ...

Page 167: ......

Page 168: ...Chapter7 Troubleshooting 5300 9677 72 7 3 EN 4 CONTENTS 1 Information 4 ...

Page 169: ...Chapter7 Troubleshooting 5300 9677 72 7 4 EN 4 1 Information The Troubleshooting chapter will be compiled later ...

Page 170: ...Broadcasting Division 5300 9677 72 8 1 EN 4 Printed in Germany CHAPTER 8 SERVICE ...

Page 171: ......

Page 172: ...er Components 5 3 Replacing Fan 6 3 1 Removing the Fan 6 3 1 1 R S SR8010 6 3 1 2 R S SR8025 SR8050 SR8100 SR8130 VU813 7 3 2 Installing the Fan 9 4 Replacing Fuses on the Power Supply 10 4 1 R S SR8010 10 4 2 R S SR8025 SR8050 SR8100 11 5 Switching on the Automatic Circuit Breaker 14 5 1 R S SR8130 VU813 14 ...

Page 173: ... 5300 9677 72 8 4 EN 4 1 Necessary Tools and Test Equipment Depending on the service work to be performed you will require the following tools Torx screwdriver size 8 and 10 Flat tipped screwdriver Side cutting pliers ...

Page 174: ...smitter Components You can remove and replace the following transmitter components if errors occur Fan Fuse 1 1 Instruments R S SR8130 and R S VU813 are fitted with an automatic circuit breaker which can be switched back on if necessary by pressing a button ...

Page 175: ...anel of the transmitter where they are easily accessible from outside 3 1 Removing the Fan 3 1 1 R S SR8010 1 Undo the cable clamp Torx screwdriver size 8 and cut through the cable tie Fig 1 Undoing cable clamp 2 Press the catch X31 at top X32 at bottom on the connector of the faulty fan and dis connect the connector ...

Page 176: ...he faulty fan upward and pull the fan out 5 Pull the fan shroud off the removed fan The fan shroud is not changed it is fitted to the replacement fan 3 1 2 R S SR8025 SR8050 SR8100 SR8130 VU813 1 Cut through the cable tie securing the two fan cables 2 Press the catch X31 at top X32 at bottom on the connector of the faulty fan and dis connect the connector ...

Page 177: ...e 5300 9677 72 8 8 EN 4 Fig 3 Disconnecting connector 3 Unscrew the fuse block using a Torx screwdriver size 10 Fig 4 Unscrewing fuse block 4 Slide the faulty fan upward out of the mounting holes and pull the fan out ...

Page 178: ...nt of fan at rear of unit 1 Mounting holes 2 Fan shroud 5 Pull the fan shroud off the removed fan The fan shroud is not changed it is fitted to the replacement fan 3 2 Installing the Fan Replace the fan by proceeding in the reverse order and then cable it ...

Page 179: ...the AC supply connector of the transmitter The fuses can be accessed from outside at the rear of the transmitter 1 Push out the fuse holder below the AC supply socket using a screwdriver Fig 6 Pushing out line filter complete with fuses 2 Pull the fuse holder out DANGER Risk of electric shock De energize the unit before removing the fuses ...

Page 180: ...ing characteristic specified at the AC supply input Fig 8 Fuse holder complete with fuses 4 Reinsert the fuse holder and fuses Note If the replaced fuse immediately blows again take the unit out of service and send it to the Rohde Schwarz Service department 4 2 R S SR8025 SR8050 SR8100 Two fuses are fitted at the rear of the transmitter above the AC supply connector They are replaced from outside ...

Page 181: ...7 72 8 12 EN 4 1 To unlock the fuse holder turn the screw 90 counterclockwise Fig 9 Unlocking fuse holder 2 Remove the fuse holder complete with fuse DANGER Risk of electric shock De energize the unit before removing the fuses ...

Page 182: ...spond to the type tripping current and tripping characteristic specified at the AC supply input Fig 11 Fuse holder with fuse 4 Reinsert the fuse holder and lock it by turning the screw 90 clockwise 5 If necessary repeat steps 1 to 4 for the second fuse Note If the replaced fuse immediately blows again take the unit out of service and send it to the Rohde Schwarz Service department ...

Page 183: ...re fitted with an automatic circuit breaker If this auto matic line fuse trips a safety button pops up Press this safety button to switch the circuit breaker back on Fig 12 Switching on the automatic circuit breaker Note If the automatic circuit breaker trips again straight away the instrument must be taken out of service and sent for service ...

Page 184: ...Broadcasting Division 5300 9677 72 9 1 EN 4 Printed in Germany CHAPTER 9 APPENDIX ...

Page 185: ......

Page 186: ...tor 9 Pin Male 6 1 2 5 X22A Remote Control Interface for Commands Messages D SUB connec tor 25 Pin Male 7 1 2 6 X22B AMP Interface to External Amplifier D SUB Connector 25 Pin Male 8 1 2 7 X11R AF Input Right XLR Connector 9 1 2 8 X11L AF Input Left Alternative MPX XLR Connector 10 1 2 9 X21 Input AES EBU Alternative MPX XLR Connector 10 1 2 10 X12 AUX1 RDS Input BNC 10 1 2 11 X13 Output Pilot BNC...

Page 187: ...le 8 Pin Protocols TCP IP HTTP 1 1 2 TEST X60 Test Output SMA Connector Signal name Direction Value range Contact Remarks TX Output Ethernet X50 1 TX Output Ethernet X50 2 RX Input Ethernet X50 3 n c X50 4 n c X50 5 RX Ethernet X50 6 n c X50 7 n c X50 8 Signal name Direc tion Value range Contact Remarks TEST_MON Output X60 1 6 dBu at 600 Ω GND Two way X60 2 ...

Page 188: ...nge Contact Remarks TEST_OUT_MON Output 7 dBm to 13 dBm 87 50 MHz to 108 00 MHz X7 1 50 Ω GND Two way X7 2 Signal name Direction Value range Contact Remarks L1 Input 100 V to 240 V AC 220 V to 240 V AC for SR8100 50 Hz to 60 Hz Current at 220 V SR8010 1 5 A SR8025 2 5 A SR8050 5 A SR8100 10 A SR8130 VU813 13 A X1 L AC Supply N Input X1 N AC Supply PE Input X1 PE AC Supply Signal name Direction Val...

Page 189: ...1 Code Bit 1 Input X23A 2 Code Bit 2 Input X23A 3 Code Bit 3 Input X23A 4 Code Bit 4 Input X23A 5 Code Bit 5 Input X23A 6 Code Bit 6 Input X23A 7 Code Bit 7 Input X23A 8 Common Two way 0 V FLT CODE X23A 9 Common line for all code bits Signal name Direction Value range Contact Remarks n c X23B 2 8 Not connected LOOP Two way Open RF loop open Connection to LOOP RF loop closed X23B 1 Internal to 12V ...

Page 190: ...2A 5 Automatic modulation Command 6 Input X22A 6 Fault reset Common Bidirect 0 V FLT X22A 7 Common line for all com mands Common Bidirect 0 V FLT X22A 8 Common line for all com mands Message 1 Output X22A 9 ON Message 2 Output X22A 10 OFF Common 1 2 Input X22A 11 Common line for messages 1 2 Message 3 Output X22A 12 RF present Message 4 Output X22A 13 Warning Message 5 Output X22A 14 Fault Message...

Page 191: ...Two Way 0 V X22B 1 Ground GND Two Way 0 V X22B 2 Ground RESET Output 0 V 5 V X22B 3 High Reset Not used in the amplifiers at present VREF_PWR Output 0 V to 5 V 4 V for Pnom X22B 4 Control voltage for the amplifier power referenced to GND PWR_OUT_EXT Input 0 mA to 2 5 mA 0 V to 5 5 V 1 818 mA 4 V for Pnom Inp Res 2200 Ω X22B 5 Detector input for forward power indicator at transmit ter output after ...

Page 192: ...dicator at transmit ter output after combiner GND X22B 18 CAN_H Two Way CAN_H X22B 19 CAN High GND X22B 20 Return line for message 10 GND 0 V X22B 21 Normally open contact 12V_EXTO Output 12 V X22B 22 Power supply outgoing 12V_EXTO Output 12 V X22B 23 Power supply outgoing 12V_EXTO Output 12 V X22B 24 Power supply outgoing 12V_EXTO Input 12 V X22B 25 Power supply outgoing Signal name Direction Val...

Page 193: ...00 Ω Audio IN 2 Input X11L 3 GND Two way 0 V X11L 1 Signal name Direction Value range Contact Remarks Audio IN 3 Input AES 200 mVpp to 10 Vpp MPX 5 dBu to 7 dBu adjustable for 40 kHz deviation X21 2 Balanced AES 110 Ω variable data rate 32 kHz to 96 kHz balanced or unbalanced selectable 600 ohm or 2000 Ω Audio IN 3 Input X21 3 GND Bidirect 0 V X21 1 Shield Signal name Direction Value range Contact...

Page 194: ...ct 0 V X13 2 Signal name Direction Value range Contact Remarks AUX2_IN Input 18 dBu to 7 dBu for SCA 4 kHz devia tion X14 1 Unbalanced 2000 Ω level adjustable for nominal devi ation GND Bidirect 0 V X14 2 Signal name Direction Value range Contact Remarks EXT_REF Input 0 1 Vpp to 5 Vpp or TTL positive edge triggered X9 1 Reference input 10 MHz BNC 50 Ω GND Bidirect 0 V X9 2 Signal name Direction Va...

Page 195: ...D Two way 0 V X5 2 Signal name Direction Value range Contact Remarks RF_OUT Output Power depends on transmitter type 87 50 MHz to 108 00 MHz X2 1 50 Ω N female connector 100 250 W 7 16 female connector 500 1000 W GND Bidirect X2 2 Signal name Direction Value range Contact Remarks 12V_FAN1 Output 12 V X31 1 GND Two way 0 V X31 2 X31 3 Unused X31 4 Unused Signal name Direction Value range Contact Re...

Page 196: ...Chapter9 Appendix 5300 9677 72 9 13 EN 4 X32 4 Unused Signal name Direction Value range Contact Remarks ...

Page 197: ...Chapter9 Appendix 5300 9677 72 9 14 EN 4 ...

Page 198: ...Broadcasting Division 5300 9677 72 A 1 EN 4 Printed in Germany WIRING DIAGRAMS ...

Page 199: ......

Reviews: