background image

32

CHECKMATE™

CheckMate™ Procedure

From the Standby screen of the CheckMate™, press 

Dump (F2) 

to go to the

 Start 

Dump

 display:

Press 

Start (F1)

 to begin downloading data to the PC.

The CSV files are saved by tag number and ID in a folder called DataFiles under the 

directory created previously.  They may be opened using Excel or a similar spreadsheet 

program.

If the CheckMate™ is not connected to the PC properly, or the PC is not running Corrdata 

CSV, the following screen may be displayed.

Make sure that Corrdata CSV software is running, that the correct COM port is checked 

in the Select menu, and that the CheckMate™ is connected to that COM port using the 

supplied cable.

If data is still not transferred after checking the connection between the PC and 

CheckMate™, please see the Troubleshooting section (Chapter 9) for further help.

Summary of Contents for CHECKMATE

Page 1: ...CHECKMATETM Reference Manual P N 723600 Manual Rev C www cosasco com Cosasco 11841 Smith Avenue Santa Fe Springs CA 90670 Tel 562 949 0123 Fax 1 562 949 3065 ...

Page 2: ...is manual may be reproduced or transmitted in any form or by any means electronic or mechanical including photocopying and recording for any purpose without the express written permission of Rohrback Cosasco Systems Inc Page No Rev Date Description of Change Issue Reviewed Approved 20 Jan 06 Initial Release A 18 Nov 08 Re drawn updating Manual K C D P D P B 27 Apr 15 Update manual format images K ...

Page 3: ... Chapter 2 Specifications 3 Chapter 3 Installation 5 Chapter 4 System Configuration 9 Chapter 5 Reading Probes 13 Chapter 6 Custom Probe Configuration 25 Chapter 7 Displaying Data 29 Chapter 8 Transfering Data to the PC 31 Chapter 9 Quick Troubleshooting Guide 33 ...

Page 4: ...ii CHECKMATE Figure Page 1 1 CHECKMATE Instrument 2 3 1 CHECKMATE Battery Cover 7 4 1 CHECKMATE Function Keys 9 Table 5 1 Electrical Resistance Probe Types and Spans 23 Figures and Tables ...

Page 5: ...1 probe span The CheckMate also features a reduced measurement cycle while still maintaining high accuracy As with its predecessors this portable unit has built in memory that stores readings for later retrieval however the CheckMate can store readings for up to 204 individual probes with 10 readings per probe Furthermore the CheckMate makes transferring its stored data to a PC a much simpler proc...

Page 6: ...2 CHECKMATE Figure 1 1 CheckMate Instrument 4 3 3 00 3 1 20 MIN 80 MIN 2 0 7 75 ...

Page 7: ...8o C to 70o C Splash proof enclosure with sealed membrane keyboard Electrical Compatible with all ER probes Measurement resolution 0 1 probe divisions 0 01 of probe span Measurement repeatability 1 division 0 1 of probe span Rapid measurement cycle of 30 seconds Memory for up to 204 probes with 10 readings per probe Reads probes on extension cable of up to 200ft 61m Power Supply 6 AA Alkaline cell...

Page 8: ...hutoff in 2 minutes after reading or non use Four Line Liquid Crystal Display LCD Supplied with ER test probe 6 AA batteries CheckMate to computer cable including DB25 to DB9 adapter CD ROM with Corrdata CSV PC software and manual ...

Page 9: ...r shipping damage and retain all damaged packaged materials to support any claim against your freight carrier should this become necessary Unpacking Carefully remove the instrument from its package Included in the package you should find CheckMate Instrument Handheld CheckMate instrument ER test probe 6 AA batteries CheckMate to computer cable including DB25 to DB9 adapter USB with software and ma...

Page 10: ...is supplied with a set of six 1 5 Volt AA alkaline batteries To install these batteries remove the access panel on the back of the unit see Figure 3 1 with the provided Allen Key and install the batteries with the polarities as indicated on the unit ...

Page 11: ...ovided by lithium batteries mounted internally within the unit These batteries should provide 7 10 years of back up capacity Replacement of these batteries requires the unit to be returned to Cosasco or an authorized dealer Figure 3 1 Battery Cover of CheckMate Instrument Battery Cover ...

Page 12: ...uld appear as shown below If the batteries are low or in need of replacement a warning screen will appear as follows If batteries are good the instrument will sequence directly to the Standby display as below The battery is tested both at initial switch on and during probe measurement ...

Page 13: ...nd the numbers using the Alpha Numeric key There are also four soft keys F1 through F4 as shown below The soft keys are multi function keys used to make on screen selections Figure 4 1 CheckMate Function Keys Setting the Time and Date on the CheckMate The CheckMate has its own clock so that individual probe readings are automatically time and date stamped To set the internal clock for Time and Dat...

Page 14: ...te followed by the time in hours followed by the time in minutes followed by 00 When the time is set correctly press Enter to start the clock To update the clock on the Mate Clock Set To display press Read F1 Press Exit to go to the Mate Settings screen Press Exit again to return to the Mate Configuration screen Press Exit again to return to the Standby screen NOTE The hour is set on the military ...

Page 15: ...Set Units F1 to go to the Set Metal Loss Units display Select and press Mils F1 for mils 0 001 and mils year or press mm F2 for millimeters and mm year or um F3 for micrometers and um year After the selection is made and correctly displayed on the display press Exit to set the units and return to the Mate Settings display Press Exit again to return to the Mate Configuration display Press Exit agai...

Page 16: ...o avoid confusion with any previously collected data To clear the memory proceed as follows From the Standby display press SetUp F4 to go to the Mate Configuration display Mate Configuration Man Set _ Conf Mate Exit Press Set Mate F3 to go to the Mate Settings display Mate Settings Set Set Clr Units Time Mem Exit Press Clr Mem F3 to go to the clear memory confirmation screen WARNING This will ERAS...

Page 17: ...The Quick reading allows the user to read a probe and view the result in approximately 30 seconds The result of a Quick read can also be saved for future reference calculation of corrosion rate and or downloading to a PC To do a Quick read From the Standby screen press Read F1 to go to the What To Read Display Press Probe F1 to go to the Read Probe By display ...

Page 18: ...t will automatically go to the Measure mode and display A series of symbols will accumulate from left to right across the display to indicate the progression of the measurement function At the conclusion of the measurement function approximately 30 seconds the CheckMate will display the probe reading and the check reading in divisions A typical displayed reading is shown below The Div reading is t...

Page 19: ... another reading will be taken and displayed If the reading is to be saved in memory for later viewing for corrosion rate calculation or for downloading to a PC the following procedure should be followed Press the Save key to go to the Enter Probe Span display From the keypad enter the span of the probe element in mils The span in mils is shown on the probe packaging or it can be found in Table 5 ...

Page 20: ... Enter Probe Tag display Note If an invalid ID has been selected the Invalid ID display appears Press Try Again F1 to return to the Enter Probe ID display Pressing Exit F4 returns to the Read Probe By display Note If the ID selected has already been configured the This ID Already Configured display appears Press Cont F1 to continue to the Enter Probe Tag display if you want to continue to use this...

Page 21: ... to the Enter Probe Alloy display The Enter Probe Alloy display allows the user to enter up to eight 8 alpha or numeric characters to identify the alloy of the probe element for reference purposes only It does not affect the calculation of corrosion rates Pressing Clr F2 clears a previously entered ID Pressing BkSp F3 backs up one space for each time it is pressed so that a change can be made Pres...

Page 22: ...D is valid the Connect To Probe display will appear If the ID is found to be invalid the ID Not Found message will appear and the Exit key should be pressed to return to the Taking Probe Reading display After connecting the CheckMate to the probe press the Start key to begin the measurement function and the Taking Probe Reading screen will appear Pressing the Exit key will return to the Read Probe...

Page 23: ... pressing the Yes F1 key which will go directly to the Probe Reading Saved display which is explained below or pressing the No key will discard the reading and return to the Read Probe By display Press the More F2 key to go to the MLoss and Rate display The cumulative metal loss MLoss in the engineering units originally selected will be displayed and the corrosion rate between the previous probe r...

Page 24: ... CYLINDRICAL T10 CYLINDRICAL T8 TUBE LOOP T4 TUBE LOOP S50 FLUSH S40 FLUSH S20 FLUSH S10 FLUSH S8 STRIP LOOP S8 FLUSH S4 STRIP LOOP S4 FLUSH S4 ATMOSPHERIC OTHER and TEST PROBE CO You may scroll up through the list by repeatedly pressing the Up F2 key or down through the list by repeatedly pressing the Down F3 key When the probe element selection is displayed press the Enter F1 key to accept the s...

Page 25: ...k reading Chk in divisions A typical display is shown below If a TF5 or TF50 high sensitivity atmospheric ER probe has been selected the Check Mate will go to a special Enter Probe Span display Using the numeric portion of the keypad enter the probe span in Angstroms Ǻ The packaging for the TF5 and TF50 ER provides the specific span for the probe Alterna tively the nominal span can be used without...

Page 26: ...y is shown below If OTHER is selected from the probe type selections on the Select Probe Type display the CheckMate will go to a second Select Probe Type display that allows the select the specific probe element conversion equation required and enter specific probe spans in mils that may be special The display is shown below Select and press A F1 for Wire Loop type probes or press B C F2 for Tube ...

Page 27: ...B 4 Flush Element S10 Cylindrical Element T10 B D 5 Flush Element S20 Cylindrical Element T20 Wire Loop Element W40 B D A 10 Wire Loop Element W45 A 11 25 Flush Element S40 Wire Loop Element W80 B A 20 Cylindrical Element T50 D 25 Table 5 1 ER and Temperature Probe Types and Spans CAUTION ER Model 2500 3500 or 4500 probes are designated as a cylindrical element not a tube element which refers only...

Page 28: ...24 CHECKMATE ...

Page 29: ...o go to the Mate Configuration display Press Man Conf F1 to go to the Enter Probe ID display Enter a number between 51 and 255 and press Enter F1 to go to the Enter Probe Tag display Note If an invalid ID is entered it is automatically cleared upon pressing Enter F1 Note If the ID selected has already been configured the This ID Already Configured display appears ...

Page 30: ...nge can be made Pressing Exit F4 returns to the Mate Configuration display Press Enter F1 to go to the Select Probe Type display The probe type selections are W80 WIRE W65 WIRE W45 WIRE W40 WIRE TF50 TF5 T50 CYLINDRICAL T20 CYLINDRICAL T10 CYLINDRICAL T8 TUBE LOOP T4 TUBE LOOP S50 FLUSH S40 FLUSH S20 FLUSH S10 FLUSH S8 STRIP LOOP S8 FLUSH S4 STRIP LOOP S4 FLUSH S4 ATMOSPHERIC OTHER and TEST PROBE ...

Page 31: ... for the probe Alterna tively the nominal span can be used without appreciable error If OTHER is selected from the probe type selections on the Select Probe Type display the CheckMate will go to a second Select Probe Type display that allows the select the specific probe element conversion equation required and enter specific probe spans in mils that may be special The display is shown below Enter...

Page 32: ...28 CHECKMATE Pressing Enter F1 will go to the ID Configured display ...

Page 33: ...be currently attached or by ID The data includes the Tag ID Metal Loss Corrosion Rate Divisions and Check Readings From the Standby screen press Disp F2 to go to the Display Data By display Press Curr Probe F1 to go directly to the current probe display or press ID F2 to select the probe by ID Press More F1 to go to the second screen of information ...

Page 34: ...30 CHECKMATE Press More F1 one more time to go to the third screen of information ...

Page 35: ...s to install The default installation directory is C Program Files RCS Corrdata CSV Configuring Corrdata CSV When installation is complete click on the Start Menu to launch the program Click on the Select menu then Data Directory to choose the location for where to save the CSV files Next from the Select Menu place a check next to the COM port to be used Connect the CheckMate to the PC Connect the...

Page 36: ...g Excel or a similar spreadsheet program If the CheckMate is not connected to the PC properly or the PC is not running Corrdata CSV the following screen may be displayed Make sure that Corrdata CSV software is running that the correct COM port is checked in the Select menu and that the CheckMate is connected to that COM port using the supplied cable If data is still not transferred after checking ...

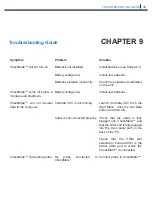
Page 37: ...g Cable is not connected properly No probe connected to CheckMate Solution Install batteries see Chapter 3 Install new batteries Check the polarities as indicated on the unit Install new batteries Launch Corrdata CSV from the Start Menu Click the Get Data button and then OK Check that the cable is fully plugged into CheckMate and that the other end is fully plugged into the 9 pin serial port on th...

Page 38: ...34 CHECKMATE ...

Reviews: