background image

USER MANUAL


Hereby, MOB, declares that item MO9090 is in Compliance with 

the essential requirements and other relevant conditions of 

Directive 2014/30/EC. A copy of the DOC (Declaration of 

Conformity) is available at: DOC@reclamond.com or  

MOB, PO BOX 644, 6710 BP (NL).


PO: 41-XXXXXX 
Made in China


Summary of Contents for MO9090

Page 1: ...MO9090 is in Compliance with the essential requirements and other relevant conditions of Directive 2014 30 EC A copy of the DOC Declaration of Conformity is available at DOC reclamond com or MOB PO BOX 644 6710 BP NL PO 41 XXXXXX Made in China ...

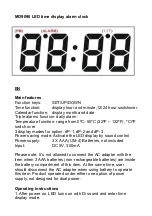
Page 2: ... Activate the LED display by sound control Power supply 3 X AAA UM 4 Batteries not included Input DC 5V 300mA Please note It s not allowed to connect the AC adapter with the item when 3 AAA batteries non rechargeable batteries are inside the battery compartment of this item At the same time user should disconnect the AC adapter when using battery to operate this item Product operated under either ...

Page 3: ...off power saving function Sd displayed means power saving function off Press DOWN button to turn on power saving function oNSd will appears on display 6 When the power saving function is on and without any operation in 10 seconds the display is off and enter power saving mode time system keeps working 7 Under temperature mode press DOWN button for 2 seconds to switch Celsius and Fahrenheit unit Ti...

Page 4: ...edly to set the alarm as the following sequence Hour Minute quit Press and hold UP DOWN buttons to speed up the forward or reverse scanning of the digits 2 Set the A2 and A3 as the setting step of A1 3 Under setting mode without any button operation in 15 seconds exit automatically 4 Alarm will sound for 1 minute when set time is out but the alarm symbol will keep on the display press any button t...

Page 5: ...nden wenn sich 3 AAA Batterien nicht wieder aufladbare Batterien in dem Gerät befinden Wenn das Gerät mit Batterien betrieben wird muss der Benutzer den Netzadapter entfernen Das Gerät arbeitet nur mit einer Stromversorgung nicht mit Dual Power Bedienungsanleitung 1 Nach dem Einschalten schaltet sich das LED mit einem Di Ton ein und gibt die Zeit an 2 Im Zeitanzeigemodus die SET Taste drücken um u...

Page 6: ...et ist wird nach 10 Sekunden ohne Funktion das Display ausgeschaltet Das Zeitsystem arbeitet jedoch weiter 7 Drücken Sie im Temperaturmodus die Taste DOWN für 2 Sekunden um zwischen der Celsius und Fahrenheit Anzeige zu wechseln Zeit einstellen 1 Nach dem Einschalten ist die Standardzeit 12 00 Uhr 12 Std Anzeige 2 Im Zeitmodus Halten Sie die SET Taste für 2 Sekunden gedrückt 12 Std Anzeige erschei...

Page 7: ...dem Display und dann die Alarmzeitanzeige Drücken Sie die SET Taste für 2 Sekunden um die Alarmeinstellung aufzurufen Drücken Sie wiederholt die SET Taste um den Alarm wie folgt einzustellen Stunde Minute beenden Halten Sie die UP DOWN Tasten gedrückt um das Vorwärts oder Rückwärts Scannen der Ziffern zu beschleunigen 2 Stellen Sie Alarmzeiten A2 und A3 wie oben für A1 beschrieben ein 3 Im Einstel...

Page 8: ...ºC ºF 3 modes d affichage pour l option dP 1 dP 2 et dP 3 Mode économie d énergie Activez l affichage LED par un contrôle sonore Alimentation 3 piles AAA UM 4 non comprises Entrée DC 5V 300mA Remarque ne branchez pas l appareil au secteur lorsque 3 piles AAA piles non rechargeables se trouvent dans le compartiment à piles L utilisateur doit débrancher l adaptateur secteur lorsqu il utilise les pil...

Page 9: ...Touche DOWN appuyez sur la touche DOWN pour activer désactiver la fonction économie d énergie 9 Sd affiché signifie fonction économie d énergie désactivée Appuyez sur la touche DOWN pour activer la fonction économie d énergie oNSd apparaîtra à l écran 10 Lorsque la fonction économie d énergie est activée et sans aucune opération en 10 secondes l affichage s éteint et entre en mode économie d énerg...

Page 10: ...rloge appuyez deux fois sur le bouton SET pour entrer dans le mode Alarme 1 Alarme 2 Alarme 3 par défaut dans l affichage A1 A 2 A3 1 En mode alarme A1 appuyez plusieurs fois sur la touche HAUT pour allumer ou éteindre l alarme Lorsque vous activez A1 l icône d alarme OnA1 apparaît sur l écran puis entrez l affichage de l heure de l alarme Appuyez sur la touche SET pendant 2 secondes pour entrer d...

Page 11: ... passer à l affichage de la température ES Principales funciones Botón función SET UP DOWN Función Time muestra la hora y los minutos 12 24 horas ajustables Función calendario muestra el mes y la fecha Función alarma triple alarma diaria Función de temperatura rango entre 0ºC 50ºC 32ºF 122ºF ºC ºF ajustable 3 modos de pantalla dP 1 dP 2 and dP 3 Modo de ahorro de energía Active la pantalla LED por...

Page 12: ...ue desee para que se vaya alternando cada 15 segundos y vuelva a la pantalla principal 5 Botón DOWN presione DOWN para poner en on off la función de ahorro de energía Sd en la pantalla significa que la función ahorro está off Presione otra vez DOWN para activar la función el logo oNSd aparecerá en la pantalla 6 Cuando la función de ahorro de energía está activada y no hay actividad durante 10 segu...

Page 13: ... A 2 A3 1 En el modo alarma A1 presione el botón UP varias veces para activar o desactivar la alarma Cuando esté activada aparecerá el icono OnA1 Presione SET por 2 segundos para confirmar la alarma presione varias veces para ajustar en la siguiente secuencia Hora Minuto salir Presione y mantenga presionado UP DOWN para acelerar la elección 2 Ajuste las alarmas A2 y A3 de la misma forma que la A1 ...

Page 14: ...io energia Attivare il display LED display tramite suono Alimentazione 3 Batterie AAA UM 4 non incluse Input DC 5V 300mA Nota non connettere l adattatore AC all apparecchio quando sono in uso le batterie non ricaricabili Rimuovere le batterie o il caricatore AC Il prodotto infatti non è costruito per la doppia alimentazione in contemporanea ma ne permette una alla volta Istruzioni 1 Dopo l accensi...

Page 15: ...ondi per passare da gradi Celsius a Fahrenheit Impostare l ora 1 Dopo l accensione l ora mostrata di default è 12 00am Sistema 12Hr 2 In modalità orologio premere SET per 2 secondi il formato a 12 ore comparirà lampeggiando sul display Dopo le 12 compare il simbolo PM Premere i pulsanti UP DOWN per modificare le impostazioni dell orologio nel formato 24 ore 3 Impostazione dell orologio Premere il ...

Page 16: ...tà se non viene premuto alcun pulsante per 15 secondi 4 La sveglia suona per un minuto all ora impostata ma il simbolo Resta visibile sul display premere un pulsante qualsiasi per fermare la sveglia 5 In modalità impostazioni disattivando la sveglia questa non suonerà più 6 In modalità sveglia se non viene eseguita alcuna operazione e non ci sono sveglie attive l apparecchio entra automaticamente ...

Page 17: ...gen het is niet geschikt voor dual power Gebruikersinstructies 1 Nadat u de luidspreker aan heeft gezet gaan de LED lampjes aan hoort u een geluid Di en de tijdsmodus verschijnt 2 Druk op de SET knop in de tijdsmodus u ziet nu in volgorde de weergave voor tijd kalender A1 alarm 1 A2 A3 temperatuur tijd 3 In elke modus behalve de temperatuurmodus houdt u de SET knop 2 seconden ingedrukt om naar de ...

Page 18: ...schijnt de standaard ingestelde tijd van 12 00AM 12 uursnotatie 2 In de tijdsinstellingsmodus drukt u 2 seconden op de SET knop de 12 uursnotatie verschijnt knipperend In de linkerbovenhoek ziet u de notatie PM verschijnen voor de middaguren Druk op de UP DOWN knop om de tijdsnotatie naar 24 uur te zetten 3 Tijd instellen Druk herhaaldelijk op de SET knop om de tijd in te stellen 12 24uurs tijdsno...

Page 19: ...dt in gedrukt wordt het menu automatisch verlaten 4 Zodra de ingestelde alarmtijd wordt bereikt zal het alarm 1 minuut afgaan Het alarmsymbool blijft in het display staan druk op een willekeurige knop om het alarm te stoppen 5 Wanneer het alarm uit staat zal deze niet afgaan indien de ingestelde tijd bereikt wordt 6 Indien er 30 seconden lang geen knop wordt in gedrukt wordt het menu automatisch v...

Page 20: ...ietlania czasu nacisnąć przycisk SET w celu sprawdzenia w kolejności czas kalendarz A1 alarm 1 A2 A3 temperatura czas 3 W dowolnym trybie za wyjątkiem trybu temperatury naciśnij i przytrzymaj przez 2 sekundy przycisk SET aby wejść w tryb ustawień naciśnij przycisk UP DOWN aby ustawić wartość Naciśnij i przytrzymaj przyciski aby przyspieszyć przewijanie cyfr do przodu lub do tyłu 4 Przycisk UP W tr...

Page 21: ...j przycisk UP DOWN aby zmienić ustawienie zegara na format 24 godzinny 24 godz 3 Ustawianie zegara Naciśnij kilkakrotnie przycisk SET aby ustawić czas w następującej kolejności Przełączanie 12 24 godzin godzina minuta zakończenie Naciśnij i przytrzymaj przyciski UP DOWN aby przyspieszyć przewijanie cyfr do przodu lub do tyłu 4 W trybie ustawień bez wykonania żadnej operacji przez 15 sekund następu...

Page 22: ...stąpi automatyczne wyjście 4 Po upływie ustawionej godziny alarm zacznie migać przez 1 minutę ale na wyświetlaczu pojawi się symbol alarmu Naciśnij dowolny przycisk aby zatrzymać alarm Alarm jest codziennie aktywny 5 W trybie ustawień wyłącz tryb alarmu Podczas ustawiania alarmu nie będzie słychać dźwięku 6 W trybie alarmowym ale nie w stanie aktywacji alarmu brak jakiegokolwiek działania w ciągu ...

Reviews: