background image

10

• 

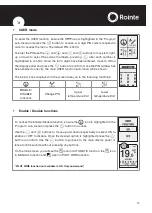
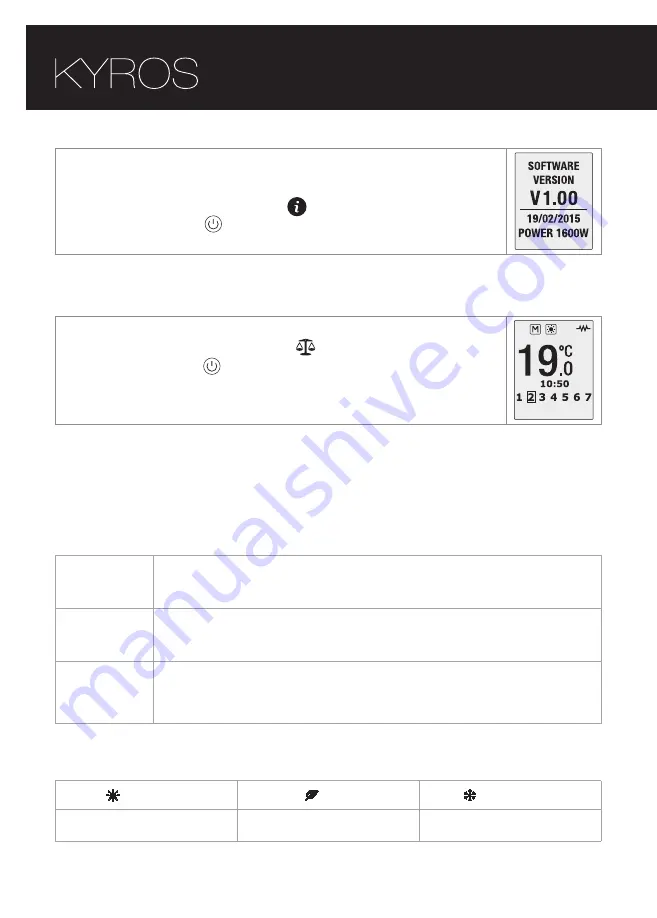
Information

This function will display the software version, the date of this release and the 
rated power of the product.

To access this information, ensure the  

 icon is highlighted in the `Energy´ 

sub-menu and press the 

 button to confirm. The information will then show 

in the display panel.

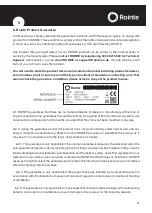
      2.6.3. Main Menu: Equilibrium / Balance sub-menu

The `Balance´ sub-menu/function returns the product to a constant temperature 
of 19°C. To activate this function ensure the  

  icon is highlighted in the `Balance´ 

sub-menu and press the 

 button to confirm. 

The product will return to the display panel in MANUAL function, with the 
temperature set to 19ºC. 

      2.6.4. Main Menu: Program sub-menu

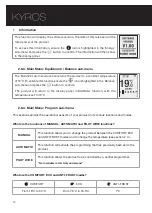
This section explains the operational aspects of your product in its various functions and modes.

What are the functions of MANUAL, AUTOMATIC and PILOT WIRE functions?

MANUAL

This function allows you to change the product between the COMFORT, ECO 
and ANTI-FROST modes and to change the temperature (see section 2.4.). 

AUTOMATIC

This function will activate the programming that has previously been set in the 
product.

PILOT WIRE

This function allows the product to be controlled by a central programmer.

* Not available in UK. Only on demand*

What are the COMFORT, ECO and ANTI-FROST modes?

  COMFORT

  ECO

  ANTI-FROST

From 19ºC to 30ºC

From 7.5ºC to 18.5ºC

7ºC

Summary of Contents for KYROS KRI0330RAD3

Page 1: ...KYROS INSTRUCTION MANUAL DIGITAL ELECTRONIC RADIATOR Information operation installation ...

Page 2: ...uilibrium Balance sub menu 10 2 6 4 Program sub menu 10 2 7 OPEN WINDOWS function 17 2 8 Fuzzy Logic Energy Control technology 18 3 Installation and mounting 18 3 1 Mounting instructions 18 3 2 Installing and fixing the supports 19 4 Maintenance and cleaning 20 5 Installation and safety precautions 20 5 1 Installation precautions 20 5 2 Safety precautions 20 6 Rointe Product Guarantee 21 7 Europea...

Page 3: ...zy Logic Energy Control technology 4 pre installed programmes Visual menus Infrared communication compatible with AIR Control and BASIC Control remote controls Equilibrium function OPEN WINDOWS function IMPORTANT Please read this Instruction Manual carefully to ensure correct operation It is impor tant that this manual is left with the product after installation 2 Product information and operation...

Page 4: ...y Logic Control technology active MANUAL function active when USER mode active COMFORT mode active PILOT WIRE function active when USER mode active Not available in UK Only on demand ECO mode active Control panel locked through keypad ANTI FROST mode active Control panel locked through remote NO DESCRIPTION 1 Programming 2 Days of the week 3 Time of day 4 Temperature selected 5 Control panel locke...

Page 5: ...s the Rointe logo will appear 2 3 Adjust the day and time To set the day and time please press the button on the keypad to access the Main Menu Select the Settings menu using the or buttons on the keypad To move left press the button and to move right press the button Once the icon is highlighted on the display panel press the button to access Now use the and buttons again to select the clock opti...

Page 6: ...8 2 5 Lock the control panel You can lock the keypad from the product or from a remote control optional To lock the keypad manually please hold and press the button AND the button TOGETHER for 3 seconds The symbol will appear on the display panel and the keys will not respond To unlock the keypad manually please hold and press the button AND the button TOGETHER for 3 seconds To lock the keypad usi...

Page 7: ...con displayed in the Main Menu screen and press to confirm Use the and buttons to move across the different options on the sub menu to choose your parameter and press to access The below icons displayed on the screen take you to the following parameters Display backlight brightness Clear Memory Language Time Adjust display backlight brightness This allows you to change the brightness of the displa...

Page 8: ... your chosen language is highlighted and confirm by pressing the button Adjust the day and time This option sets the hour minutes and day of the week in your product Please refer to section 2 3 2 6 2 Main Menu Energy sub menu The Energy sub menu provides access to functions related to energy management of the product To access select the icon displayed in the Main Menu screen and press to confirm ...

Page 9: ...anel will then show a status according to the current state of consumption of the product OK CONSUMPTION Up to 40 effective power CONSUMPTION CAUTION 40 60 effective power CONSUMPTION WARNING More than 60 effective power Effective Power function To check the Effective Power status of your product ensure the icon is highlighted in the Energy sub menu and press the button to access The display panel...

Page 10: ...turn to the display panel in MANUAL function with the temperature set to 19ºC 2 6 4 Main Menu Program sub menu This section explains the operational aspects of your product in its various functions and modes What are the functions of MANUAL AUTOMATIC and PILOT WIRE functions MANUAL This function allows you to change the product between the COMFORT ECO and ANTI FROST modes and to change the tempera...

Page 11: ...IC functions To change or choose the MANUAL or AUTOMATIC function ensure the icon is highlighted in the Program sub menu and press the button to confirm You can change from AUTOMATIC to MANUAL and vice versa by pressing the button again On the display panel the symbol will appear for the AUTOMATIC function and the symbol for the MANUAL function Programming options To choose a program for your prod...

Page 12: ...between 19ºC and 30ºC using the and buttons The icon and the temperature will flash Press the button to confirm STEP 2 Select ECO mode temperature ECO mode will be programmed next Select the ECO mode temperature between 7 5ºC and 18 5ºC The icon and the temperature will flash Press the button to confirm STEP 3 Select the Days The days of the week will start flashing on the display panel and show a...

Page 13: ...ram sub menu Press the button to confirm and the display panel will show 4 programs for you to choose from A1 A2 A3 and A4 Using the and buttons choose the program you wish to activate and once highlighted press the button to confirm You will then be automatically taken back to the main display panel and your pre program option will show on the screen to confirm it is active To MODIFY any of the p...

Page 14: ...GRAM A1 A2 A3 A4 TIME DAY Mon Fri Sat Sun Mon Fri Sat Sun Mon Sun Mon Fri Sat Sun 00 00 01 00 02 00 03 00 04 00 05 00 06 00 07 00 08 00 09 00 10 00 11 00 12 00 13 00 14 00 15 00 16 00 17 00 18 00 19 00 20 00 21 00 22 00 23 00 COMFORT ECO OFF ...

Page 15: ... shown The below icons displayed on the screen take you to the following functions ENABLE DISABLE functions Change PIN Upper temperature limit Lower temperature limit Enable Disable functions To access the Enable Disable function ensure the icon is highlighted in the Program sub menu and press the button to access Use the and buttons to move up and down respectively to select ON to enable or OFF t...

Page 16: ...icon is highlighted in the Program sub menu and press the button to access Use the and buttons to decrease or increase your desired upper temperature between 19ºC to 30ºC and press the button to confirm You will then return to the USER function screen To exit press the button to go back to the main display panel or leave for 30 seconds without pressing any buttons Lower temperature limit To set th...

Page 17: ...isplay panel the symbol will appear 2 7 OPEN WINDOWS function This function is activated when the temperature sensor in the product detects a drop of 4ºC from the set temperature within a 30 minute time period The OPEN WINDOWS function will be active for 2 hours If the button is pushed during this period the product will switch off Pushing the button again will switch on the product without the OP...

Page 18: ...s been activated and is working 3 Installation and mounting 3 1 Mounting instructions The product must never be installed directly below a power point In bathrooms the product must never be installed where the switches and or other products may be within the reach of someone in the shower or bathtub The product works using natural air convection Figure 1 In order to achieve optimial performance an...

Page 19: ...n the wall marking the places for the holes Once you have marked the holes remove the stencil and make the holes in the wall Fix the supports using the plugs and screws provided or others suitable for the wall type Check the positioning is correct of the lower support Align the product with the top supports Once aligned place the product in the supports Installing Template measurements dependent o...

Page 20: ...if they are supervised or have been given instruction concerning use of the product in a safe way and understand the hazards involved The product is not a toy children should not play with the product Cleaning and user maintenance should not be carried out by children without supervision Children must be supervised at all times to ensure that they do not interfere with the product The product is f...

Page 21: ...and electrical components for 36 months provided that they have not been modified in any way 6 2 If during the guarantee period the product does not work correctly under normal use and any design material or manufacturing defect is found ROINTE will repair or substitute the product as it may see fit in accordance with the terms and conditions as follows 6 2 1 The guarantee is only applicable if th...

Page 22: ...by Rointe and in the installation manual If in doubt please contact ROINTE 6 2 4 Any repairs or substitutions that are included in this guarantee do not allow any additions or new periods of guarantee 6 2 5 Any repairs or substitutions covered under this guarantee must be parts that are functionally equivalent The defective parts or parts removed or replaced shall become the property of ROINTE 6 2...

Page 23: ...uct or guarantee please contact ROINTE by telephoning 0203 321 5929 for Technical Support or by email to support rointe co uk 7 European Directive WEEE 2012 19 UE Under the European Directive 2012 19 UE on Waste Electrical and Electronic Equipment WEEE the product cannot be disposed in the usual council bins and containers They must be separated to optimize the recovery and recycling of all of the...

Page 24: ...7 7 12 2 16 4 20 4 24 1 25 9 32 1 Finish White RAL 9010 ELECTRICAL CHARACTERISTICS Nominal Power W 330 550 770 990 1 210 1 430 1 600 Effective Power W 125 209 293 376 460 543 608 Voltage V 230 V 230 V 230 V 230 V 230 V 230 V 230 V Current A 1 5 2 4 3 4 4 3 5 3 6 2 7 0 Power per Elem W Element 110 110 110 110 110 110 110 PERFORMANCE SECURITY Safety thermostat Protection Grade IP21 IP21 IP21 IP21 IP...

Page 25: ...following postal address INDUSTRIAS ROYAL TERMIC S L C E Parcela 43 30140 Santomera Murcia Spain CERTIFICATE OF GUARANTEE REFERENCE Nº SERIES PURCHASE DATE USER HOME ADDRESS TOWN POSTCODE COUNTY COUNTRY TELEPHONE EMAIL SELLER S STAMP NB This certificate of Guarantee MUST be completed in full in order to obtain guarantee rights The purchase date and seller s stamp are compulsory Please attach a cop...

Page 26: ......

Page 27: ...27 NOTES ...

Page 28: ...28 NOTES ...

Page 29: ...29 NOTES ...

Page 30: ...30 NOTES ...

Page 31: ...you for choosing Rointe We hope you enjoy your product If you require further assistance or information please contact our Technical Service Department by telephoning 0203 321 5929 or email support rointe co uk ...

Page 32: ...98i MKRUK17V2 ROINTE UK Catalyst House 720 Centennial Court Centennial Park Elstree Herts WD6 3SY T 0203 321 5928 F 0208 953 5861 Technical Support T 0203 321 5929 E support rointe co uk www rointe co uk ...

Reviews: