background image

74

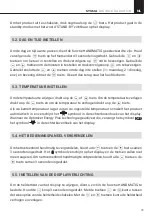
De cursor geeft de intensiteit van het licht aan. Als u de gewenste helderheid hebt ingesteld, 
raak dan 10 seconden lang geen knoppen op het toetsenbord aan om vervolgens terug te 
keren naar het hoofdscherm.

5.6. FUNCTIES HANDMATIG / AUTOMATISCH

Om de functie HANDMATIG OF AUTOMATISCH te selecteren of te veranderen drukt u op 
de 

 toets.  

U kunt AUTOMATISCH naar HANDMATIG veranderen en vice versa door op de 

 toets te 

drukken. In het hoofdscherm verschijnt het symbool    voor  de functie AUTOMATISCH en 
het symbool    voor de functie HANDMATIG. 

HANDMATIG

AUTOMATISCH

Deze functie geeft u de ruimte om te kiezen 

tussen COMFORT, ECO en VORSTVRIJ-modus 

en u kunt de temperatuur aanpassen. 

Deze functie activeert de eerder in het product 

ingestelde programmering.

 5.6.1. FUNCTIE HANDMATIG

De symbolen voor COMFORT, ECO en VORSTVRIJ verschijnen wanneer de temperatuur 
wordt gewijzigd en in het bovenstaande bereik valt.

  COMFORT

ECO

  VORSTVRIJ

Van 19ºC tot 30ºC

Van 7,5ºC tot 18,5ºC

7ºC

 5.6.2. FUNCTIE AUTOMATISCH

Om de functie AUTOMATISCH te programmeren, dient u het product eerst in de modus 
AUTOMATISCH te zetten. Houd de 

 toets 3 seconden ingedrukt om te kunnen beginnen 

met programmeren.
STAP 1 - Selecteer de temperatuur voor de COMFORT-modus

 De COMFORT-modus wordt als eerste geprogrammeerd. Stel uw COMFORT-modus 

temperatuur in tussen de 19ºC en 30ºC met behulp van de toetsen 

 en 

. Het symbool 

 en de temperatuur knipperen. Druk op de toets 

 om te bevestigen.

Summary of Contents for Sygma SRI0330RAD2

Page 1: ...NG Page 63 ES EN PT NL SYGMA Energy saving digital radiator Radiador digital de bajo consumo Radiador digital economizador de energia Energiebesparende digitale radiator GUARANTEE GARANTÍA GARANTIA GARANTIE ON THE BODY EN EL CUERPO NO CORPO IN HET LICHAAM YEARS AÑOS ANOS JAAR YEARS AÑOS ANOS JAAR ON ELECTRONICS EN ELECTRÓNICA NA ELECTRÓNICA IN ELEKTRONICA ...

Page 2: ......

Page 3: ...tile substances or similar objects within 250 mm of the radiator HOT SURFACE This symbol indicates that your surfaces are hot during and immediately after use These must not be touched danger of burns OBSERVE THE INSTRUCTIONS IN THE MANUAL Please read this manual carefully before installing and using the product Keep it for later use Read all instructions and safety warnings Failure to follow thes...

Page 4: ...ck the control panel 14 5 5 Adjust display backlight brightness 14 5 6 Manual automatic functions 15 5 6 1 Manual function 15 5 6 2 Automatic function 15 5 7 Open windows function 16 5 8 Optimizer Energy Plus technology 17 6 Maintenance and cleaning 17 7 European Regulation WEEE 2012 19 EU 17 8 Guarantee 17 9 How to register your product guarantee 20 Directive ERP Commission Regulation 81 EU Decla...

Page 5: ...rom this product unless supervised DO NOT use the product in enclosed spaces if the persons present cannot leave the room independently and are not under constant supervision DO NOT COVER To avoid overheating do not cover the radiator DO NOT place spray cans volatile substances or similar objects within 250mm of the product DO NOT use insecticides paints or chemicals on or near the product Some pa...

Page 6: ...se observe the current and relevant regulations when disposing of this product and its thermal fluid If the power cable is damaged it must be replaced by personnel authorised by ROINTE to prevent any damage To avoid the risk of suffocation do not leave the packaging including bags and other items within reach of babies or children The product has an IP24 degree of protection and can be used in bat...

Page 7: ...nsible for incorrect sizing of the product unless it has been followed by an official ROINTE technical study Before the first start up or before the start of winter or when the product has not been used for many days the appliance should be cleaned follow the steps in the maintenance section of this manual Do not sit or lean on the product Temperature contrasts can generate clicks or noises in the...

Page 8: ...18 118 Weight kg 7 7 12 2 16 4 20 1 24 1 27 8 32 1 Finish White RAL 9016 ELECTRICAL CHARACTERISTICS Nominal Power W 330 550 770 990 1 210 1 430 1 600 Effective Power W 132 220 308 396 484 572 640 Voltage V 230 V 230 V 230 V 230 V 230 V 230 V 230 V Current A 1 5 2 4 3 4 4 3 5 3 6 2 7 0 PERFORMANCE SECURITY Safety thermostat Protection Grade IP24 IP24 IP24 IP24 IP24 IP24 IP24 INSTALLATION Template I...

Page 9: ... over an electrical outlet or junction box Do not install the product or use it outdoors Do not install directly under a shelf This product is designed to be installed on an interior wall using the ROINTE template the installation kit and the fixings supplied Do not install the product in such a way that it encounters the power cable The product must be mounted on the wall in the position shown in...

Page 10: ...nstallation kit is included in the product packaging You will need a drill a rubber mallet a spirit level and a pencil to complete the installation WARNING The weight of some of the products may be heavy The installation may require two people IMPORTANT Please follow these instructions carefully 1 Remove the packaging and check that the installation contains brackets screws rawl plugs and a cardbo...

Page 11: ...e lower bracket To distinguish it the lower bracket has a different design from the top ones 5 Slide the product up and down over the fixed brackets 6 Check the straightness with a spirit level and adjust the supports accordingly if necessary 7 Connect your product to the power supply and switch it on 8 See section 5 for operating instructions Bottom bracket Top bracket ...

Page 12: ...12 IMPORTANT Measurement template per model SRI0330RAD2 SRI0550RAD2 SRI0770RAD2 SRI0990RAD2 SRI1210RAD2 SRI1430RAD2 SRI1600RAD2 ...

Page 13: ...ndsthetemperature time and days of the week will be show on the display panel To switch the product off please press the button again once The product will go into stand by mode with the word STAND BY displayed on the display panel Programming Days of the week Control panel locked unlocked MANUAL AUTOMATIC PILOT WIRE function indicator COMFORT ECO ANTI FROST mode indicator Optimizer Energy Plus in...

Page 14: ...cted temperature the product is consumed and the symbol at the top right of the screen When the symbol replaces the symbol then the Optimizer Energy Plus technology is in operation 5 4 LOCK THE CONTROL PANEL Pressing simultaneously the and for 3 seconds the keyboard is locked by turning on the keyboard lock icon To unlock press the and keys again for 3 seconds 5 5 ADJUST DISPLAY BACKLIGHT BRIGHTNE...

Page 15: ...to the above ranges Depending on the selected temperature you will see one of these symbols on the display CONFORT ECO ANTI FROST From 19ºC to 30ºC From 7 5ºC to 18 5ºC 7ºC 5 6 2 AUTOMATIC FUNCTION To start programming check that it is in the Automatic function with the display showing the symbol press to chenge the function Once in Automatic function press and hold for 3 seconds to enter programm...

Page 16: ...mming again go back to step 1 and proceed as described above If you want to activate the anti frost mode in the hours that do not have COMFORT or ECO mode from the main screen of the radiator and in automatic mode press the key If you want to reverse this action press If you want different schedules on multiple days within your programme you will need to modify each day or group of days separately...

Page 17: ...19 EU Based on the European regulation 2012 19 EU on Waste Electrical and Electronic Equipment WEEE these appliances cannot be thrown in the usual council bins they must be collected selectively to optimise the recovery and recycling of the components and materials that make them up and reduce the impact on human health and the environment The crossedout wheelie bin symbol on a horizontal bar is m...

Page 18: ... the following terms and conditions 2 1 1 The guarantee is only applicable if the original guarantee is issued by the seller and when such guarantee has been registered with Rointe correctly including the product reference serial number marked on the metal label of the product date of purchase and proof of purchase The product guarantee can be registered on our website at www rointe co uk or can b...

Page 19: ...h a way as to allow access by ROINTE technicians or authorised persons in the event that they need to access the product for repair or maintenance The user customer is responsible for the organisational means necessary to allow access to the products by ROINTE for repair or replacement 2 5 ROINTE s Technical Support department will advise you if you need to purchase any parts not covered by this g...

Page 20: ...chase such as your invoice in PDF JPEG or PNG format This is not mandatory but doing so ensures that your warranty period is accurate 7 Click on Register 8 Congratulations Your product is now registered EMAIL 1 Send an email to support rointe com with the following information Customer name Address and postcode Telephone number and email address Product reference Serial number The date of purchase...

Page 21: ...EN SYGMA DIGITAL RADIATOR 21 ...

Page 22: ...250 mm del radiador SUPERFICIE CALIENTE Este símbolo indica que sus superficies están calientes durante e inmediatamente después de su uso Las superficies calientes no deben ser tocadas peligro de quemaduras OBSERVE LAS INSTRUCCIONES EN EL MANUAL Por favor lea cuidadosamente el manual antes de instalar y utilizar el producto Guárdelo para su uso posterior Leatodaslasinstruccionesyadvertenciasdeseg...

Page 23: ...tura 34 5 4 Bloqueo del panel de control 34 5 5 Ajustar iluminación de la pantalla 34 5 6 Funciones manual automático 35 5 6 1 Función manual 35 5 6 2 Función automático 35 5 7 Función ventanas abiertas 36 5 8 Tecnología Optimizer Energy Plus 37 6 Manteniemiento y limpieza 37 7 Normativa Europea RAEE 2012 19 UE 37 8 Garantía 38 9 Cómo registrar la garantía de su producto 40 Directiva ERP Reglament...

Page 24: ...o usar el dispositivo en espacios cerrados si hay personas presentes que no pueden abandonar la habitación independientemente y no están bajo constante supervisión NO CUBRIR Para evitar sobrecalentamientos no cubrir el radiador No colocar botes de spray sustancias volátiles u objetos similares a una distancia inferior a 250mm del producto No utilice insecticidas pinturas productos químicos sobre o...

Page 25: ...s piezas de recambio oficiales aprobadas por el fabricante Por favor respete las normas al desechar este producto y su fluido térmico Si el cable de alimentación está dañado debe ser sustituido por ROINTE o por su personal autorizado para evitar cualquier daño Para evitar riesgos de asfixia no dejar las bolsas y demás accesorios al alcance de bebes y niños ElproductotieneungradodeprotecciónIP24ypu...

Page 26: ...tos con un dimensionamiento incorrecto a menos que se haya seguido un estudio técnico oficial de ROINTE Antes del primer arranque o antes del comienzo de la campaña de invierno o cuando el emisor no se ha usado durante muchos días el aparato debe ser limpiado siga los pasos del punto mantenimiento de este manual No se siente o apoye sobre el producto Los contrastes de temperatura pueden generar ch...

Page 27: ...8 118 118 118 118 118 118 Peso kg 7 7 10 1 12 2 13 9 16 4 18 1 20 1 Acabados Blanco RAL 9016 CARACTERÍSTICAS ELÉCTRICAS Potencia nominal W 330 440 550 660 770 880 990 Potencia efectiva W 132 176 220 264 308 352 396 Voltaje V 230 V 230 V 230 V 230 V 230 V 230 V 230 V Intensidad A 1 4 1 9 2 3 2 8 3 3 3 8 4 3 SEGURIDAD E INSTALACIÓN Termostato de seguridad Grado de protección IP24 IP24 IP24 IP24 IP24...

Page 28: ...8 118 118 Peso kg 21 9 24 1 26 4 27 8 30 5 32 1 Acabados Blanco RAL 9016 CARACTERÍSTICAS ELÉCTRICAS Potencia nominal W 1 100 1 210 1 320 1 430 1 540 1 600 Potencia efectiva W 440 484 528 572 616 640 Voltaje V 230 V 230 V 230 V 230 V 230 V 230 V Intensidad A 4 7 5 2 5 7 6 2 6 6 6 9 SEGURIDAD E INSTALACIÓN Termóstato de segurança Grau de protecção IP24 IP24 IP24 IP24 IP24 IP24 Kit de instalación inc...

Page 29: ...conexiones No instale el producto ni lo use en el exterior No la instale directamente debajo de un estante Este producto está diseñado para ser instalado en una pared interior utilizando la plantilla ROINTE el kit de instalación y los elementos de fijación suministrados No instalar el producto de forma que quede en contacto con cable de alimentación El producto debe ser montado en la pared en la p...

Page 30: ...a un nivel y un lápiz para completar la instalación ADVERTENCIA El peso de algunos de los productos podría ser elevado Su instalación puede requerir la intervención de dos personas IMPORTANTE Por favor siga estas instrucciones cuidadosamente 1 Quite el embalaje y compruebe que el kit de instalación contiene soportes tornillos tacos y plantilla de cartón 2 Seleccione el lugar adecuado de la pared C...

Page 31: ...stinguirlo el soporte inferior tiene un diseño diferente a los superiores 5 Deslice el producto de arriba a abajo sobre soportes fijos 6 Compruebe la rectitud con un nivel y ajuste los soportes en consecuencia si es necesario 7 Conecte su producto al suministro eléctrico y enciéndalo 8 Consulte la sección 5 para ver las instrucciones de funcionamiento IMPORTANTE Plantilla de medidas por modelo sup...

Page 32: ...32 SRN0330RAD2 SRN0550RAD2 SRN0770RAD2 SRN0990RAD2 SRN1210RAD2 SRN1430RAD2 SRN1600RAD2 SRN0440RAD2 SRN0660RAD2 SRN0800RAD2 SRN1100RAD2 SRN1320RAD2 SRN1540RAD2 Suelo Suelo Suelo Suelo Suelo Suelo ...

Page 33: ... Programación Días de la semana Panel de control bloqueado desbloqueado Indicador de función MANUAL AUTOMÁTICO HILO PILOTO Indicador de modo CONFORT ECO ANTIHIELO Indicador Optimizer Energy Plus Indicador de elemento de calefacción activo Indicador de función de VENTANAS ABIERTAS Temperatura seleccionada Hora Incrementar temperatura Mover a la derecha Disminuir la temperatura Mover hacia la izquie...

Page 34: ... etc y confirme pulsando el botón 5 3 SELECCIÓN DE TEMPERATURA Con las teclas o puede cambiar la temperatura de consigna Aumentando la temperatura con la tecla y disminuyendo la temperatura con la tecla Si la temperatura de la estancia es inferior a la seleccionada el producto entra en consumo apareciendo el símbolo en la parte superior derecha de la pantalla Cuando el símbolo reemplaza al símbolo...

Page 35: ...N MANUAL Esta función le permite variar la temperatura cambiando los modos del producto entre CONFORT ECO y ANTIHIELO Para ajustar la temperatura en modo MANUAL ver punto 5 3 de este manual Los iconos para CONFORT ECO y ANTIHIELO aparecerán cuando la temperatura cambie a los rangos anteriores Según la temperatura seleccionada verá uno de estos símbolos en pantalla CONFORT ECO ANTIHIELO De 19ºC a 3...

Page 36: ...que desee modificar para todos los días seleccionados en el paso 3 El icono correspondiente para ese modo aparecerá en la parte superior de la pantalla repita el proceso de seleccionar el modo con el botón cada vez que lo necesite Una vez que de por finalizada la programación pulse el botón para terminar o simplemente no pulse ninguna tecla durante 30 segundos Para cambiar de nuevo la programación...

Page 37: ...ENIMIENTO Y LIMPIEZA El producto no necesita ningún tipo de mantenimiento Recomendamos la limpieza del producto parte trasera inferior del producto aletas superiores etc No utilice sustancias abrasivas sobre el producto límpielo con un paño húmedo y jabón pH neutro y la pantalla con un paño seco Antes de efectuar cualquier operación de limpieza asegúrese de que el radiador está apagado y a tempera...

Page 38: ...ación en el momento de la compra original ROINTE garantiza el cuerpo de aluminio durante 120 meses 10 años y los componentes eléctricos y electrónicos durante 36 meses 3 años solo para este producto desde la fecha de compra o entrega si esta fue posterior siempre que no haya sido modificado y de acuerdo con lo dispuesto en las estipulaciones siguientes 2 Condiciones 2 1 Siduranteelperiododegarantí...

Page 39: ... pero no limitado a rayos incendios inundaciones desastres naturales desórdenes públicos fenómenos atmosféricos o geológicos y todos aquellos de análoga naturaleza v Los fallos que resulten de una instalación incorrecta En caso de duda póngase en contacto con ROINTE 2 2 Cualquier reparación o sustitución realizada como parte de este servicio de garantía no permite periodos de ampliación o nuevos p...

Page 40: ...enta 2 9 ROINTE sus oficinas empleados distribuidores e instaladores no se harán responsables de ningún daño accidental que se produzca por la infracción de cualquier norma implícita en este producto así como por su uso inadecuado o incorrecto 2 10 Compruebe las condiciones del EULA suministradas con el producto para obtener información sobre el acuerdo legal que acepta al instalar un producto de ...

Page 41: ...ctura en formato PDF JPEG o PNG Esto no es obligatorio pero al hacerlo se asegura que su período de garantía es exacto 7 Haga clic en Registro 8 Enhorabuena Su producto ya está registrado EMAIL 1 Envíe un correo electrónico a sat rointe com con la siguiente información Nombre del cliente Dirección y código postal Número de teléfono y dirección de correo electrónico Referencia del producto Número d...

Page 42: ...melhantes num raio de 250 mm do radiador SUPERFÍCIE QUENTE Este símbolo indica que as suas superfícies estão quentes durante e imediatamente após a sua utilização Não devem ser tocados perigo de queimaduras OBSERVAR AS INSTRUÇÕES DO MANUAL Por favor leia atentamente o manual antes de instalar e utilizar o produto Guarde o para utilização posterior Ler todas as instruções e avisos de segurança O nã...

Page 43: ...a 54 5 4 Bloqueio do painel de controlo 54 5 5 Ajustar a iluminação do display 54 5 6 Funções manual automático 55 5 6 1 Função manual 55 5 6 2 Função automático 55 5 7 Função janelas abertas 56 5 8 Tecnología Optimizer Energy Plus 57 6 Manutenção e limpeza 57 7 Regulamento Europeu RAEE 2012 19 UE 55 8 Garantia 57 9 Como registar a garantia do seu produto 60 Diretiva ERP Regulamento da Comissão 81...

Page 44: ... a menos que sejam supervisionadas Não manusear o dispositivo em espaços fechados se estiverem presentes pessoas que não possam sair da sala independentemente e que não estejam sob supervisão constante NÃO COBERTAR Para evitar o sobreaquecimento não cobrir o radiador Não colocar latas de spray substâncias voláteis ou objectos semelhantes num raio de 250mm do produto Não utilizar insecticidas tinta...

Page 45: ...itução oficiais aprovadas pelo fabricante É favor observar os regulamentos ao eliminar este produto e o seu fluido térmico Se o cabo de alimentação for danificado deve ser substituído por ROINTE ou pelo seu pessoal autorizado para evitar qualquer dano Para evitar o risco de asfixia não deixar os sacos e outros acessórios ao alcance de bebés e crianças O produto tem um grau de protecção IP24 e pode...

Page 46: ...bilizada por produtos com dimensões incorrectas a menos que um inquérito técnico oficial ROINTE tenha sido seguido Antes do primeiro arranque ou antes do início da estação de Inverno ou quando o transmissor não tiver sido utilizado durante vários dias o dispositivo deve ser limpo seguir os passos na secção manutenção deste manual Não sentar ou apoiar no produto Os contrastes de temperatura podem g...

Page 47: ... 118 118 118 118 118 118 Peso kg 7 7 10 1 12 2 13 9 16 4 18 1 20 1 Acabamento Branco RAL 9016 CARACTERÍSTICAS ELÉCTRICAS Potência nominal W 330 440 550 660 770 880 990 Potência efectiva W 132 176 220 264 308 352 396 Voltagem V 230 V 230 V 230 V 230 V 230 V 230 V 230 V Intensidade A 1 4 1 9 2 3 2 8 3 3 3 8 4 3 SEGURANÇA E INSTALAÇÃO Termóstato de segurança Grau de protecção IP24 IP24 IP24 IP24 IP24...

Page 48: ...118 118 Peso kg 21 9 24 1 26 4 27 8 30 5 32 1 Acabamento Branco RAL 9016 CARACTERÍSTICAS ELÉCTRICAS Potência nominal W 1 100 1 210 1 320 1 430 1 540 1 600 Potência efectiva W 440 484 528 572 616 640 Voltagem V 230 V 230 V 230 V 230 V 230 V 230 V Intensidade A 4 7 5 2 5 7 6 2 6 6 6 9 SEGURANÇA E INSTALAÇÃO Termóstato de segurança Grau de protecção IP24 IP24 IP24 IP24 IP24 IP24 Kit de instalação inc...

Page 49: ...caixa de junção fixa Não instalar o produto ou utilizá lo ao ar livre Não instalar directamente debaixo de uma prateleira Este produto foi concebido para ser instalado numa parede interior utilizando o modelo ROINTE kit de instalação e fixadores fornecidos Não instalar o produto de forma que este entre em contacto com o cabo de alimentação O produto deve ser montado na parede na posição indicada n...

Page 50: ...acete de borracha um nível e um lápis para completar a instalação ADVERTÊNCIA O peso de alguns dos produtos pode ser pesado A instalação pode requerer a intervenção de duas pessoas IMPORTANTE Por favor siga cuidadosamente estas instruções 1 Retirar a embalagem e verificar se o kit de instalação contém suportes parafusos tampões e modelo de cartão 2 Seleccionar a localização apropriada na parede Co...

Page 51: ...ra o distinguir o suporte inferior tem um desenho diferente dos parênteses superiores 5 Deslizar o produto para cima e para baixo sobre suportes fixos 6 Verificar a rectidão com um nível e ajustar os suportes em conformidade se necessário 7 Ligar o seu produto à fonte de alimentação e ligue o 8 Consultar a secção 5 para instruções de funcionamento IMPORTANTE Modelo de medição por modelo superior i...

Page 52: ...0330RAD2 SRN0550RAD2 SRN0770RAD2 SRN0990RAD2 SRN1210RAD2 SRN1430RAD2 SRN1600RAD2 SRN0440RAD2 SRN0660RAD2 SRN0800RAD2 SRN1100RAD2 SRN1320RAD2 SRN1540RAD2 Chão Chão Chão Chão Chão Chão Chão Chão Chão Chão Chão ...

Page 53: ...undos irá visualizar a temperatura principal no visor Se está ligado carregue de novo na tecla e o produc to passará ao modo Stand By Aumentar a temperatura Mover para a direita Reduzir a temperatura Mover para a esquerda Acesso Regresso ao menu Mover para cima Ligar Desligar Aceitar Confirmar Função MANUAL AUTOMÁTICA Mover para baixo Programação Dias da semana Painel de controlo bloqueado desbloq...

Page 54: ...o símbolo então a tecnologia Optimizer Energy Plus está em execução 5 4 BLOQUEIO DO PAINEL DE CONTROLO Se pulsar simultaneamente durante 3 segundos com as teclas e bloqueará o teclado e ligará o ícone de bloqueio de teclado Para desbloquear carregue de novo as teclas e Para desbloquear carregue de novo as teclas 5 5 AJUSTAR A ILUMINAÇÃO D DISPLAY Poderá modificar a iluminação do visor carregue na ...

Page 55: ...FORTO ECO e ANTICONGELANTE aparecerão quando a temperatura mude para os rangos anteriores Segundo a temperatura selecionada verá um destes símbolos no visor CONFORTO ECO ANTICONGELANTE A partir dos 19ºC aos 30ºC A partir dos 7 5ºC aos 18 5ºC 7ºC 5 6 2 FUNÇÃO AUTOMÁTICO Para começar a programar comprove que está em função AUTOMÁTICO aparecerá no visor o símbolo Se o visor mostra o símbolo carregue ...

Page 56: ...eje modificar e para todos os dias selecionados no passo 3 O ícone correspondente para esse modo aparecerá na parte superior do visor repita o processo de selecionar o modo com o botão cada vez que o necessite Uma vez finalizada a programação pulse o botão para terminar ou então não carregue em nenhuma tecla durante 30 segundos Para alterar novamente a programação volte ao passo 1 e proceda como s...

Page 57: ...o e a tela com um pano seco Antes de efectuar qualquer operação de limpeza certifique se de que o produto está desligado e à temperatura ambiente 7 REGULAMENTO EUROPEU 2012 19 UE Com base no regulamento europeu 2012 19 UE sobre resíduos de equipamentos eléctricos e electrónicos REEE estes aparelhos não podem ser atirados para os contentores municipais habituais devem ser recolhidos selectivamente ...

Page 58: ...erá reparado ou substituído por opção do cliente de acordo com as disposições da lei e sujeito aos seguintes termos e condições 2 1 1 A garantia só é aplicável se a garantia original for emitida pelo vendedor e quando tal garantia tiver sido registada correctamente na ROINTE incluindo a referência do produto número de série marcado no rótulo metálico do produto data de compra e prova de compra A g...

Page 59: ... tal 2 4 O produto deve ser instalado de modo a permitir o acesso de técnicos ROINTE ou de pessoas autorizadas no caso de necessitarem de aceder ao produto para reparação ou manutenção O utilizador cliente é responsável pelos meios organizacionais necessários para permitir o acesso aos produtos por ROINTE para reparação ou substituição 2 5 O departamento de suporte técnico de ROINTE irá assesorar ...

Page 60: ... uma factura em formato PDF JPEG ou PNG Isto não é obrigatório mas ao fazê lo garante que o seu período de garantia é preciso 7 Clique em Registar 8 Parabéns O seu produto está agora registado EMAIL 1 Enviar um e mail para sat rointe com com as seguintes informações Nome do cliente Endereço e código postal Número de telefone e endereço de correio electrónico Referência do produto Número de série A...

Page 61: ...gelijke voorwerpen binnen een straal van 250 mm van de radiator worden achtergelaten HEET OPPERVLAK Dit symbool geeft aan dat de oppervlakken heet zijn tijdens en onmiddellijk na het gebruik Ze mogen niet worden aangeraakt er is gevaar voor brandwonden VOLG DE AANWIJZINGEN IN DE HANDLEIDING Neem de handleiding zorgvuldig door voordat u het product plaatst en gebruikt Bewaar het voor later gebruik ...

Page 62: ... 4 Het bedieningspaneel vergrendelen 73 5 5 Instellen van de displayverlichting 73 5 6 Functies handmatig automatisch 74 5 6 1 Functie handmatig 74 5 6 2 Functie automatisch 74 5 7 Raam open functie 75 5 8 Optimizer Energie Plus Technologie 76 6 Onderhoud en reiniging 76 7 Europese Richtlijn 2012 19 EU 76 8 Garantie 77 9 Hoe de garantie registreren 80 Diretiva ERP Regulamento da Comissão 81 EU Ver...

Page 63: ...oezicht staan Gebruik het apparaat niet in gesloten ruimtes waar mensen aanwezig zijn die de ruimte niet zelfstandig kunnen verlaten en niet onder continu toezicht staan NIET VERDIEPEN Om oververhitting te voorkomen mag u de radiator niet afdekken Plaats geen spuitbussen vluchtige stoffen of voorwerpen binnen 250mm van het product Geen insecticiden verf chemicaliën gebruiken op of nabij het produc...

Page 64: ...em alstublieft de voorschriften in acht bij het wegwerpen van dit product en zijn thermische vloeistof Als het netsnoer beschadigd is moet het worden vervangen door ROINTE of door haar bevoegd personeel om schade te voorkomen Laat geen zakken of andere voorwerpen die een verstikkingsgevaar met zich meebrengen in de buurt van baby s en kinderen Het product heeft een IP24 beschermingsgraad en kan wo...

Page 65: ... met een onjuiste dimensionering tenzij wanneer het vastgesteld is door een officieel technisch onderzoek door ROINTE Voor de eerste opstart voor de winterstop of wanneer de zender gedurende meerdere dagen niet zal worden gebruikt moet het toestel worden gereinigd volg de stappen in het hoofdstuk onderhoud van deze handleiding Ga niet op het product zitten of leunen Temperatuurschommelingen kunnen...

Page 66: ...8 118 118 118 Gewicht kg 7 7 10 1 12 2 13 9 16 4 18 1 20 1 Afwerking Wit RAL 9016 ELEKTRISCHE EIGENSCHAPPEN Nominaal vermogen W 330 440 550 660 770 880 990 Effectief vermogen W 132 176 220 264 308 352 396 Spanning V 230 V 230 V 230 V 230 V 230 V 230 V 230 V Stroom A 1 4 1 9 2 3 2 8 3 3 3 8 4 3 INSTALLATIE EN BESCHERMING Veiligheidsthermostaat Graad van bescherming IP24 IP24 IP24 IP24 IP24 IP24 IP2...

Page 67: ...8 118 118 118 118 118 Gewicht kg 21 9 24 1 26 4 27 8 30 5 32 1 Afwerking Wit RAL 9016 ELEKTRISCHE EIGENSCHAPPEN Nominaal vermogen W 1 100 1 210 1 320 1 430 1 540 1 600 Effectief vermogen W 440 484 528 572 616 640 Spanning V 230 V 230 V 230 V 230 V 230 V 230 V Stroom A 4 7 5 2 5 7 6 2 6 6 6 9 INSTALLATIE EN BESCHERMING Veiligheidsthermostaat Graad van bescherming IP24 IP24 IP24 IP24 IP24 IP24 Insta...

Page 68: ...product niet en gebruik het niet buitenshuis Niet direct onder een plank installeren Dit product is ontworpen om te worden geïnstalleerd op een binnenmuur met behulp van het meegeleverde ROINTE model de installatiekit en bevestigingsmiddelen Installeer het product niet zo dat het in contact komt met het netsnoer Het product moet aan de muur worden bevestigd op de plaats die is aangegeven in de bij...

Page 69: ...t U hebt een boormachine een rubberen hamer een waterpas en een potlood nodig om de installatie te voltooien WAARSCHUWING Het gewicht van sommige producten kan zwaar zijn De installatie moet mogelijks met twee personen gebeuren BELANGRIJK Volg deze instructies nauwkeurig 1 Verwijder de verpakking en controleer of de installatiekit beugels schroeven pluggen en kartonnen sjabloon bevat 2 Kies de jui...

Page 70: ...st OPMERKING Ter onderscheiding heeft de trapas een ander ontwerp dan de bovenste beugels 5 Schuif het product op en neer op vaste steunen 6 Controleer de rechtheid met een waterpas en pas zo nodig de steunen aan 7 Sluit uw product aan op de stroomvoorziening en schakel het in 8 Zie hoofdstuk 5 voor gebruiksaanwijzingen BELANGRIJK Meting per model top bottom ...

Page 71: ...R 71 SRN0330RAD2 SRN0550RAD2 SRN0770RAD2 SRN0990RAD2 SRN1210RAD2 SRN1430RAD2 SRN1600RAD2 SRN0440RAD2 SRN0660RAD2 SRN0800RAD2 SRN1100RAD2 SRN1320RAD2 SRN1540RAD2 Vloer Vloer Vloer Vloer Vloer Vloer Vloer Vloer Vloer Vloer Vloer ...

Page 72: ...eer op de toets op het toetsenbord Na 3 seconden wordt op het display de temperatuur tijd en dag van de week weergegeven Temperatuur verhogen Ga naar rechts Verlaag de temperatuur Ga naar links Toegang Terugkeer naar menu Ga naar boven Aansluiten loskoppelen Accepteren Bevestigen HANDMATIGE AUTOMATISCHE functie Naar beneden Programmering Dagen van de week Bedieningspaneel vergrendeld ontgrendeld F...

Page 73: ...u op de toets en om de temperatuur te verhogen drukt u op de toets Als de kamertemperatuur lager is dan de ingestelde temperatuur schakelt het product automatisch in en verschijnt het symbool in de rechterbovenhoek van het display Wanneer de Optimizer Energy Plus technologie geactiveerd is vervangt het symbool het symbool in de rechterbovenhoek van het display 5 4 HET BEDIENINGSPANEEL VERGRENDELEN...

Page 74: ...CO en VORSTVRIJ modus en u kunt de temperatuur aanpassen Deze functie activeert de eerder in het product ingestelde programmering 5 6 1 FUNCTIE HANDMATIG De symbolen voor COMFORT ECO en VORSTVRIJ verschijnen wanneer de temperatuur wordt gewijzigd en in het bovenstaande bereik valt COMFORT ECO VORSTVRIJ Van 19ºC tot 30ºC Van 7 5ºC tot 18 5ºC 7ºC 5 6 2 FUNCTIE AUTOMATISCH Om de functie AUTOMATISCH t...

Page 75: ...r dat u wilt wijzigen Dit geldt voor alle dagen die u in stap 3 heeft geselecteerd Het bijbehorende symbool voor die modus verschijnt bovenin het display Om het programmeren te beëindigen drukt u op of u wacht 30 seconden zonder op een knop te drukken Om de programmering aan te passen gaat u terug naar stap 1 en volgt u de instructies zoals beschreven Als u een verschillend programma voor verschil...

Page 76: ... schurende middelen op het product veeg het af met een vochtige doek en neutrale pH zeep en reinig het scherm met een droge doek Zorg ervoor dat het product in goede staat en op kamertemperatuur is voordat u het schoonmaakt 7 EUROPESE WETGEVING 2012 19 EU Op basis van de Europese richtlijn betreffende afgedankte elektrische en elektronische apparatuur 2012 19 EU AEEA mag dergelijke apparatuur niet...

Page 77: ...p ROINTE garandeert de aluminium frame gedurende 120 maanden 10 jaar en de elektrische en elektronische onderdelen gedurende 36 maanden 3 jaar vanaf de datum van aankoop of levering indien later op voorwaarde dat het niet werd gewijzigd en in overeenstemming is met de volgende bepalingen 2 Conditions 2 1 Indien gedurendedegarantieperiode hetproductbijnormaalgebruikengoedonderhoud nietnaarbehorenfu...

Page 78: ... ROINTE te vallen zoals maar niet beperkt tot bliksem branden overstromingen natuurrampen verstoringen van de openbare orde natuurrampen natuurverschijnselen van atmosferische of geologische en van soortgelijke aard v defecten die het gevolg zijn van een verkeerde installatie In geval van twijfel gelieve contact op te nemen met ROINTE 2 2 Reparaties of vervangingen die in het kader van deze garant...

Page 79: ...nkomst 2 9 ROINTE haar kantoren werknemers distributeurs en installateurs kunnen niet aansprakelijk worden gesteld voor alle incidentele schade die voortvloeit uit de schending van een regel impliciet in deze product alsmede het oneigenlijke of onjuiste gebruik ervan 2 10 Raadpleeg de EULA voorwaarden meegeleverd met het product voor informatie over de wettelijke overeenkomst die u aanvaardt bij d...

Page 80: ...ls een factuur in PDF JPEG of PNG formaat Dit is niet verplicht maar het garandeert wel dat uw garantieperiode accuraat is 7 Klik op Registreren 8 Gefeliciteerd Uw product is nu geregistreerd EMAIL 1 Stuur een e mail naar support rointe com met de volgende informatie Naam klant Adres en postcode Telefoonnummer en e mail adres Productreferentie Serienummer De datum van aankoop van het product en ee...

Page 81: ...0 0006 0 0006 0 0006 0 0006 0 0006 TYPE OF HEAT OUTPUT INDOOR TEMPERATURE CONTROL TIPO DE CONTROL DE POTENCIA CALORÍFICA DE TEMPERATURA INTERIOR TIPO DE SAÍDA DE CALOR CONTROLO DE TEMPERATURA DO AR TYPE WARMTEAFGIFTE REGELING BINNENTEMPERATUUR CElectronic indoor temperature control and weekly timer Control electrónico de temperatura interior y temporizador semanal Con trolo electrónico da temperat...

Page 82: ...OF HEAT OUTPUT INDOOR TEMPERATURE CONTROL TIPO DE CONTROL DE POTENCIA CALORÍFICA DE TEMPERATURA INTERIOR TIPO DE SAÍDA DE CALOR CONTROLO DE TEMPERATURA DO AR TYPE WARMTEAFGIFTE REGELING BINNENTEMPERATUUR CElectronic indoor temperature control and weekly timer Control electrónico de temperatura interior y temporizador semanal Controlo electrónico da temperatura interior e temporizador semanal Elekt...

Page 83: ... overeenstemming is met de bepalingen van de volgende relevante norm en specificatie s richtlijn en ErP Directive 2009 35 EU UE 2015 1188 LVD Directive 2014 35 EU EN 60335 1 2012 Annexes A11 2014 A13 2017 EN 60335 2 30 2010 Annexes A11 2012 EMC Directive 2014 30 EU EN 55014 1 2017 EN 55014 2 2015 EN 62233 2008 AC 2008 RoHS Directive 2011 65 EU EN 62321 1 2013 EN 50581 2012 The company declares tha...

Page 84: ... nos o direito de alterar ou modificar quaisquer produtos ou especificações sem aviso prévio Isto também se aplica aos produtos que já foram encomendados desde que tais alterações possam ser feitas sem alterações subsequentes às especificações já acordadas Não podemos aceitar responsabilidade por quaisquer erros em catálogos ou outros materiais impressos Alle rechten voorbehouden In het kader van ...

Reviews: