5
TOVARE
OVAL
EN
2. Rointe towel rails installation
2.1. Mounting instructions
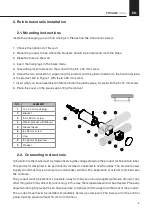
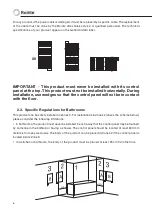
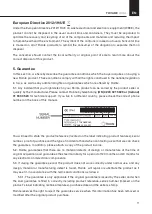
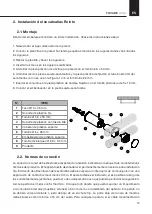
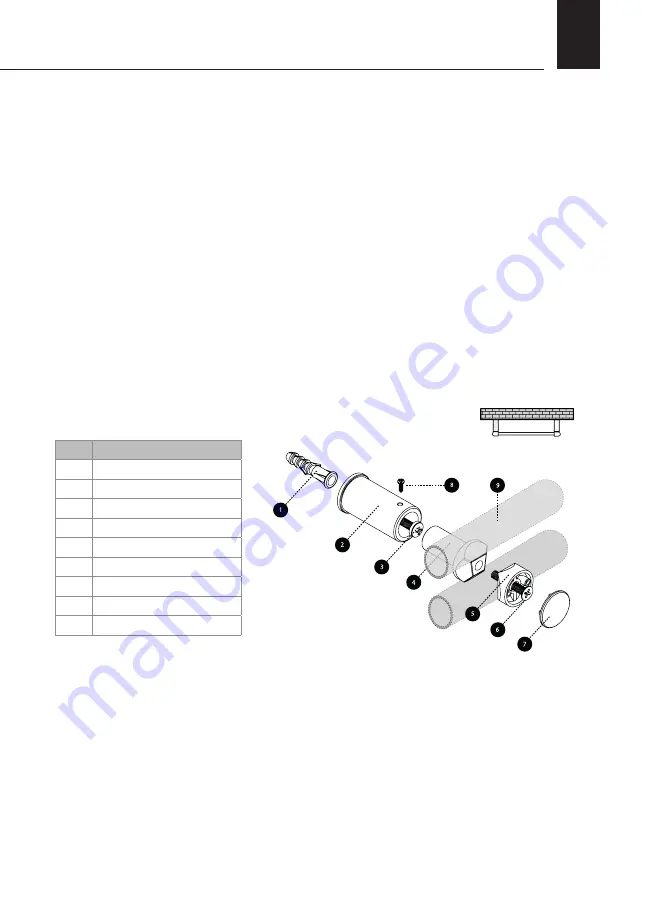
Inside the packaging you will find a fixing kit. Please find the instructions below:
1. Choose the right part of the wall.
2. Place the product to see where the brackets should be located and mark the holes.
3. Make the holes in the wall.
4. Insert the rawl plugs in the holes made.
5. Screw the plastic fastener to the wall with the 5.5 x 50 mm screw.
6. Screw the two brackets for supporting the product and the plastic fastener to the horizontal tube
of the product like in Figure 1 with the 8 x 26 mm screw.
7. Insert what you have assembled in Section 6 into the plastic piece. Fix well with the 5 x 12 mm screw.
8. Place the cover on the piece supporting the product.
NO.
ELEMENT
1
10 x 45 mm rawl plug
2
Bracket
3
5.5 x 50 mm screw
4
Plastic bracket with M6 nut
5
Bracket head
6
6 x 35 mm screw
7
Cap
8
8 x 26 mm fixig screw
9
Product
2.2. Connecting instructions
Connection to the mains must be made observing the voltage stated on the product technical data label.
This product is designed to be permanently installed connected to fixed facilities. The product power
supply circuit must have an all-pole circuit breaker switch with a separation of at least 3 mm between
the contacts.
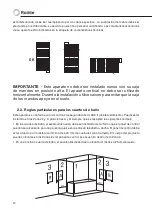
The product must be installed, if possible, away from any source of draughts (windows, doors) or any
other thing which may affect its functioning. In this way, the temperature will not be affected. Place any
object which might prevent the air flow (furniture, armchairs) 50 cm away from the front of the product.
The product must never be installed immediately below a power point. The lower part of the control
panel must be placed at least 15 cm from the floor.


