background image

8


Chapter 

• 

• 

• 

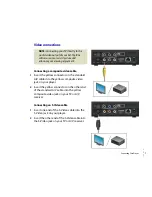
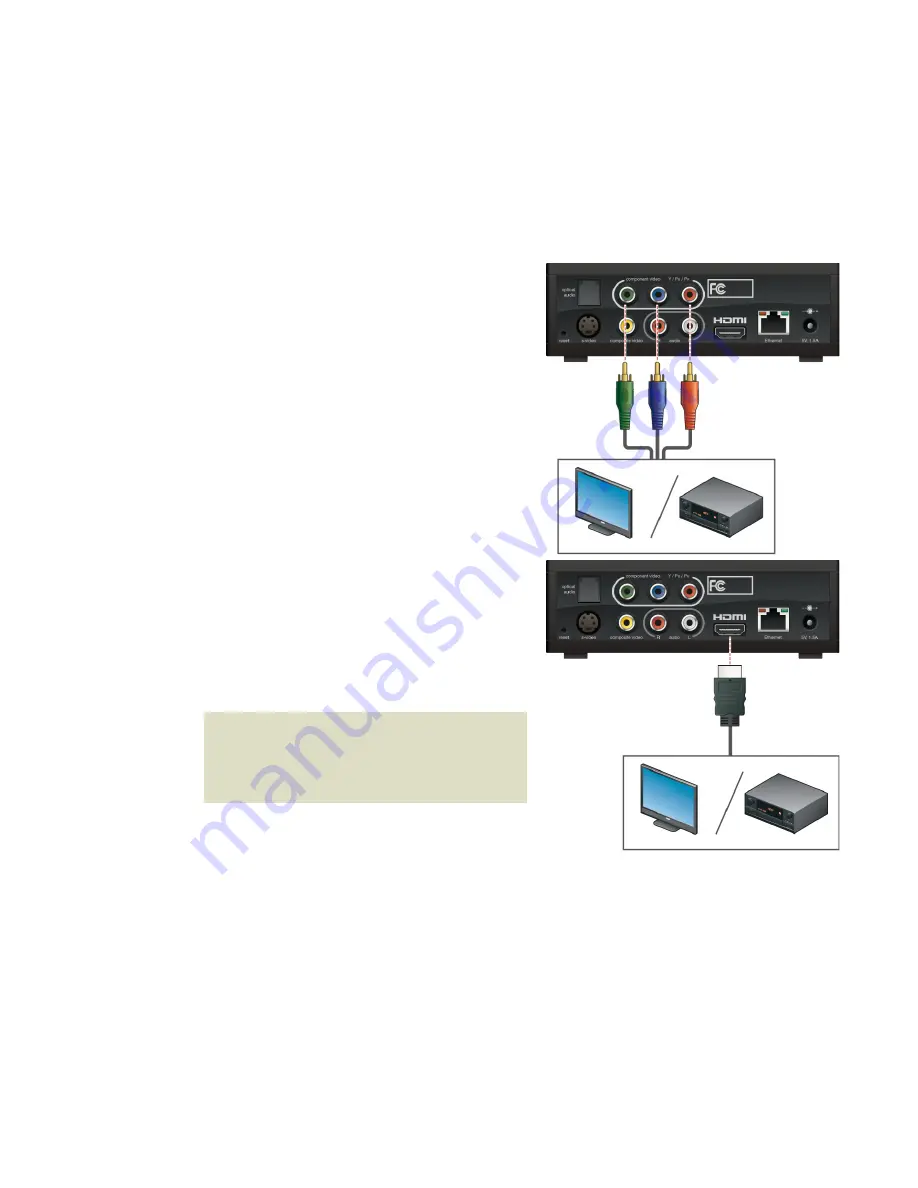
Connecting a component video cable

1

Insert one end of the green, blue, and red 
video cable into the jacks with the matching 
colors on your player.

2

Insert the other end of the green, blue, and 
red cable into the corresponding component 
video jacks on your TV or A/V receiver.

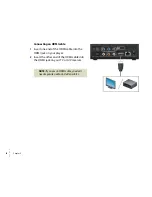
Connecting an HDMI cable

1

Insert one end of the HDMI cable into the 
HDMI jack on your player.

2

Insert the other end of the HDMI cable into 
the HDMI jack on your TV or A/V receiver.

NOTE: 

If you use an HDMI cable, you don’t 

need separate audio and video cables, 
unless you’re routing the sound to an 
audio receiver.

Summary of Contents for 2500R

Page 1: ...User Guide...

Page 2: ...yright Copyright 2008 2009 by Roku Inc All rights reserved Roku and the Roku logo are trademarks of Roku Inc Other brand and product names are trademarks or registered trademarks of their respective h...

Page 3: ...emote control 4 Chapter 2 Connecting Your Player 5 Connecting your player to your TV 5 Viewing HD video 6 Video connections 7 Audio connections 9 Connecting your player to your home network 11 Connect...

Page 4: ...or sound effects 27 Changing your screensaver settings 29 Viewing and updating your player info 31 Performing a factory reset 34 Chapter 6 Additional Information 37 Manually entering your network s na...

Page 5: ...ions on your purchase of the Roku Digital Video Player In just a few minutes you ll be ready to select videos and watch them instantly on your TV What s in the box Your Digital Video Player package sh...

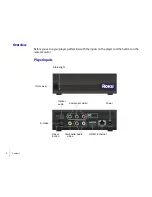
Page 6: ...set up your player get familiar with the inputs on the player and the buttons on the remote control Player inputs Status light IR receiver Optical audio Component video Reset button Composite video S...

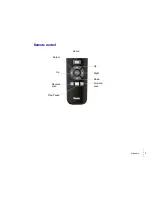
Page 7: ...Welcome 3 Remote control Home Up Right Down Forward scan Select Up Reverse scan Play Pause...

Page 8: ...o open the remote If your remote doesn t have a battery door release button just slide the top panel upward to open the remote 2 Insert 2 AAA batteries included into the battery compartment 3 Align th...

Page 9: ...udes a combination cable that has both composite video and stereo audio connectors If you purchased the optional cable package you also received an optical audio cable a component video cable and an H...

Page 10: ...tbandwidthtoreceiveHDstreams 4 0 Mbps or greater See Connecting your player to your home network for details Select the HDTV option in Display Type Settings See Changing your display setting for detai...

Page 11: ...of the standard A V cable into the yellow composite video jack on your TV or A V receiver Connecting an S Video cable 1 Insert one end of the S Video cable into the S Video jack on your player 2 Inser...

Page 12: ...blue and redcableintothecorrespondingcomponent video jacks on your TV or A V receiver Connecting an HDMI cable 1 Insert one end of the HDMI cable into the HDMI jack on your player 2 Insert the other...

Page 13: ...standard A V cable into the red Right and white Left audio jacks on your player 2 Insert the other end of the stereo cable into the red Right and white Left audio jacks on your TV or A V receiver Conn...

Page 14: ...cable 1 Insert one end of the HDMI cable into the HDMI jack on your player 2 Insert the other end of the HDMI cable into the HDMI jack on your TV or A V receiver NOTE IfyouuseanHDMIcable youdon t need...

Page 15: ...using a connection that is 4 0Mbps or faster If you re using a wired connection follow these steps to connect your player to your network If you re using a wireless connection skip ahead to the next...

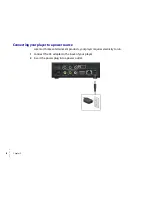
Page 16: ...onnecting your player to a power source Like most home entertainment products your player requires electricity to run 1 Connect the AC adapter to the back of your player 2 Insert the power plug into a...

Page 17: ...our player After you plug your player into a power outlet it is on all the time There is no power button to turn on and off You simply access your player through your TV 1 Turn on your TV and if neces...

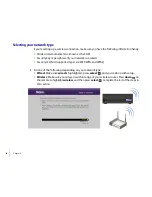
Page 18: ...se if your network is secured Security method supported types are WEP WPA and WPA2 1 Do one of the following depending on your network type Wired Make sure wired is highlighted press select and you re...

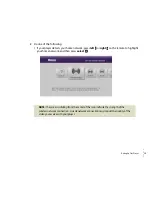
Page 19: ...network press left or right on the remote to highlight your home network and then press select NOTE The waves radiating from the center of the icon indicate the strength of the wirelessnetworkconnecti...

Page 20: ...lect Make sure your player is within range of your wireless router highlight scan again and then press select If yournetworkdoesn tbroadcastitsname ithasahiddenSSID pressleft orright onthe remote to h...

Page 21: ...hlight the first character of the key or passphrase and then press select to enter it in the box at the top of the screen Repeat this process to enter the rest of the characters in the key or passphra...

Page 22: ...18 Chapter 3...

Page 23: ...ct a channel You can then use your player s remote to select and watch videos on your TV You ll be amazed at how quick and easy it is NOTE Somechannelsrequireaccountsetupthefirsttimeyouaccessthechanne...

Page 24: ...ut on your TV that displays the player 2 On the player remote press home 3 Press left or right to highlight the channel you want to watch and then press select 4 Press left or right to scroll through...

Page 25: ...ight Pauses playing the video and enters frame scanning mode To scan forward one frame at a time press the button again left Pauses playing the video and enters frame scanning mode To scan backward on...

Page 26: ...22 Chapter 4...
Page 27: ...ation about your player and reset your player to the original factory settings Changing your network settings If you install a new network router or change to a different Internet Service Provider ISP...

Page 28: ...ighlight network settings and then press select 4 Highlight repeat guided setup and then press select 5 Follow the onscreen instructions to enter your new network settings See Selecting your network t...

Page 29: ...isplay setting If you purchase a new TV or connect your player to a different TV you already have you can change your display type selection 1 Press home to go to the Home screen 2 Highlight settings...

Page 30: ...ay type and then press select 4 Press left or right on the remote to highlight HDTV 4 3 standard or 16 9 anamorphic also known as widescreen full or stretch mode and then press select 5 Press select t...

Page 31: ...for sound effects You can adjust the volume level of the sound effects produced by your player or you can turn off the sound effects completely 1 Press home to go to the Home screen 2 Highlight settin...

Page 32: ...28 Chapter 5 3 Highlight sound effects and then press select 4 Press up or down to highlight the volume level you want to use and then press select...

Page 33: ...active for five minutes the screensaver appears You can however adjust this setting and choose how much time must pass before the screensaver appears or disable the screensaver completely 1 Press home...

Page 34: ...30 Chapter 5 3 Highlight screensaver and then press select 4 Press up or down to highlight the option you want to use and then press select...

Page 35: ...ut your player such as the hardware and software version and the serial number as well as your current network settings You can also check for software updates to keep your player up to date 1 Press h...

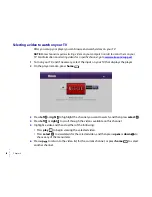
Page 36: ...32 Chapter 5 3 Highlight player info and then press select 4 Highlight check for update and then press select...

Page 37: ...Adjusting Settings on Your Player 33 5 Highlight yes and then press select to begin the update 6 When you re player finishes updating it restarts and displays the Home screen...

Page 38: ...we recommend that you perform a factory reset before delivering the player to the new owner 1 Press home to go to the Home screen 2 Highlight settings and then press select to display the Settings scr...

Page 39: ...Adjusting Settings on Your Player 35 3 Highlight factory reset and then press select 4 To continue with the reset select factory reset To cancel the reset select back...

Page 40: ...36 Chapter 5 5 When prompted highlight yes to confirm that you want to reset your player and then press select...

Page 41: ...s in this guide Manually entering your network s name SSID If your network is setup as a hidden network that doesn t broadcast its name you can enter the name manually 1 From the Choose Wireless Netwo...

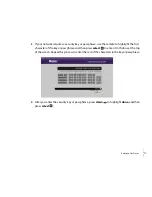
Page 42: ...the remote to highlight the first character of the network name and then press select to enter it in the box at the top of the screen Repeat this process to enter the rest of the characters in the net...

Page 43: ...d restore the original factory settings To restart your player press the Reset button To do a factory reset press and hold the Reset button for 15 seconds WARNING Performingafactoryresetdeactivatesyou...

Page 44: ...peed Your Internet Service Provider ISP determines your broadband speed Werecommendaminimumconnectionspeedof1 5Mbps Forthebestqualitypicture a connection speed of 4 0 Mbps is required Sometimes your b...

Page 45: ...CRules These limits are designed to provide reasonable protection against harmful interference in a residential installation This equipment generates uses and can radiate radio frequency energy and if...

Page 46: ...d in the Roku Product is subject to third party licenses which require that you be given the following notices THIS PRODUCT IS LICENSED UNDER THE AVC PATENT PORTFOLIO LICENSE FOR THE PERSONAL AND NONC...

Page 47: ...n of such technology outside of this product is prohibited without a license from Microsoft or an authorized Microsoft subsidiary Please visit www roku com for detailed information on our use of third...

Page 48: ...harge to you If the Warranty Period has expired or is otherwise not applicable see Scope and Limitation on Warranty below you are responsible for the payment of all labor charges parts and materials o...

Page 49: ...ghts and you may also have other rights which vary from jurisdiction to jurisdiction LIMITATION OF LIABILITY IN NO EVENT WILL ROKU OR ITS SUPPLIERS BE LIABLE FOR ANY CONSEQUENTIAL SPECIAL EXEMPLARY IN...

Page 50: ...uct may fall causing serious injury to a child or adult and serious damage to the product Use only with a cart stand tripod bracket or table recommended by the manufacturer or sold with the product A...

Page 51: ...duct has been exposed to rain or water If the product does not operate normally by following the operating instructions Adjust only those controls that are covered by the operating instructions as an...

Reviews: