194
Editing Your Musical Performance Data
5.
Touch the “Event” value (the type of
performance data that you wish to erase).
6.
Touch <
> <
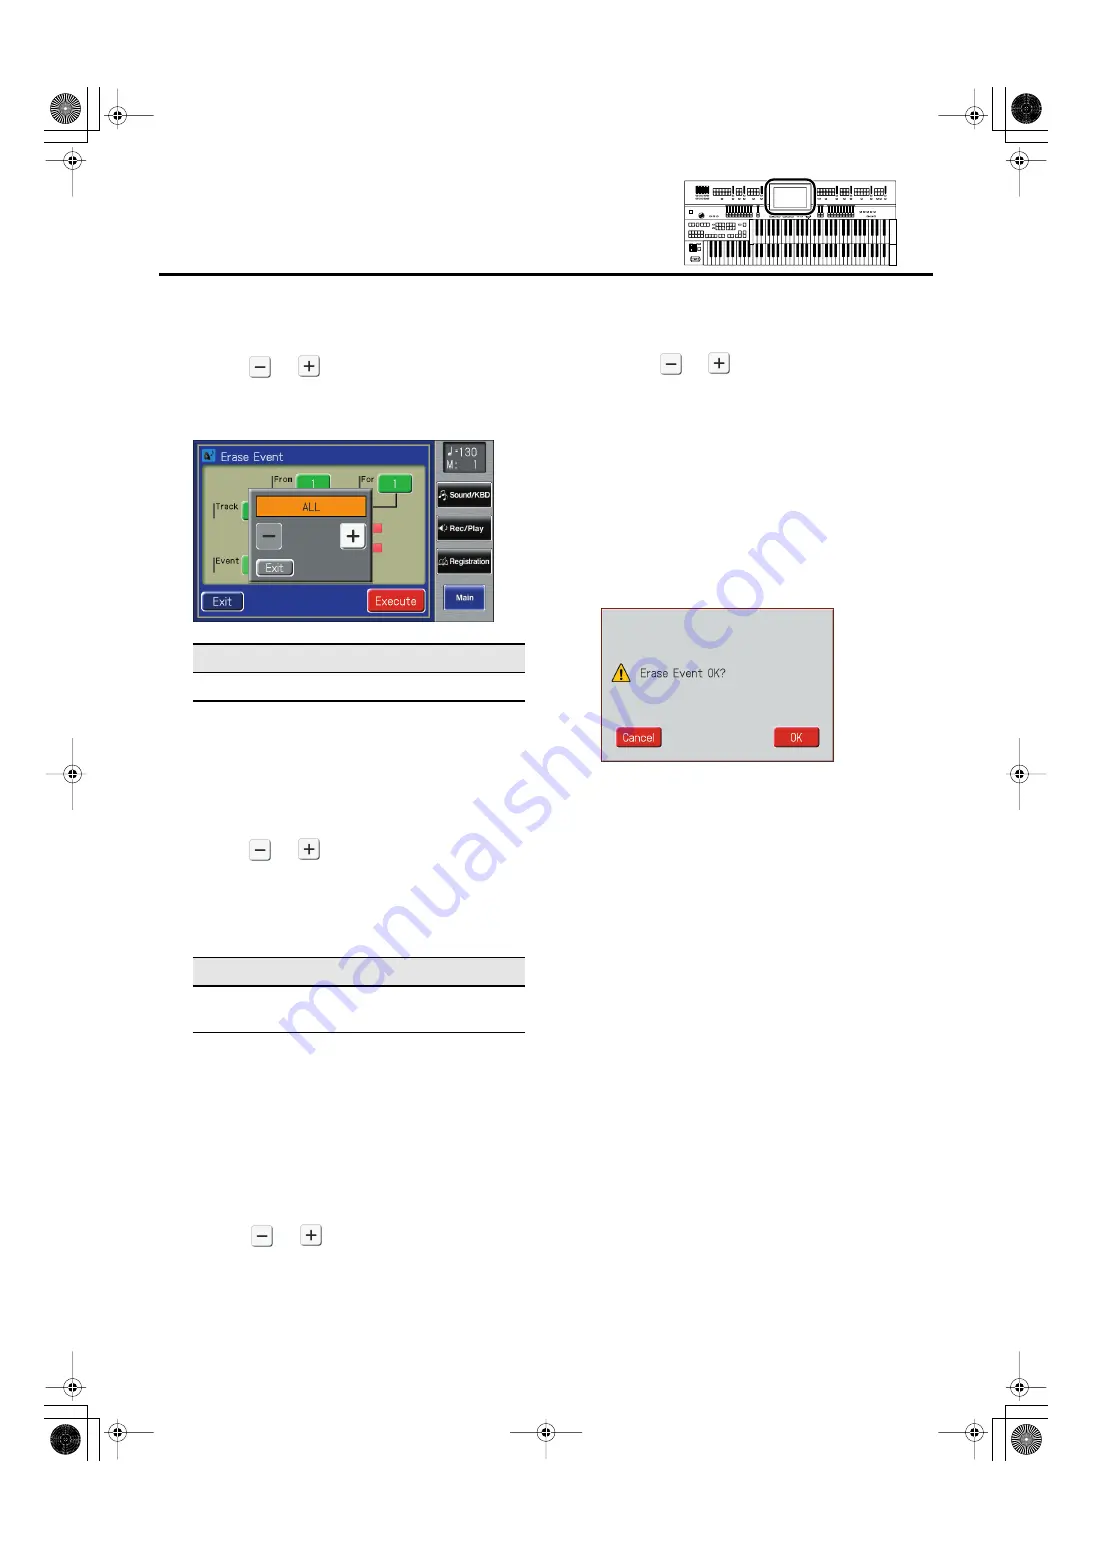
> to specify the “Event” (the
type of performance data that you wish to
erase).
fig.08-12.eps
7.
When you’re done making the settings, touch
<Exit>.
8.
Touch the “Track” value (the track from which
data will be erased).
9.
Touch <
> <
> to specify the “Track” (the
track from which data will be erased).
If you have selected EXPRESSION, VOICE and TEMPO
as the type of recording to be erased, you need not
specify the track.
If you select “ALL,” the recording will be erased from all
parts.
10.
When you’re done making the settings, touch
<Exit>.
11.
Touch the “From” value (the measure at which
erasure will begin).
12.
Touch <
> <
> to set “From” (the
measure at which erasure will begin).
13.
When you’re done making the settings, touch
<Exit>.
14.
Touch the “For” value (the number of
measures from which the data will be erased).
15.
Touch <
> <
> to set “For” (the number
of measures from which the data will be
erased).
If you wish to erase to the last measure (bar), set “for:
ALL.”
16.
When you’re done making the settings, touch
<Exit>.
17.
Touch <Execute>.
The following display appears.
fig.08-23.eps
To cancel operation, touch <Cancel>.
18.
Touch <OK> to erase the performance data.
Once the performance data has been erased, you are
returned to the Erase Event screen.
Setting
ALL, NOTE, PANEL, EXPRESSION, VOICE, TEMPO
Track
ALL, RHYTHM, ACCOMP, BASS, LOWER, UPPER,
SOLO, CONTROL
AT-800_e.book 194 ページ 2008年10月15日 水曜日 午前9時37分


