22
3 Replacement of Main Parts
3
9
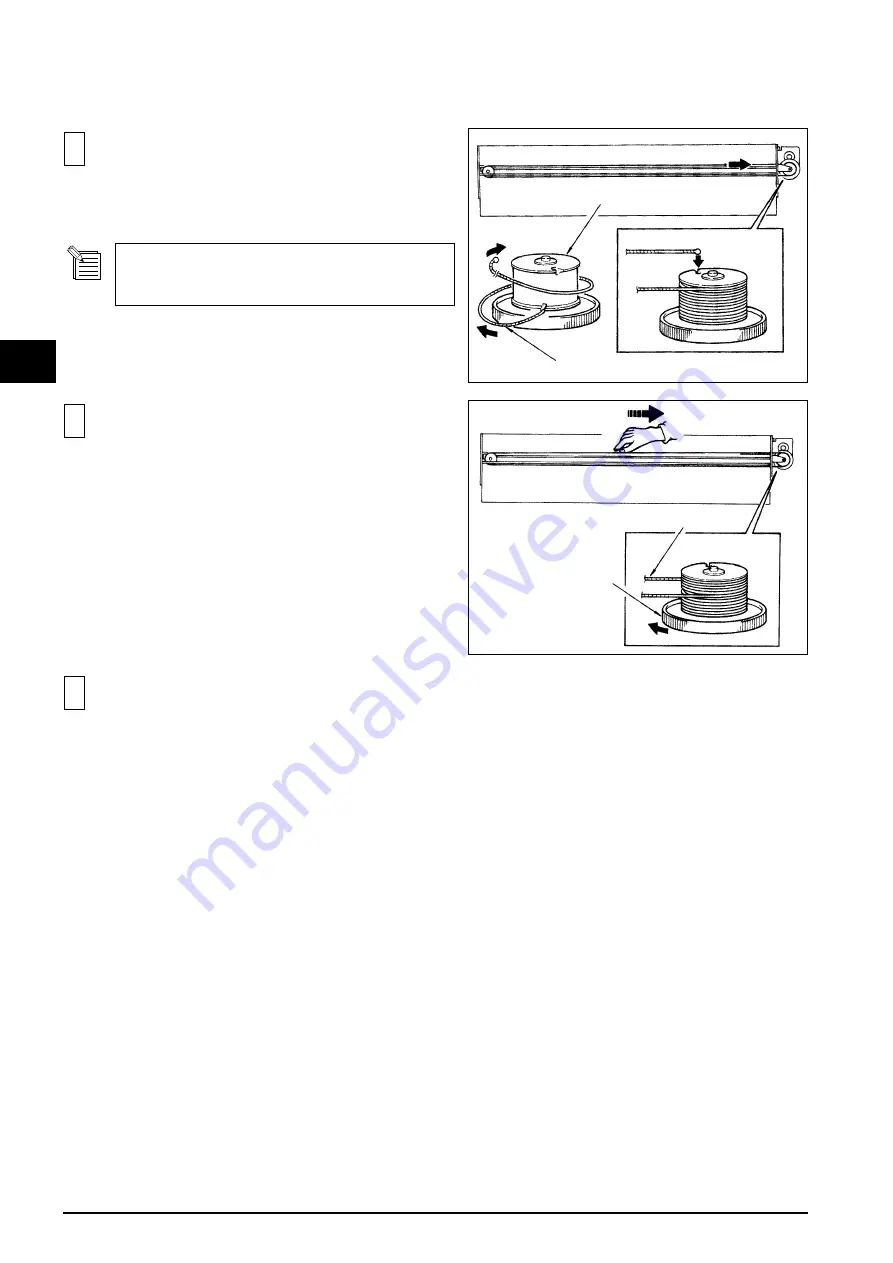
Wind the CARRIAGE WIRE around the DRIVE PULLEY
from the bottom to the top.
10
Rotate the DRIVE PULLEY until the CARRIAGE WIRE
comes to its center.
DRIVE PULLEY ASSEMBLY
CARRIAGE WIRE
DRIVE PULLEY
ASSEMBLY
11
Fix the TOOL CARRIAGE at the center part of the GUIDE
RAIL and adjust the WIRE TENSION.
CARRIAGE WIRE
Make sure that the CARRIAGE WIRE doesn't cross
over.
Summary of Contents for CAMM-1 PRO CM-300
Page 4: ... MEMO ...
Page 6: ...2 1 Structure Spare Parts 1 1 2 FRAME ...
Page 28: ...24 3 Replacement of Main Parts 3 MEMO ...
Page 62: ......
Page 63: ...CM 500 400 300 ...


