39
Adjustments for the JX-3P (Test Mode)
To enter test mode press and hold the ARP CLOCK button as you power on the JX-3P. This is the Sequencer Write
button on the original JX-3P front panel. Let the JX-3P run for 15mins or so to warm and stabilise.
Except for test mode #3, while in TEST MODE the ARP CLOCK button will slow flash and the current test tone will
fast flash on the BANK LEDs. As keys are pressed the voice being allocated will show on Tone LED 8-3. Voice 1 will
show on Tone LED 8, Voice 2 on Tone LED 7 etc . These are the same order that the voices are on the JX-3P main
board. Test mode #3 uses the buttons differently (see below).
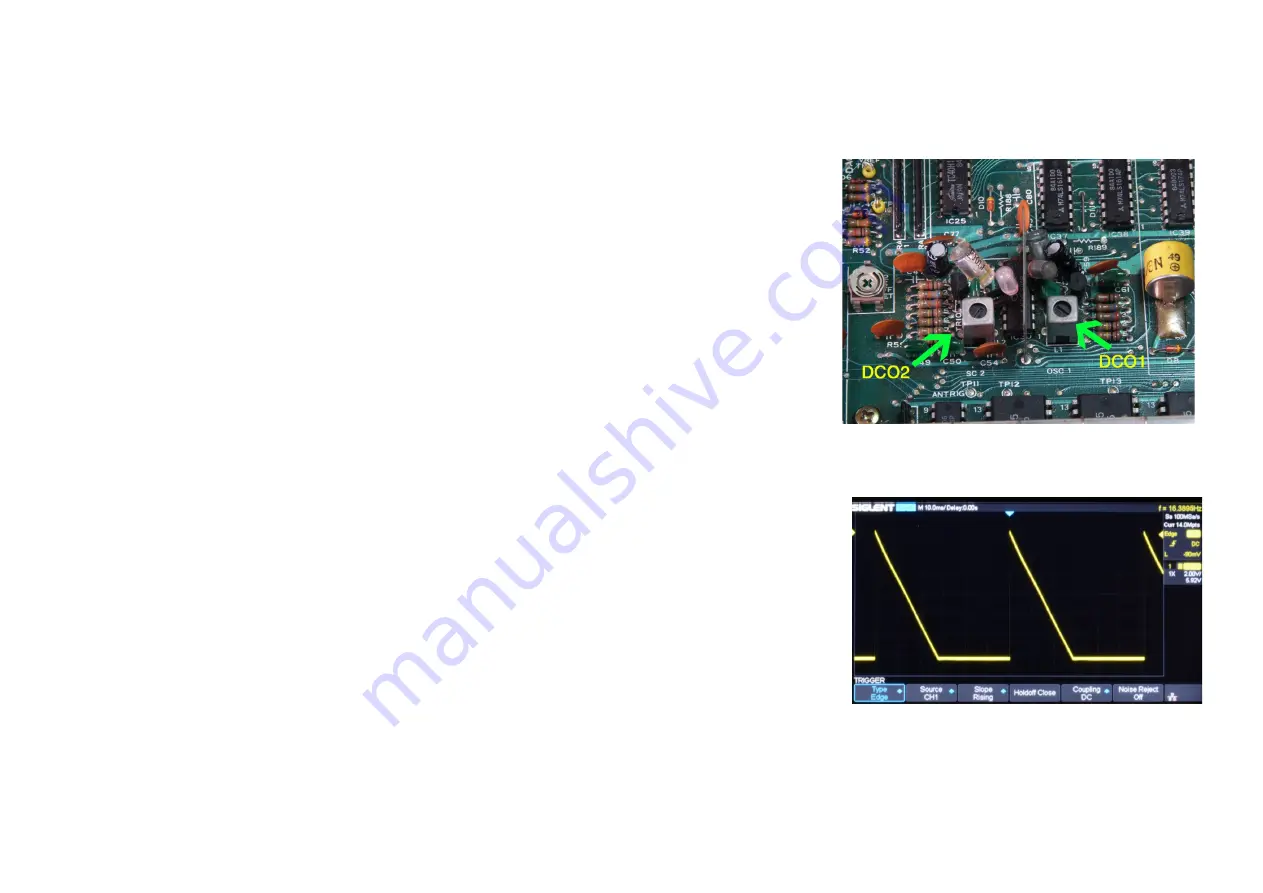
1) Test #1 – Set DCO2 Master Tune. This is selected by pressing BANK 1. Bank 1 will flash.
Center the Tune trim on the rear of the JX-3P and make sure that the Master Fine Tune Global parameter is
centred. The Kiwi-3P Matrix is shipped with the MFT centred so if it has never been changed it will be fine.
Press A4 and tune DCO2 using the DCO2 trimmer to 440Hz. If you do not have a hardware tuner try the
APTuner app.
Note - The DCO 1&2 trims are pretty fragile and are effected by metal. Be
very
gentle turning
them and move the metal away in between adjustments. Use a plastic screwdriver if you have one.
2) Test #2 – Set DCO1 Master Tune. This is selected by pressing BANK 2. Bank 2 will flash.
Press A4 and tune DCO1 using the DCO1 trimmer until the beating between the DCOs is at a minimum.
3) Test #3 – Set DAC and voice Saw wave Offsets. This is selected by pressing BANK 3. Bank 3 will flash.
First the Reference voltage needs to be set. Connect an accurate voltmeter to TP9 (Marked VREF) and
adjust VR1 (marked VREF ADJ) so that 4.70volts is on TP9.
Next each voice needs to have the Sawtooth wave form adjusted for the low end. As there is no auto tune
hardware in the JX-3P this must be done manually. At low frequencies the Saw wave is very sensitive to
component tolerances (and also temperature) it is important to adjust these out as much as possible so
that the new Pulse Width wave works correctly.
Select Tone #3. Turn the VR2 adjust (marked DAC ADJUST) to minimum (anti-clockwise). Press the bottom
C on the keyboard at least 6 times to make sure all voices are outputting this note. Next search all the
voices for the voice with the highest level of SAW wave (longest clipping the bottom of the wave on the
oscilloscope) by looking at all 12 outputs of IC104-604 looking at both pin1 and pin7 outputs. Clipping
looks like a flat part of the wave at the bottom (see photo). The voice with the longest flat portion is the one
you want. Once this voice is found adjust VR2 while watching this output until the flat portion is just gone
and it is at the highest level possible. Take a note of this voice as this can and should be skipped in the
individual voice trimming. It is the reference voice and should not need to be adjusted further.
www.kiwitechnics.com
3P Matrix Upgrade User Manual v1.2
Summary of Contents for KIWI-3P
Page 5: ...5 Front Panel Description www kiwitechnics com 3P Matrix Upgrade User Manual v1 2 ...
Page 6: ...6 Basic Connections www kiwitechnics com 3P Matrix Upgrade User Manual v1 2 ...
Page 7: ...Menu Flow Chart ...
Page 8: ...8 Edit Map www kiwitechnics com 3P Matrix Upgrade User Manual v1 2 ...


