48
2)
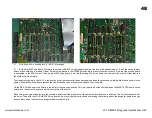
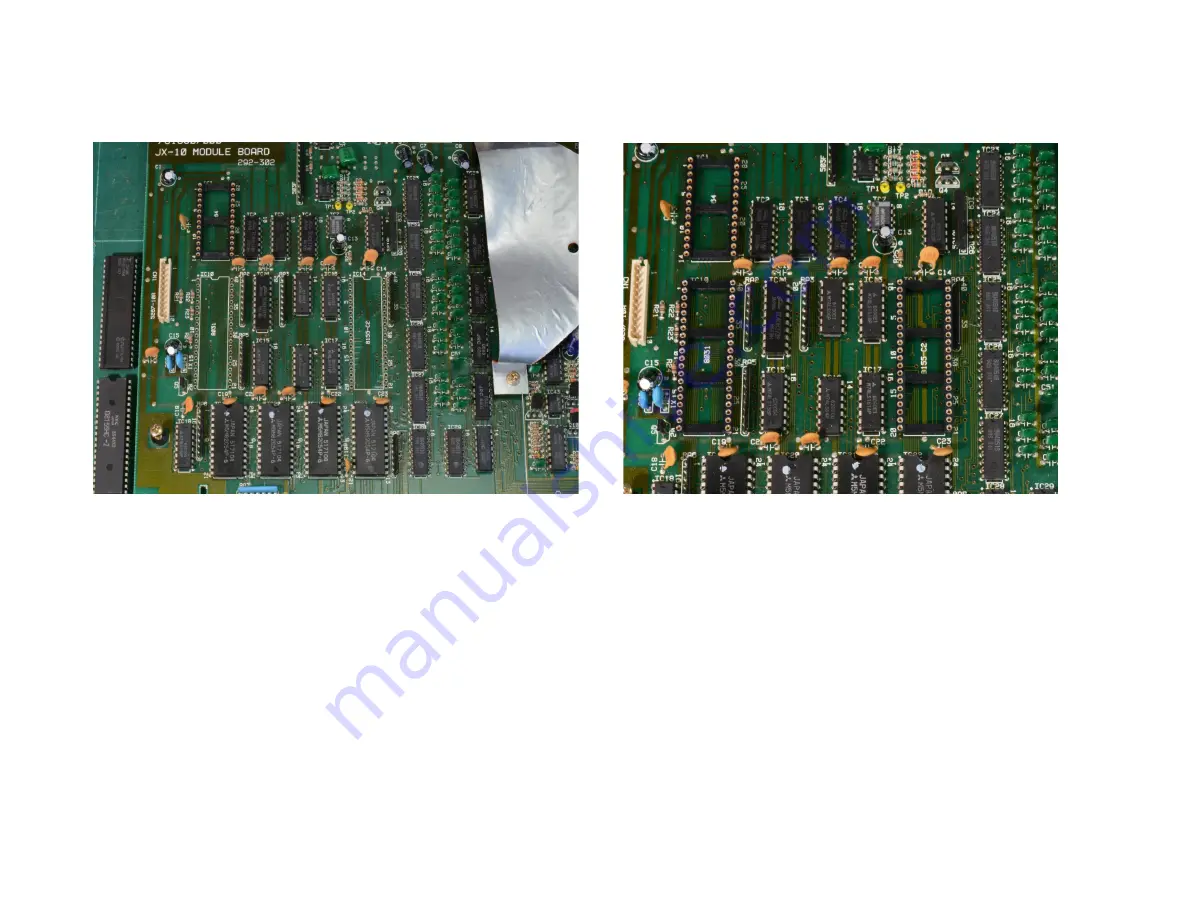
Fit the two 40 Pin Sockets into IC10 & IC14 locations.
3)
Fit the KiwiSJX Voice Board. There are two different KiwiSJX Voice Daughter boards. One has a link fitted between 1 & 2 on the option jumper
point on the board and is marked 'Upper'. This must be placed in the UPPER Voice board in order to function correctly. Only the Upper voice board
is connected to the Midi Out so if the wrong KiwiSJX Voice board is put into the wrong SJX Voice board the midi out will not work. Other than this
the synth will work normally.
The Upper voice board in the JX-10 is the board on the right nearest to the power supply and has the grounded shielding fitted that is shown in the
photos. The KiwiSJX Voice board that has the link fitted need to be placed in the Upper SJX voice board.
On the MKS-70 the upper voice board is the lower of the two voice boards. This is in the middle of the synth between the MKS-70 CPU board on the
bottom and the Lower Voice board which is at the top of the synth.
When fitting the upgrade boards into the sockets make sure all the pins are in all the socket holes and press in half way. This will seat the board into
the holes. Then with the JX-10/MKS-70 Voice board on a static free firm surface and something firm directly under the daughter board area you
need to press down firmly until the daughter board is seated fully.
www.kiwitechnics.com
JX-10/MKS-70 Upgrade User Manual v100
Summary of Contents for Kiwitechnics KIWI-SJX
Page 1: ......
Page 6: ...Kiwi SJX JX 10 Flow Chart...
Page 7: ...Kiwi SJX MKS 70 Flow Chart...
Page 8: ...Kiwi SJX JX 10 Front Panel...
Page 9: ...Kiwi SJX MKS 70 Front Panel...
Page 89: ...89 www kiwitechnics com JX SJX Upgrade User Manual v100...


