®ÂØÒňÎ
MPU-401 Windows 95 Supplemental Notes
©1996 Roland Corporation U.S. Installing MPU-401 Compatible Cards in Windows 95
Page 7 of 8
Setting the Interrupt and Address in Windows
If your MIDI card is not at the default settings, or if
Windows is not recognizing the card, follow these
steps to change the settings in Windows. Otherwise,
go to the “Selecting the MIDI Card as the Primary
Windows MIDI Device” section below.
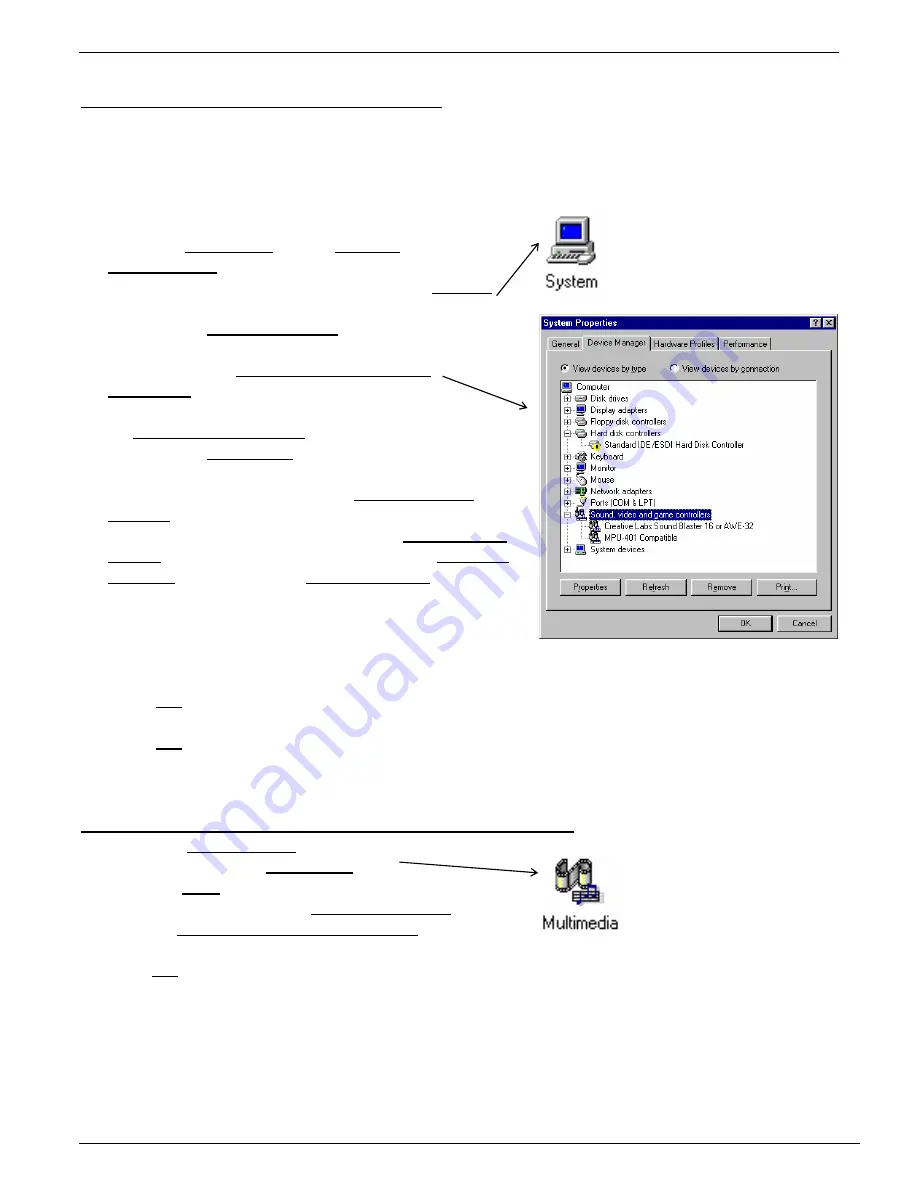
1) From the Start Menu, select Settings and open the
Control Panel.
2) In the Control Panel, double-click on the System
icon.
3) Click on the Device Manager tab at the top of the
System Properties window.
4) Double-click on Sound, video and game
controllers.
5) Your sound cards will be displayed. Double-click
on MPU-401 Compatible.
6) Click on the Resources tab at the top of the
Properties window.
7) Clear the check mark from the Use automatic
settings box, if necessary.
8) To change the port address, click on Input/Output
Range. To change the interrupt, click on Interrupt
Request. Then click the Change Setting button.
9) The screen you will be shown displays the value
for the parameter you have selected. Click the up
and down arrows to choose from the available
values, making sure that no devices are conflicting
in the Device Conflict box at the bottom.
10) Click OK, and change the other settings as
necessary.
11) Click OK again and restart Windows when
requested.
Selecting the MIDI Card as the Primary Windows MIDI Device
1) Open the Control Panel.
2) Double-click on the Multimedia icon.
3) Click the MIDI tab at the top of the window.
4) Click the dot to the left of Single Instrument.
5) Click on MIDI for MPU-401 Compatible in the
white box under Single Instrument.
6) Click OK at the bottom of the window.


