background image

+48V

Hi-SPEED USB

IN 1/2

MAIN

OUT 1/2

IN 3/4

OUT 3/4

IN

OUT

MIDI

AUDIO

DIRECT MIXER

D/A

INPUT

OUTPUT

INPUT 1L

INPUT 2R

COAXIAL IN

(3/4)

MIDI IN

MIDI OUT

COAXIAL OUT

(3/4)

OUTPUT 1L

OUTPUT 2R

PHONES

DIGITAL

OUT

SELECTOR

MIXER

MONO/

STEREO

MIX

Hi-Z/

Lo-Z

COMP

PHASE

SENS

A/D

HPF

100Hz

COMP

PHASE

SENS

A/D

HPF

100Hz

For the following languages, a PDF version of the Owner’s Manual can be found on the CD-ROM.

Deutsch, Français, Italiano, Español, Português, Nederlands

*

5

1

0

0

0

4

2

9

9

1

-

0

5

*

Summary of Contents for Quad-Capture

Page 1: ...For the following languages a PDF version of the Owner s Manual can be found on the CD ROM Deutsch Fran ais Italiano Espa ol Portugu s Nederlands...

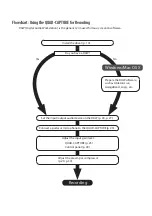
Page 2: ...ll the driver p 14 Windows Mac OS X Prepare the DAW software such as Ableton Live GarageBand Logic etc Yes No Set the input output audio device on the DAW p 24 p 27 Connect a guitar or microphone to t...

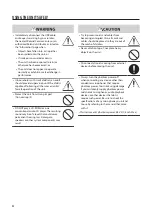
Page 3: ...rcuits faulty operation or other malfunctions Used for instructions intended to alert the user to the risk of injury or material damage should the unit be used improperly Material damage refers to dam...

Page 4: ...D ROM disc on a conventional audio CD player The resulting sound may be of a level that could cause permanent hearing loss Damage to speakers or other system components may result Try to prevent cords...

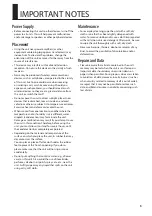
Page 5: ...condition Therefore before using the unit you must allow it to stand for several hours until the condensation has completely evaporated Depending on the material and temperature of the surface on whi...

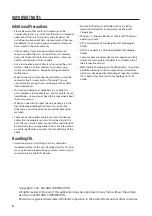
Page 6: ...packaging materials Some connection cables contain resistors Do not use cables that incorporate resistors for connecting to this unit The use of such cables can cause the sound level to be extremely...

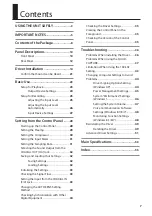
Page 7: ...nitializing the Settings 33 Checking the Signal Flow 33 Setting the Input from the COAXIAL IN 3 4 Jack 33 Changing the AUTO SENS Setting Method 34 Checking Synchronization with Other Digital Equipment...

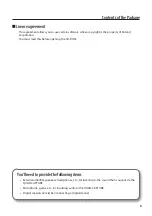
Page 8: ...ement Avoid touching or scratching the shiny underside encoded surface of a disc Damaged or dirty discs may not be read properly Use a commercially available CD ROM DVD ROM cleaner to keep your disc c...

Page 9: ...Roland Corporation You must read this before opening the CD ROM You ll need to provide the following items External amplifier speakers headphones etc for listening to the sound that is output via the...

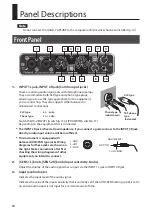
Page 10: ...low impedance If you connect a guitar or bass to the INPUT 2R jack directly audio input volume will be insufficient This instrument is equipped with balanced XLR TRS type jacks Wiring diagrams for th...

Page 11: ...ghted the audio signal sent via USB to your computer will be stereo 8 MIX knob Adjusts the monitor volume As you turn this knob to the left towards PLAYBACK the levels of the audio signals arriving at...

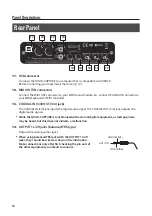
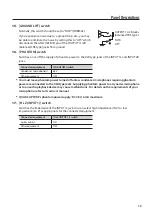
Page 12: ...3 4 jacks The COAXIAL IN 3 4 jack inputs the digital audio signal The COAXIAL OUT 3 4 jack outputs the digital audio signals While the QUAD CAPTURE is synchronized with external digital equipment a s...

Page 13: ...V Other equipment OFF You must leave phantom power turned off unless condenser microphones requiring phantom power are connected to the XLR type jacks Supplying phantom power to a dynamic microphone o...

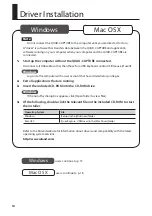
Page 14: ...nt that has administrator privileges 2 Exit all applications that are running 3 Insert the included CD ROM into the CD ROM drive Windows If the AutoPlay dialog box appears click Open folder to view fi...

Page 15: ...e computer using the USB cable Turn down the volume on any peripheral devices before connecting the USB cable This unit is equipped with a protection circuit A brief interval a few seconds after power...

Page 16: ...click Sound If you have selected Icon view or Classic view double click Sound 11 Click the Playback tab select the QUAD CAPTURE s 1 2 and then click Set Default 12 Click OK Proceed to p 21 If you can...

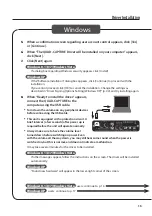
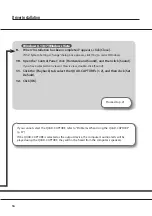
Page 17: ...System Settings dialog box appears click Yes to restart Windows 14 Open the Control Panel click Sounds Speech and Audio Devices and then click Sounds and Audio Devices If you have selected Classic vie...

Page 18: ...Turn down the volume on any peripheral devices before connecting the USB cable This unit is equipped with a protection circuit A brief interval a few seconds after power up is required before the uni...

Page 19: ...Mac OS X 10 5 or earlier Click the MIDI Devices tab 16 Confirm that QUAD CAPTURE appears in the MIDI Studio window or the Audio MIDI Setup dialog box If QUAD CAPTURE does not appear or if it is graye...

Page 20: ...22 16 21 23 17 18 21 Click Test Setup If you have a sound module connected to the QUAD CAPTURE s MIDI OUT connector the following step will cause it to produce a fairly laud sound so please reduce th...

Page 21: ...dows Windows Media Player starts Mac OS X iTunes starts Click the playback button to play the sample file The software that starts and is used to play the sample file may vary depending on your comput...

Page 22: ...PTURE s OUTPUT knob to adjust the volume If the sample file can be heard the computer and QUAD CAPTURE are connected properly and the driver has been successfully installed If you cannot hear the samp...

Page 23: ...onnect the QUAD CAPTURE Select the QUAD CAPTURE for the DAW software s audio device setting The QUAD CAPTURE will not operate in the Mac OS X Classic environment Use the QUAD CAPTURE when the Classic...

Page 24: ...URE as the audio and MIDI output device For details about settings refer to the documentation for your DAW software Audio Output Device Device name MME WDM KS ASIO Core Audio 44 1 kHz 96 kHz 192 kHz Q...

Page 25: ...UT 1L jack Set the Hi Z switch to ON Connect a condenser microphone to the INPUT 2R jack Set the PHANTOM switch to 48V Howling could be produced depending on the location of microphone s relative to s...

Page 26: ...stment The AUTO SENS setting does not work for jacks that are not connected 3 Play the loudest section of the song The input sensitivity is automatically adjusted so it matches the input level When yo...

Page 27: ...udio and MIDI input device For details about settings refer to the documentation for your DAW software Audio Input Device Device name MME WDM KS ASIO Core Audio 44 1 kHz 96 kHz 192 kHz QUAD CAPTURE 1...

Page 28: ...the control panel you can also select Show README from the QUAD CAPTURE control panel Windows version From the Driver menu select Show README Mac OS X version From the QUAD CAPTURE Control Panel menu...

Page 29: ...gain over a range of 0 54 dB in steps of 1 dB The input level indicator of the QUAD CAPTURE varies according to the gain setting When setting the input gain from the control panel the AUTO SENS butto...

Page 30: ...Specifies the compression ratio by which the audio signal is to be compressed Attack Time Specifies the time in msec from when the input level exceeds the threshold level until the compressor begins t...

Page 31: ...match the rate of the audio data that is played or the rate that your DAW software is set to when recording You can also change the sampling rate of the QUAD CAPTURE manually Click of the SAMPLE RATE...

Page 32: ...st select the sound to be output No sound is output from the COAXIAL OUT 3 4 jack when operating at a sampling rate of 192 kHz Saving and LoadingYour Settings From the QUAD CAPTURE control panel you c...

Page 33: ...ng a block diagram 1 From the Device menu select Show the signal flow Setting the Input from the COAXIAL IN 3 4 Jack You can set whether the digital signal is received or not 1 From the Device menu se...

Page 34: ...s the AUTO SENS button again 3 Using AUTO SENS Margin you can change the maximum value of the recording level that is detected Range for Margin 12 0 Value Description 6 Default value The maximum value...

Page 35: ...TURE Control Panel menu select Driver Settings Viewing the Control Panel in the Foreground You can set the software so the QUAD CAPTURE control panel always appears in the foreground Windows From the...

Page 36: ...Reinstall the QUAD CAPTURE driver p 49 Installer does not exit Is your computer running on battery power Connect the power cord to the computer Other than a mouse and keyboard are any USB devices conn...

Page 37: ...and reconnect the USB cable while using the QUAD CAPTURE Exit all programs that are using the QUAD CAPTURE disconnect the QUAD CAPTURE s USB cable and then reconnect it If the problem is not resolved...

Page 38: ...ficient volume from your guitar Are you using the correct connector Connect your guitar to the INPUT 1L jack p 10 Is the Hi Z INPUT 1 switch set to OFF Set the Hi Z INPUT 1 switch to ON p 13 Is the in...

Page 39: ...ing Exit programs that are not in use Is the software s audio buffer size set correctly If the software allows you to adjust the audio buffer size change the buffer size Refer to the documentation for...

Page 40: ...or guitar connected Disconnect the unused microphone or guitar and turn the SENS 1L and SENS 2R knobs to the left fully in order to lower the input level Is the GROUND LIFT switch set to NOR Try setti...

Page 41: ...UAD CAPTURE s USB cable and then reconnect it If the problem is not resolved restart the computer Did you disconnect and reconnect the USB cable while using the QUAD CAPTURE Exit all programs that are...

Page 42: ...ced Driver Settings or software Are you playing or recording audio data Change the sampling rate within the software currently being used or exit the software and then change the sampling rate in the...

Page 43: ...AD CAPTURE s sampling rate is set to 192 kHz its operation will be limited as follows The COAXIAL IN 3 4 OUT 3 4 jacks cannot be used The 3 4 port of the audio output device and the 3 4 port and MAIN...

Page 44: ...as follows 1 Open the Control Panel click Performance and Maintenance and then click the System icon If you have selected Classic view double click System 2 Click the Hardware tab and then click Driv...

Page 45: ...nce is not displayed in Windows 8 1 8 7 click Show additional plans 4 Click Change advanced power settings 5 In the Advanced settings tab of the Power Options control panel click the mark next to Hard...

Page 46: ...con 2 Click Advanced system settings at the left 3 When a User Account Control dialog box appears click Yes or Continue If you re asked to enter an administrator password log on to the computer with a...

Page 47: ...ct the QUAD CAPTURE s 1 2 from the Device menu and adjust the volume If Mute is set to On click Mute to set it to Off Windows XP 1 Open the Control Panel click Sounds Speech and Audio Devices and then...

Page 48: ...ommunications activity to Do nothing 3 Click OK to close Sound Monitoring Function Settings Windows 8 1 8 7 If the monitoring function of Windows is enabled the input sound may be doubled each sound i...

Page 49: ...p the computer without the QUAD CAPTURE connected Disconnect all USB cables other than those for a USB keyboard and or USB mouse if used 2 Log on to the computer with a user account that has administr...

Page 50: ...luded CD ROM 4 When This uninstalls QUAD CAPTURE driver from this Mac appears click Uninstall If other messages appear follow the instructions on the screen 5 When Are you sure you want to uninstall t...

Page 51: ...t clock source INTERNAL The internal clock is operating EXTERNAL The clock is operating in sync with the equipment connected to the COAXIAL IN 3 4 jack The sampling rate of the input digital signal is...

Page 52: ...CLOCK You can display the current clock source INTERNAL The internal clock is operating EXTERNAL The clock is operating in sync with the equipment connected to the COAXIAL IN 3 4 jack The sampling rat...

Page 53: ...type 50 to 4 dBu Nominal Output Level OUTPUT 1 2 0 dBu balanced Head Room 14 dB Input Impedance Input jacks 1 2 XLR type 4 8 k ohms balanced Input jacks 1 2 1 4 inch TRS phone type 15 k ohms balanced...

Page 54: ...or MIDI connectors In Out USB connector Interface USB 2 0 Hi Speed Digital input output Coaxial type conforms to IEC60958 MIDI IN OUT Power Supply USB Bus Power Current Draw 480 mA Dimensions 184 6 W...

Page 55: ...ver Advanced settings 51 Delete 49 Install 14 Reinstall 49 Dynamic microphone 13 G GROUND LIFT switch 13 H Hi Z INPUT 1 switch 13 I INPUT 1L jack 10 INPUT 2R jack 10 Input device 27 Input level Adjust...

Page 56: ...56 For EU Countries For China...

Page 57: ...rference by one or more of the following measures Reorient or relocate the receiving antenna Increase the separation between the equipment and receiver Connect the equipment into an outlet on a circui...

Page 58: ...58...

Page 59: ...59 MEMO...

Page 60: ...AUDIO DIRECT MIXER D A INPUT OUTPUT INPUT 1L INPUT 2R COAXIAL IN 3 4 MIDI IN MIDI OUT COAXIAL OUT 3 4 OUTPUT 1L OUTPUT 2R PHONES DIGITAL OUT SELECTOR MIXER MONO STEREO MIX Hi Z Lo Z COMP PHASE SENS A...

Reviews: