38
Settings for the R-07
In the “Menu” screen you can make various settings for the R-07
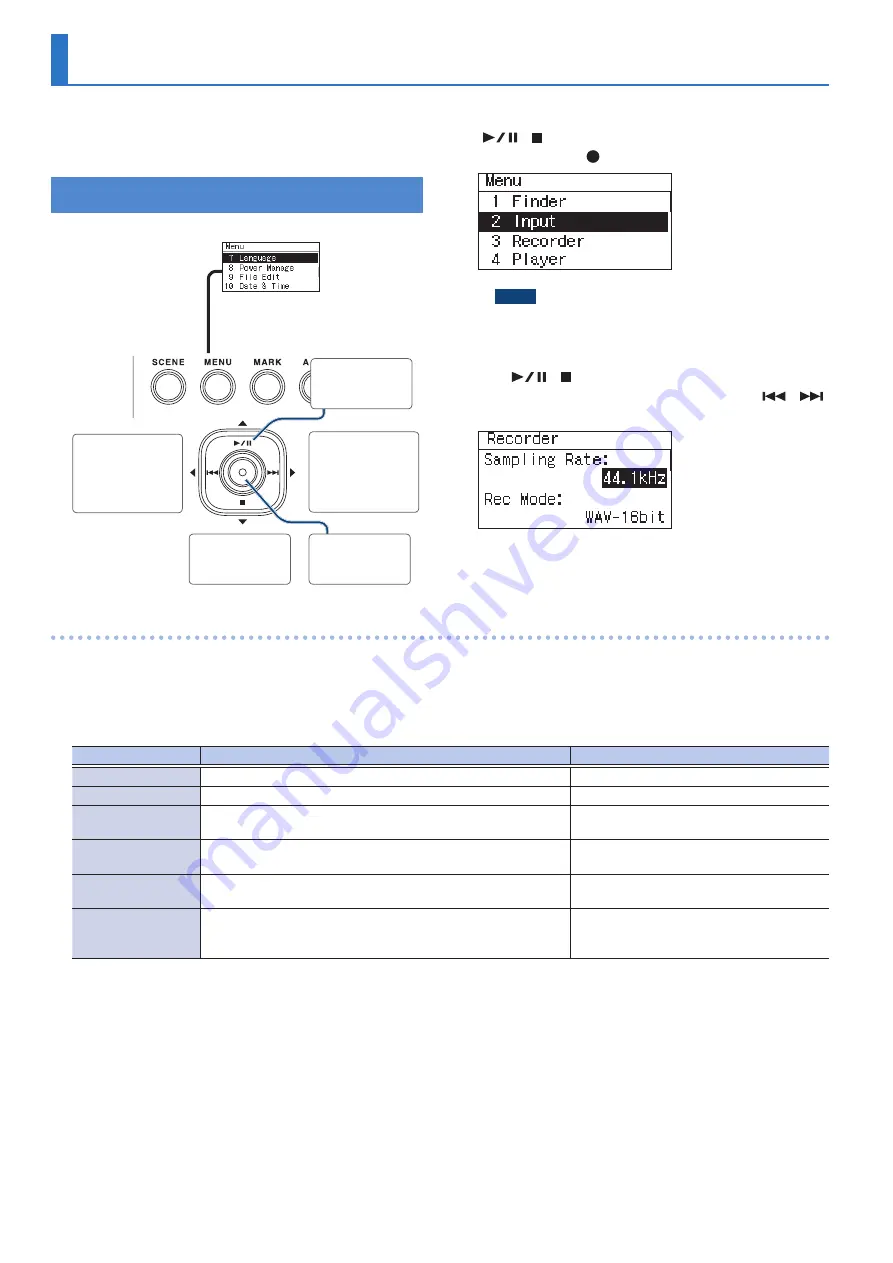
itself, such as settings for recording and playback, and the date
and time.
Basic Procedure
Change the
value (–)
Move the cursor
to the left
Move the
cursor down
Confirm
Change the
value (+)
Move the cursor
to the right
Access the Menu screen
If the menu screen is shown,
cancels the operation or returns to
the previous screen
Move the
cursor up
1
Press [MENU] to access the “Menu” screen, use
[
]/[ ] to choose the desired settings category,
and then press [ ].
NOTE
You can’t move to a different screen while a file is playing
or recording. You must stop playback or recording before
moving to a different screen.
2
Use [
]/[ ] to move the cursor to the menu
setting that you want to change, and use [
]/[
]
to change the value.
List of settings
Category: Finder
Here you can copy or delete audio files that are on a microSD card inserted in the microSD card slot (p. 32).
Category: Input
Menu item
Effect
Value (default value: bold)
Limiter
Specifies whether to use the limiter or auto gain control (p. 16).
OFF,
ON
, AGC
Low Cut Freq.
Cuts the low-frequency region (p. 16).
OFF
, 100 Hz, 200 Hz, 400 Hz
Rehearsal Time
Specifies the length of time that will be used to automatically set
the recording level (p. 18).
Manual, 30 sec,
1 min
, 3 min, 5 min
Rec Monitor Sw
Specifies whether the audio input will be monitored via
headphones during recording.
OFF,
ON
EXT Mic Type
Specifies the type of mic that is connected to the MIC/AUX IN jack
(p. 19).
Mono,
Stereo
Plug In Power
Turn this ON if you’ve connected a plug-in powered mic (a small
condenser mic that requires power to be supplied, such as used
with a computer). A voltage of 2.5 V will be supplied (p. 20).
OFF
, ON
Summary of Contents for R-07
Page 1: ...Reference Guide...


