5
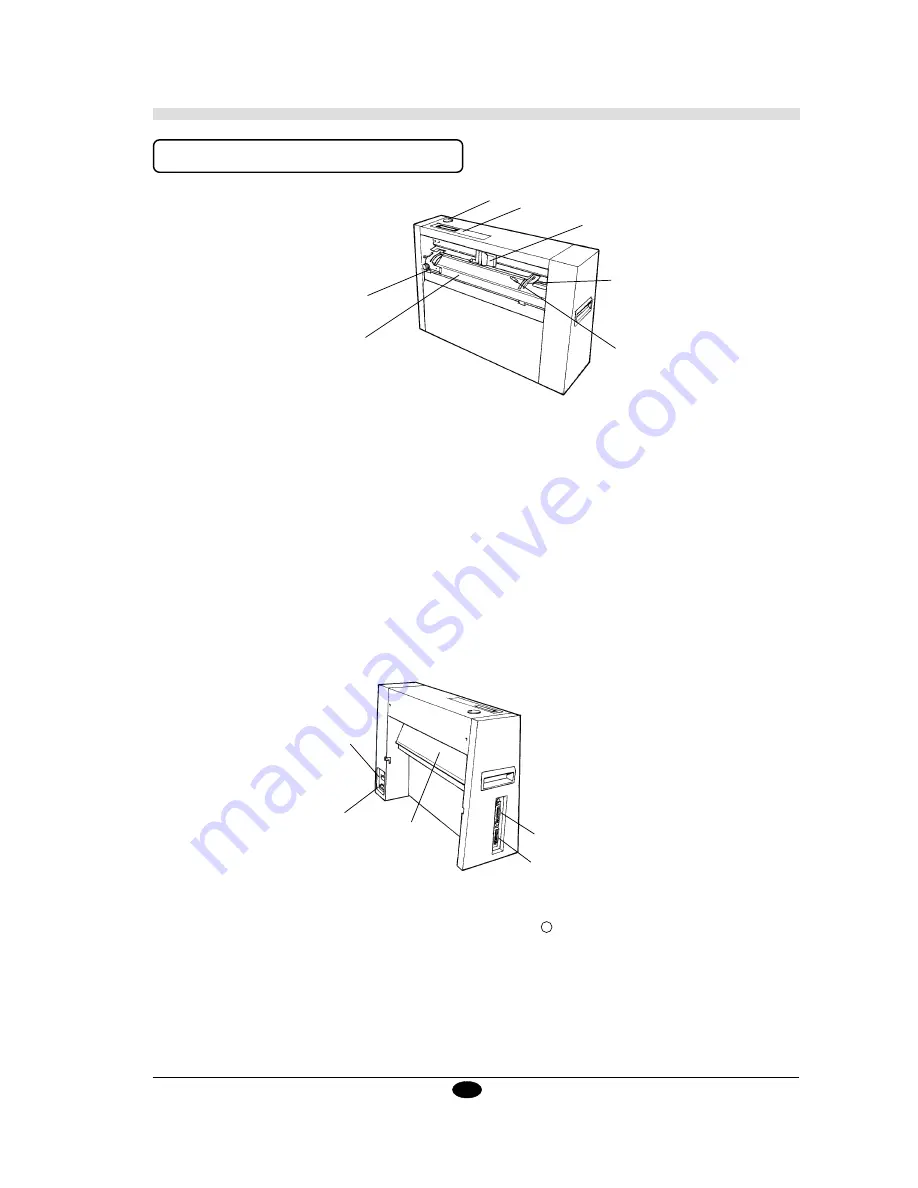
(1) Front View
3
1
4
5
6
2
7
2
1
5
4
3
(2) Rear View
1. Front Sheet Guide
This secures the sheet and toggles between the cutting mode and the setup mode.
2. Tool Carriage
The blade holder or pen are mounted to this part of the PNC-1050.
3. Pin Wheel
The protrusions ( pins ) around the perimeter mesh with the holes in the sheet for sheet feeding. The
left-hand pinwheel can be shifted approx. 8 mm ( 5/16" ) from side to side to match the size of the
sheet.
4. Pinwheel Door
This shifts to match the position of the pinwheel.
5. Pen Force Knob
Sets the pen force to be used with the tool.
6. Control Panal
Use this control panel for all menu setting and PNC-1050 operations. ( For further details, please
refer to page 7.)
7. Handle
Hold this when raising or lowering the front sheet guide.
1. Power Connector
Connect provided power supply cord to this connector.
2. Power Switch
When pushed toward [ | ], power is turned ON. Push toward [
] to turn it OFF.
3. Parallel Connector ( In Compliance with the specification of Centronics )
This interface is used to connect the PNC-1050 to the computer using a parallel cable.
4. Serial Connector ( RS-232C Specifications )
This interface is used to connect the PNC-1050 to the computer using a serial cable.
5. Rear Sheet Guide
This supports the sheet during cutting operations.
1.4 Part Names and Functions
Summary of Contents for Sign Maker CAMM-1 PNC-1050
Page 1: ...ROLAND DG CORPORATION Model PNC 1050 User s Manual SIGN MAKER...
Page 41: ...39...
Page 42: ...F2082693BE V3 1...


