12
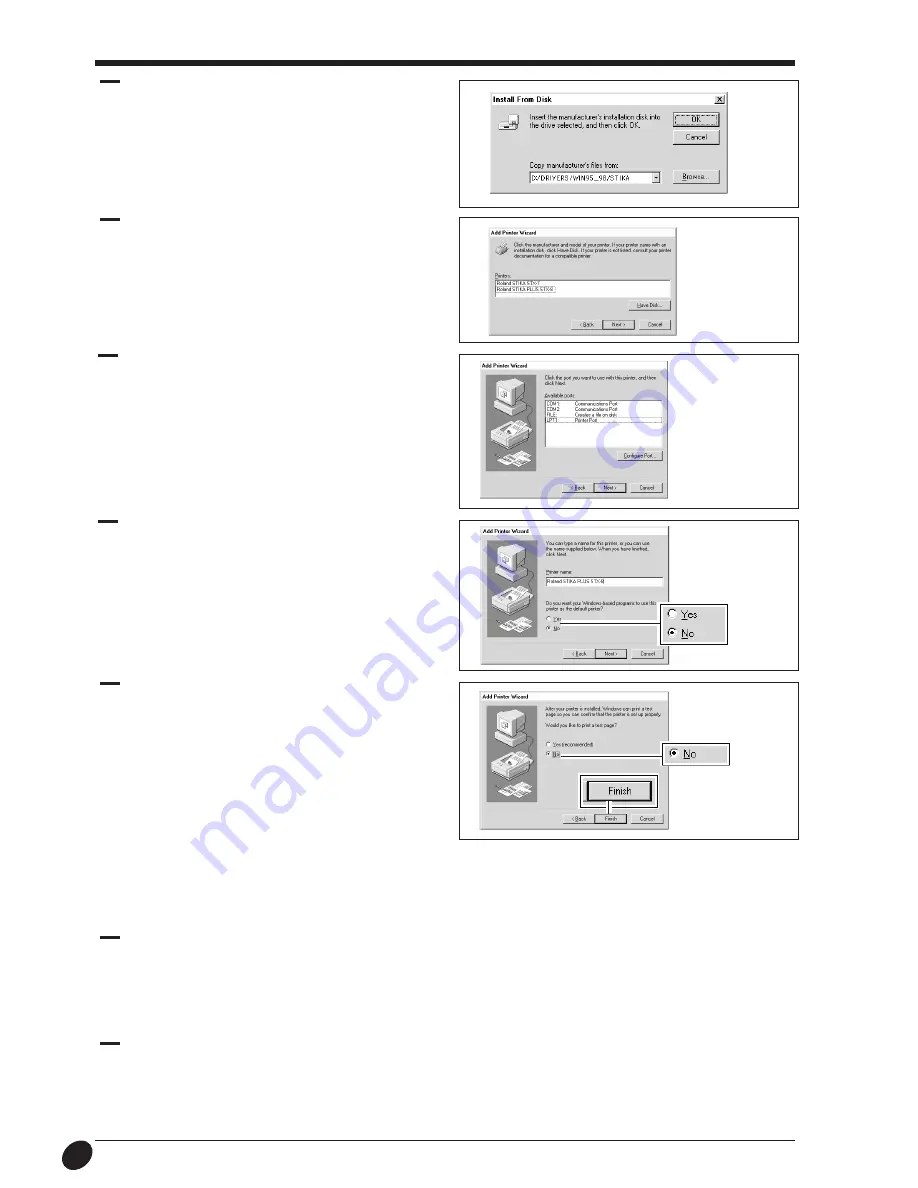
Make sure the [STIKA] folder displays [Copy
manufacturer's files from:], and click [OK].
Click on the model name to choose it, then click [Next].
If you're using the STX-8:
[Roland STIKA PLUS STX-8]
If you're using the STX-7:
[Roland STIKA STX-7]
10
11
Make sure [LPT1: ] is selected, then click [Next].
12
13
To make this the default printer, click [Yes]. Otherwise click
[No], then click [Next].
Click [No], then click [Finish].
Copying of the files from the CD-ROM starts.
After all the files have been copied, a printer icon appears in
the [Printers] folder, and installation of the driver is
complete.
Remove the CD-ROM disk from the CD-ROM drive.
14
Installing the driver for Windows NT
Take a look at the help screens for the Roland Software Package CD-ROM for information on how to install the driver.
Read on to learn how to display the help screens.
1
Place the CD in the CD-ROM drive on a computer running Windows NT 4.0.
2
The program selection screen appears automatically.
At this screen, click [How to install the Driver].
The help screen for the installation procedure appears.


