20
Applying the Completed Cutout
12
Press the
STANDBY
key to switch off the power. Make sure the
STANDBY
LED is not lit up.
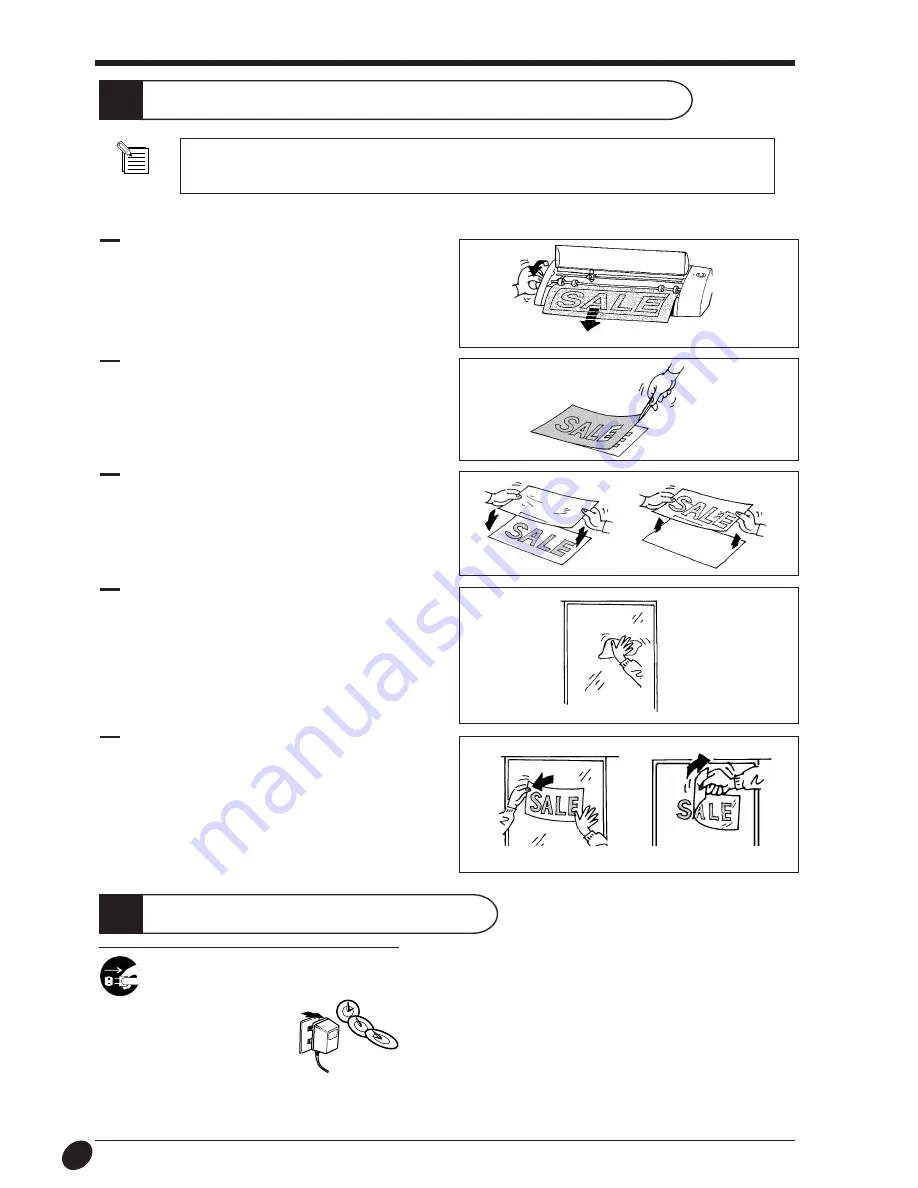
1
Rotate the material feed knob and remove the sheet.
When storing material that has been cut, be sure to cover it with application tape. This protects the material
against dust.
Switch off the Power
13
When not in use for several hours,
unplug the AC adapter from the
electrical outlet.
Failure to do so may
result in danger of
shock, electrocution,
or fire due to
deterioration of the
electrical insulation.
2
Peel off excess portions of the sheet. (Commercially avail-
able tweezers can be handy for peeling detailed areas and other
hard-to-peel places.)
3
Cover evenly with application tape so that no air bubbles are
trapped between the tape and the material, then transfer the
material to the tape.
4
Wipe away any dust or oil from the location where the mate-
rial is to be applied.
5
When transferring the material to the object, air may get be-
tween the material and the transfer surface, forming air
bubbles. If this happens, use a needle to puncture the bubbles,
then press out the trapped air and affix the material to the
transfer surface.
Place the entire piece of application tape against the object,
then press down evenly on the tape, working from top to bot-
tom. While constantly making sure the material has been trans-
ferred to the object, slowly peel away the application tape.


