4
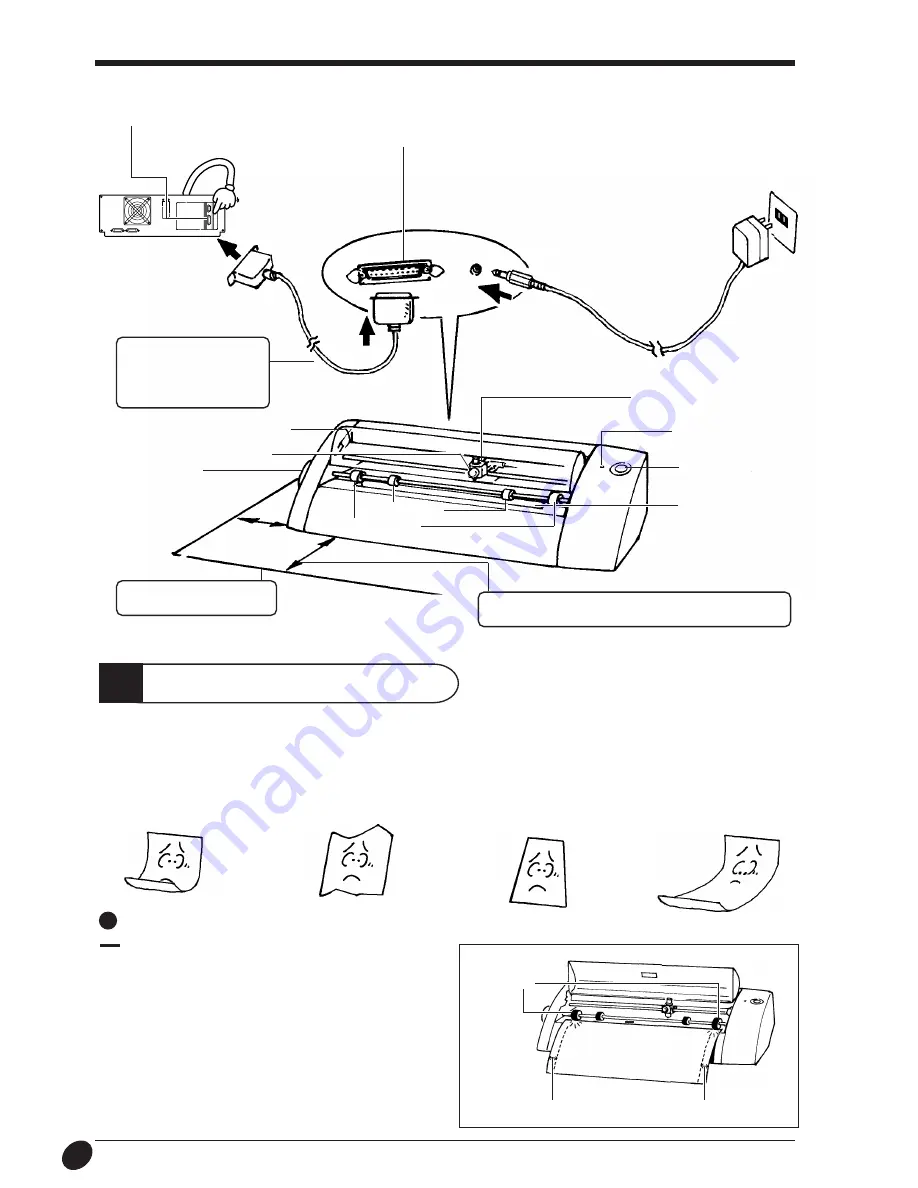
The AC adapter plugs in here
Connect the unit to the Computer
Make sure the two sides of the material are even
Pinch rollers
Parallel connector
Use the clips on either side to
secure the connector in place.
Parallel connector
Use the clips on either side to
secure the connector in place.
1
Place the material against the pinch rollers.
Load the material as shown in the figure, so that it does not
come loose during cutting.
Loading the material
Do not use any of the following materials. The material may come loose during cutting or otherwise fail to be fed properly.
Materials which has
curled upward
Material with a front edge
that is not straight
Material that is longer than
1 m 10 cm (43-1/4")
Material with left and right
edges that are not parallel
3
Load the material
Material of the following composition and thickness can be cut.
- Composition
Vinyl chloride sheets
- Thickness
Sheet portion :0.1 mm (0.00394") or less, including base paper of 0.3 mm (0.0118) or less
The cable is available
separately. Be sure to
use the correct cable for
the computer.
Do not place any objects within the range of material
movement to the front or rear of the unit.
Do not place any object
within the area.
Sheet feed knob
STANDBY key
Blade protector
Pinch rollers
Subrollers
Screw
50 mm
(1-15/16")
Blade carriage
STANDBY LED
Front cover
Parallel Cable
AC adapter jack


