background image


Owner’s Manual


Thank you, and congratulations on your choice of the Studio Package Pro.


Copyright © 2003  ROLAND CORPORATION

All rights reserved. No part of this publication may be reproduced in any form 

without the written permission of ROLAND CORPORATION.


http://www.roland.co.jp/

In order to feel assured that you have gained a good grasp of every 

feature provided by your new unit, Owner’s manual should be read 

in its entirety. The manual should be saved and kept on hand as a 

convenient reference.

Summary of Contents for Studio Package Pro

Page 1: ...art of this publication may be reproduced in any form without the written permission of ROLAND CORPORATION http www roland co jp In order to feel assured that you have gained a good grasp of every feature provided by your new unit Owner s manual should be read in its entirety The manual should be saved and kept on hand as a convenient reference ...

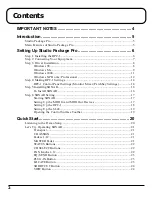
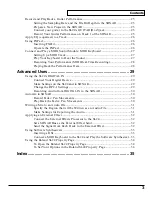
Page 2: ... Panel Settings Monitor Mixer Patchbay Settings 14 Step 5 Installing SONAR 16 To Install SONAR 16 Step 6 SONAR Setting 17 Starting SONAR 17 Setting Up the MIDI In and MIDI Out Devices 17 Setting Up the RPC 1 18 Setting Up the SI 24 19 Opening the Control Surface Toolbar 19 Quick Start 20 Listening to the Demo Song 20 Let s Try Operating SONAR 21 Transport 21 CH ASSIGN 21 Faders 1 12 21 MASTER Fade...

Page 3: ...t Your Digital Device 29 Make Settings on the SI 24 and in SONAR 29 Change the RPC 1 Settings 29 Recording Audio from DIGITAL IN to the SONAR 30 Automix in SONAR 30 Record Fader Pan Movements 30 Play Back the Fader Pan Movements 30 Writing a Mix to an Audio File 31 Specify the Region that will be Written as an Audio File 31 Make Settings for Exporting the Audio 31 Applying an External Effect 32 Co...

Page 4: ...unit for purposes that could infringe on a copyright held by a third party We assume no responsibility whatsoever with regard to any infringements of third party copyrights arising through your use of this unit Use of the song data supplied with this product for any purpose other than private personal enjoyment without the permission of the copyright holder is prohibited by law Additionally this d...

Page 5: ...IncludedItems eps Main Features of Studio Package Pro 24 bit 96kHz recording and mixing system w plug in effects Dedicated SI 24 Control Surface w motorized faders 8x24 bit XLR mic line inputs w phantom power Send receive 8 channels of 24 bit 96kHz digital audio to from computer Knobs for fast control of plug ins panning and more Cakewalk SONAR software for multi track 24 bit 96kHz audio recording...

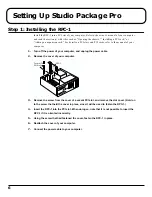
Page 6: ...r computer and unplug the power cable 2 Remove the cover of your computer fig eRpcset eps 3 Remove the screw from the cover of a vacant PCI slot and remove the slot cover Hold on to the screw that held the cover in place since it will be used to fasten the RPC 1 4 Insert the RPC 1 into the PCI slot When doing so note that it is not possible to insert the RPC 1 if it is oriented incorrectly 5 Using...

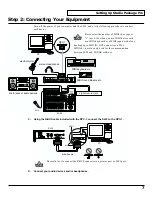
Page 7: ...ctor to a printer port or SCSI port 2 Connect your audio devices and or headphones digital recorder etc RPC 1 PC electric Guitar mic stereo Headphones MIDI Sound Module etc MIDI Keyboard etc line In jacks of audio devices SI 24 R BUS cable SI 24 R BUS blue RPC 1 rear PC Please select the number of MIDI ch as expect 1 use 2 16 when you use MIDI device such as a MIDI keyboard or a MIDI sound module ...

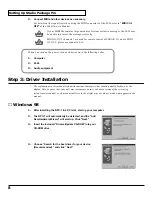
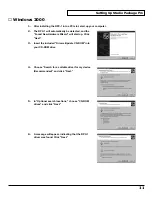
Page 8: ...lude illustrations that depict what should typically be shown by the display Note however that your unit may incorporate a newer enhanced version of the system e g includes newer sounds so what you actually see in the display may not always match what appears in the manual Windows 98 1 After installing the RPC 1 in a PCI slot start up your computer 2 The RPC 1 will automatically be detected and th...

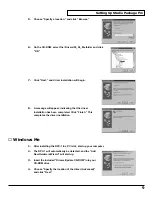
Page 9: ...r indicating that the driver installation has been completed Click Finish This completes the driver installation Windows Me 1 After installing the RPC 1 in a PCI slot start up your computer 2 The RPC 1 will automatically be detected and the Add New Hardware Wizard will start up 3 Insert the included Drivers Update CD ROM into your CD ROM drive 4 Choose Specify the location of the driver Advanced a...

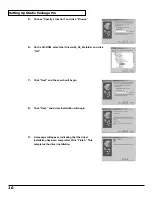
Page 10: ...n the CD ROM select the Drivers 95_98_Me folder and click OK 7 Click Next and the search will begin 8 Click Next and driver installation will begin 9 A message will appear indicating that the driver installation has been completed Click Finish This completes the driver installation ...

Page 11: ...cted and the Found New Hardware Wizard will start up Click Next 3 Insert the included Drivers Update CD ROM into your CD ROM drive 4 Choose Search for a suitable driver for my device Recommended and click Next 5 In Optional search locations choose CD ROM drives and click Next 6 A message will appear indicating that the RPC 1 driver was found Click Next ...

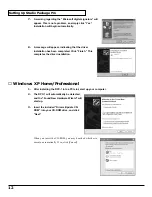
Page 12: ...ion has been completed Click Finish This completes the driver installation Windows XP Home Professional 1 After installing the RPC 1 into a PCI slot start up your computer 2 The RPC 1 will automatically be detected and the Found New Hardware Wizard will start up 3 Insert the included Drivers Update CD ROM into your CD ROM drive and click Next When you insert the CD ROM you may be asked whether to ...

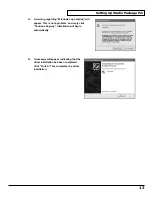
Page 13: ...indows Logo testing will appear This is not a problem so simply click Continue Anyway Installation will begin automatically 5 A message will appear indicating that the driver installation has been completed Click Finish This completes the driver installation ...

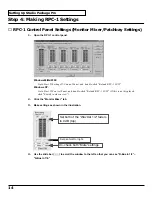
Page 14: ...click Roland RPC 1 H W Windows XP Go to Start Control Panel and double click Roland RPC 1 H W If this is not displayed click Switch to classic view 2 Click the Monitor Mixer tab 3 Make settings as shown in the illustration 4 Use the slide bar to scroll the window to the left so that you can see R Bus In 1 2 R Bus In 7 8 Set pan to left or right Un check both Mute settings Set both of the WavOut 1 ...

Page 15: ...g M05 or fig DisableAudioAppUse eps The wording may differ according to the OS you are using 10 Click Save to assign suitable name to the settings and then click OK to save them If for some reason the settings are changed you can load the settings that you saved here Click Load in the RPC 1 control panel to load the settings 11 Click Done to close the RPC 1 control panel Set pan to left or right S...

Page 16: ...ly To Install SONAR 1 Close any open programs you have running 2 Place the SONAR CD ROM in the CD ROM drive 3 If you have auto play enabled the setup will open automatically If it doesn t select Start Run click Browse and choose the Autorun exe program from the product CD and click OK to start SONAR Setup 4 Click the Install SONAR button 5 Follow the installation instructions displayed on the scre...

Page 17: ...at it shows devices on MIDI Inputs Make sure that the Roland RPC 1 MIDI Windows XP 2000 or MIDI In Roland RPC 1 Windows Me 98 is highlighted If the device isn t highlighted click on it once to select it for MIDI Input 3 If you use other MIDI Inputs you can select some MIDI input devices 4 Look at the window on the right Notice that it shows devices on MIDI Outputs Make sure that the Roland RPC 1 M...

Page 18: ...ers Output Drivers Roland RPC 1 Multichannel 1 2 Roland RPC 1 Multichannel 3 4 Roland RPC 1 Multichannel 5 6 Roland RPC 1 Multichannel 7 8 Roland RPC 1 Multichannel 9 10 Roland RPC 1 Multichannel 1 2 Roland RPC 1 Multichannel 3 4 Roland RPC 1 Multichannel 5 6 Roland RPC 1 Multichannel 7 8 Input Drivers Output Drivers PCM In 1 2 RolandRPC 1 PCM In 3 4 RolandRPC 1 PCM In 5 6 RolandRPC 1 PCM In 7 8 R...

Page 19: ... In Roland RPC 1 Windows Me 98 4 In the Output Port field select the Roland RPC 1 MIDI Windows XP 2000 or the MIDI Out Roland RPC 1 Windows Me 98 5 Click OK The Roland SI 24 name appears in the Control Surface dialog under Connected Surfaces 6 Click Close to finish setting up the SI 24 Opening the Control Surface Toolbar 1 Select View Toolbars command in SONAR to open the Toolbars dialog 2 In the ...

Page 20: ...YSTEM is lit the status is off Unless hold SYSTEM down and press MIDI ctrl to turn the MIDI control off 8 Start up SONAR 9 From the File menu choose Open 10 In the Open dialog box navigate to the directory in which you installed SONAR double click the Tutorials folder to open it and select the file TUTORIAL5 CWB 11 From the folder into which you installed the demo song select Demosong 12 When the ...

Page 21: ...hat will be controlled The correspondence between CH ASSIGN and the controlled items is shown below You can get a overlay sheet to fit over the buttons in the CH ASSIGN section The overlay renames some of the buttons for special SONAR functionality TRACK Assign SI 24 s faders and controls to tracks AUX Assign SI 24 s faders and controls to Aux buses MAIN Assign SI 24 s faders and controls to Virtu...

Page 22: ... command to reduce the demand on your CPU When STATUS MODE is SOLO Un solo dark Solo green Blinking green indicates silent by mute When STATUS MODE is REC PLAY Normal dark Arm for recording red Arm Enable a track for recording When STATUS MODE is AUTOMIX Normal dark Arm for automation red Blinking red indicates can t become automation armed because there is at least one recording armed track CH SE...

Page 23: ... SELECT PAN knobs 1 10 Parameter 1 10 of plug in selected by EQ buttons 1 4 PAN knobs 11 Bypass on off of plug in selected by EQ buttons 1 4 EQ button 1 4 Select plug in 1 4 The plug in parameters to which the SI 24 s knobs 1 10 correspond will depend on the plug in LOCATE Button When you press the LOCATE button so it lights in red the Num Pad 1 0 buttons will have the following functions 1 Specif...

Page 24: ...racks which are not selected 0 Undo track zoom You can re assign each buttons to a different command For more information see Using the Roland SI 24 Property Page p 34 VIEW Button When you press the VIEW button so it lights in red the Num Pad 1 0 buttons can open the specified view 1 Open Piano Roll View 2 Open Event List View 3 Open Synth Rack View 4 Open Loop Construction View 5 Open Loop Explor...

Page 25: ...ur guitar and the SI 24 connect it to the conventional INPUT jack rather than the GUITAR Hi Z jack Record Your Guitar Performance on Track 1 of the SONAR 9 Track 1 s In field choose the Roland RPC 1 Right Roland RPC 1 Multichannel 7 8 Windows XP 2000 or the Roland RPC 1 Right PCM In 7 8 Roland RPC 1 Windows Me 98SE 10 Set the SI 24 s CH ASSIGN to TRACK and set STATUS MODE to REC PLAY 11 Press the ...

Page 26: ... the Normal template Track 1 12 You need to insert the FxEq manually when using other tracks or templates Using FXPad Here s how you can use the joystick to control FXPad s powerful effects Inserting FXPad 1 Right click in the effects bin of the track you want to add the FXPad and select Audio Effects Cakewalk FXPad 2 The FXPad will be inserted and property page will appear Operate the FXPad 3 Use...

Page 27: ...itted from the SONAR to the sound module except 1 6 In the Bnk field enter the bank number Double click the mouse and then enter a number from the PC keyboard 7 In the Pch field enter the program change number Double click the mouse and then enter a number from the PC keyboard For the correspondence between the program change numbers and the sound or patch refer to the owner s manual of your sound...

Page 28: ...d your performance 10 Press the SI 24 s REC button to begin recording 11 When you play your keyboard the performance data will be recorded on the MIDI track Playing Back the Performance Data 12 Use the SI 24 s jog dial and FF REW buttons to move the Now Time to the location where you want to play back your performance 13 Press the SI 24 s PLAY button to play back the song ...

Page 29: ...Sampling Rate Click OK 2 Press the SI 24 s DIGITAL IN button If the DIGITAL IN button lights red things are working just fine If using the SI 24 s DIGITAL IN The SI 24 will synchronize to the word clock of the digital device In this case the RPC 1 must be synchronized to the word clock of the digital device that is supplied from the SI 24 via R BUS Change the RPC 1 Settings 1 Access the RPC 1 Cont...

Page 30: ...which you want to record fader and pan movements press STATUS lit red 3 Press the SI 24 s REC to record fader and pan movements If there is recording armed track audio data or MIDI events will be recorded instead of fader and pan movements Make sure that there is no recording armed track before Automation recording 4 When you operate the faders pan those movements will be recorded 5 Press the SI 2...

Page 31: ...ses If more than one is selected the mixdown takes into account the levels of all virtual main buses mixing the outputs of each selected bus If you want to keep the output from each different source separate check the Each Source to Separate Submix option 9 In the Mix Enables field choose the elements you want to include in the mixdown If you want to exclude muted tracks and or include only soloed...

Page 32: ... to patch through Aux 1 click the Aux 1 Send Enable button lit green You may need to enlarge a track to show the Aux 1 Send Enable button In a track click the Restore Strip Size button to expand the bus 6 Use the SI 24 s CH SELECT to select the track to which you want to apply the effect lit red 7 Turn the SI 24 s SEND EQ on lit red and use the SEND knob to adjust the amount of signal that is sent...

Page 33: ...rst Synth Output Audio option New MIDI Track and Audio Track are created at the bottom of existing tacks 5 Click OK to finish inserting a DXi Connect a MIDI Keyboard to the SI 24 and Play the Software Synthesizer 6 Connect your MIDI keyboard to the SI 24 s MIDI IN connector 7 Play your MIDI keyboard and the software synthesizer will produce sound If you do not hear sound from the DXi be sure that ...

Page 34: ...open the Toolbars dialog and check the Control Surfaces option 2 Make sure the name of the Roland SI 24 is displayed in the toolbar s dropdown menu of connected control surfaces 3 Click the Properties button that is at the right end of the toolbar To Set Your Options in the Roland SI 24 Property Page The Roland SI 24 Property Page has following options Short Cut commands You can assign each of the...

Page 35: ...Hardware Settings 15 I Int Clock 29 L LOCATE Button 23 M Master Clock 29 MASTER Fader 21 MIDI Devices 17 Monitor Mixer 14 MUTE 22 N No MIDI Outputs Selected 17 Number of Aux Buses 18 Number of Virtual Mains 18 P PAN Knobs 22 Patchbay Router 15 PLUG IN Button 23 R R BUS cable 7 REC PLAY 22 Roland RPC 1 H W 14 Roland SI 24 Property Page 34 RPC 1 6 S serial number 16 SHORT CUT Button 24 Software Synt...

Page 36: ... Sound Equipment Ltd 17 Diagorou Street Nicosia CYPRUS TEL 022 66 9426 DENMARK Roland Scandinavia A S Nordhavnsvej 7 Postbox 880 DK 2100 Copenhagen DENMARK TEL 3916 6200 FRANCE Roland France SA 4 Rue Paul Henri SPAAK Parc de l Esplanade F 77 462 St Thibault Lagny Cedex FRANCE TEL 01 600 73 500 FINLAND Roland Scandinavia As Filial Finland Elannontie 5 FIN 01510 Vantaa FINLAND TEL 0 9 68 24 020 GERM...

Reviews: