4-31
4
7
9
8
Move the HEAD CARRIAGE to the lock position by
hand.
10
After the HEAD CARRIAGE is locked, push the
Head Carriage to the left until it stops because there
is a play with the HEAD CARRIAGE.
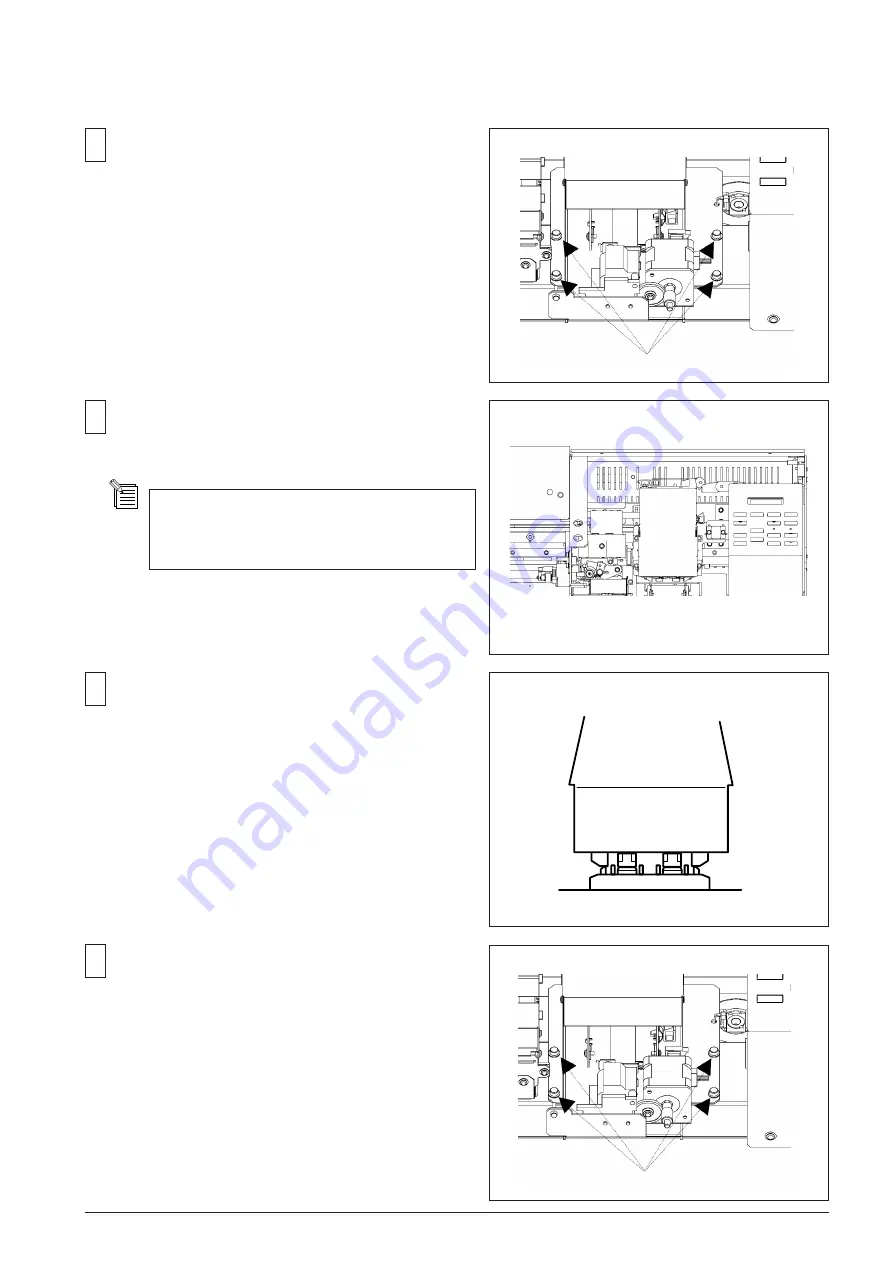
Loosen four screws for fixing the CAPPING UNIT.
Fix the four screws for fixing the CAPPING UNIT at
that position.
Press the [ENTER] key.
4 screws for fixing the CAPPING UNIT
Adjust the position of CAPPING UNIT by moving it left
and right by hand so that the caps come straight below
the each head.
Move the CAPPING UNIT up and down with the cursor
keys, and cap the heads at that position.
4 screws for fixing the CAPPING UNIT
Summary of Contents for VersaCamm SP-540V
Page 31: ...2 10 2 3 SERVO BOARD ...
Page 32: ...2 11 ...
Page 37: ...2 16 2 4 HEATER BOARD ...
Page 40: ...2 19 2 5 SUB BOARD ...
Page 88: ...3 43 9 Carry out the LINEAR ENCODER SETUP ...
Page 150: ...4 53 4 9 Check and make sure that the tension is within the range If not adjust it again ...


