Performing Printing and Cutting Separately
36
Chapter 2 Fully Utilizing the Machine
Chapter 2 Fully Utilizing the Machine
Procedure
Display the BN-20 driver's Printing Preferences screen.
P. 6, "How to Open the BN-20 Driver's Printing Preferences Screen"
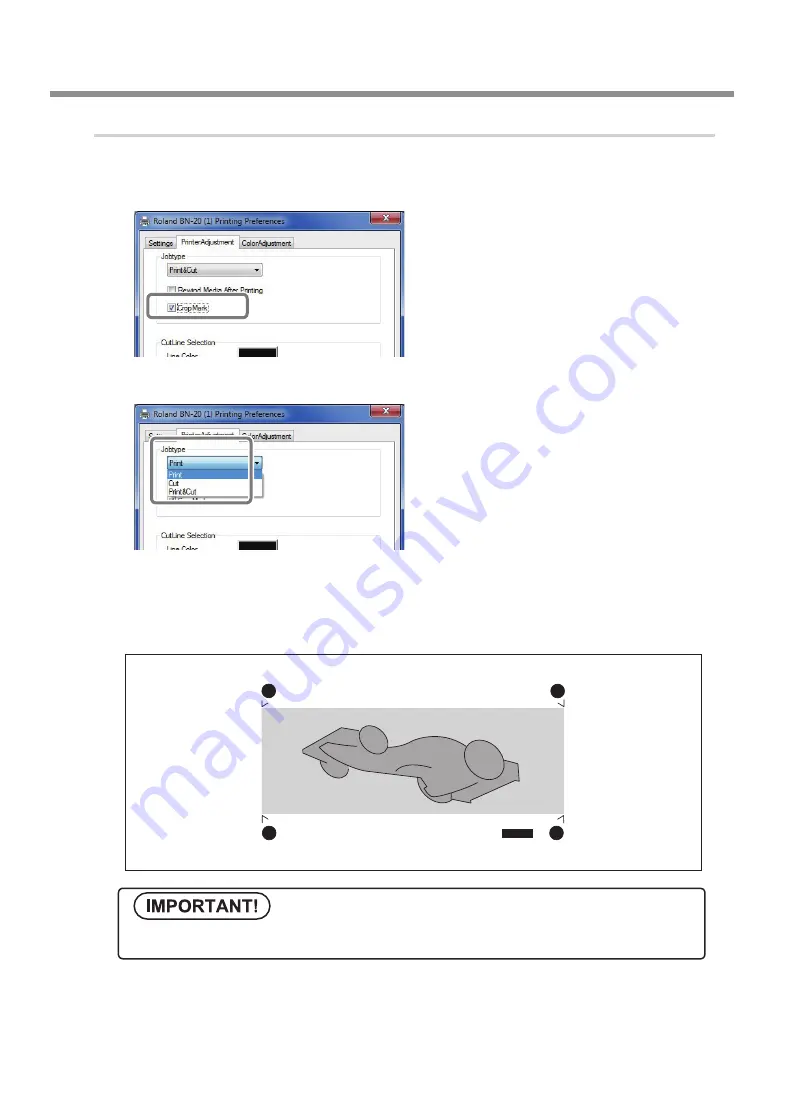
Select [Cropmark] on the [Printer Adjust-
ment] tab.
Select [Print].
When [Printing & Cutting] is selected, pull back the
media after printing the crop mark to start cutting
immediately. Cutting is performed by following the
crop mark.
Start printing.
P. 23, “STEP 5 : Starting Print Output”
The crop marks are printed as shown in the figure.
Alignment marks and symbols drawn using a graphics program cannot be used as crop marks.
Crop Mark
(Align point 1)
Crop Mark
(Align point 3)
Crop Mark
(Align point 2)
Crop Mark
(Base point)
Summary of Contents for VersaStudio BN-20
Page 28: ...26 ...
Page 106: ...104 ...
Page 107: ...105 ...
Page 108: ...106 ...
Page 109: ...107 ...
Page 110: ...108 ...
Page 111: ......
Page 112: ...R2 110905 ...


