1-74
LEF2-300
1
R
EPLACEMENT
Board Replacement
12.
Perform the following if the parameters have not been transferred by Peck.
12-1.
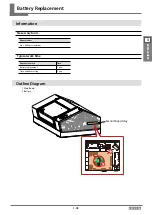
Battery installation
"
Refer to Chapter 1 "Battery Replacement".
12-2.
Firmware installation
* Refer to Chapter 2 “Firmware Upgrade”, “Firmware Installation”.
12-3.
System parameter initialization
* Refer to Chapter 2 “Firmware Upgrade”, “Firmware Installation”.
12-4.
Time and date setting
"
Refer to Chapter 2 “Firmware Upgrade”, “Firmware Installation”.
* Set the date and time in [SUB MENU] > [CLOCK] > [DATE] > [TIME].
* Set [DATE] in the order of [Year/Month/Day].
12-5.
IP address setting
* Start the machine with the service mode and set in the user menu.
12-6.
Firmware version confirmation of network controller
"
Refer to firmware version confirmation of network controller
12-7.
Head rank setting
* Set in [PRINT MENU] > [HEAD RANK].
12-8.
Serial number input
* Set in [SUB MENU] > [SERIAL NO.].
12-9.
Ink type setting
* Set in [SUB MENU] > [CHANGE INKTYPE].
12-10.
Cap & wiper check
* [IS MENU] > [IS CHECK]
12-11.
Sensor check
* [SERVICE MENU] > [SENSOR CHECK]
12-12.
Limit position & cut down position initialization
"
Refer to chapter 2 “Limit position & cut down position initialization”.
12-13.
Flushing position adjustment
"
Refer to chapter 2 “"Flushing Position Adjustment".
12-14.
Linear encoder setup
"
Refer to Chapter 2 "Linear Encoder Setup".
12-15.
Paper side sensor level adjustment
12-16.
Print head alignment
"
Refer to Chapter 2 "Print Head Alignment".
* Only horizontal adjustment is required.

