12
Video Operations
Displaying a Combination of Two Videos (Scene)
You can register a configuration of screens as a “scene” and show a combination of two videos. If you register your favorite configurations as
scenes, you can instantly switch between those configurations just by pressing SCENE buttons. The VR-1HD provides five scenes.
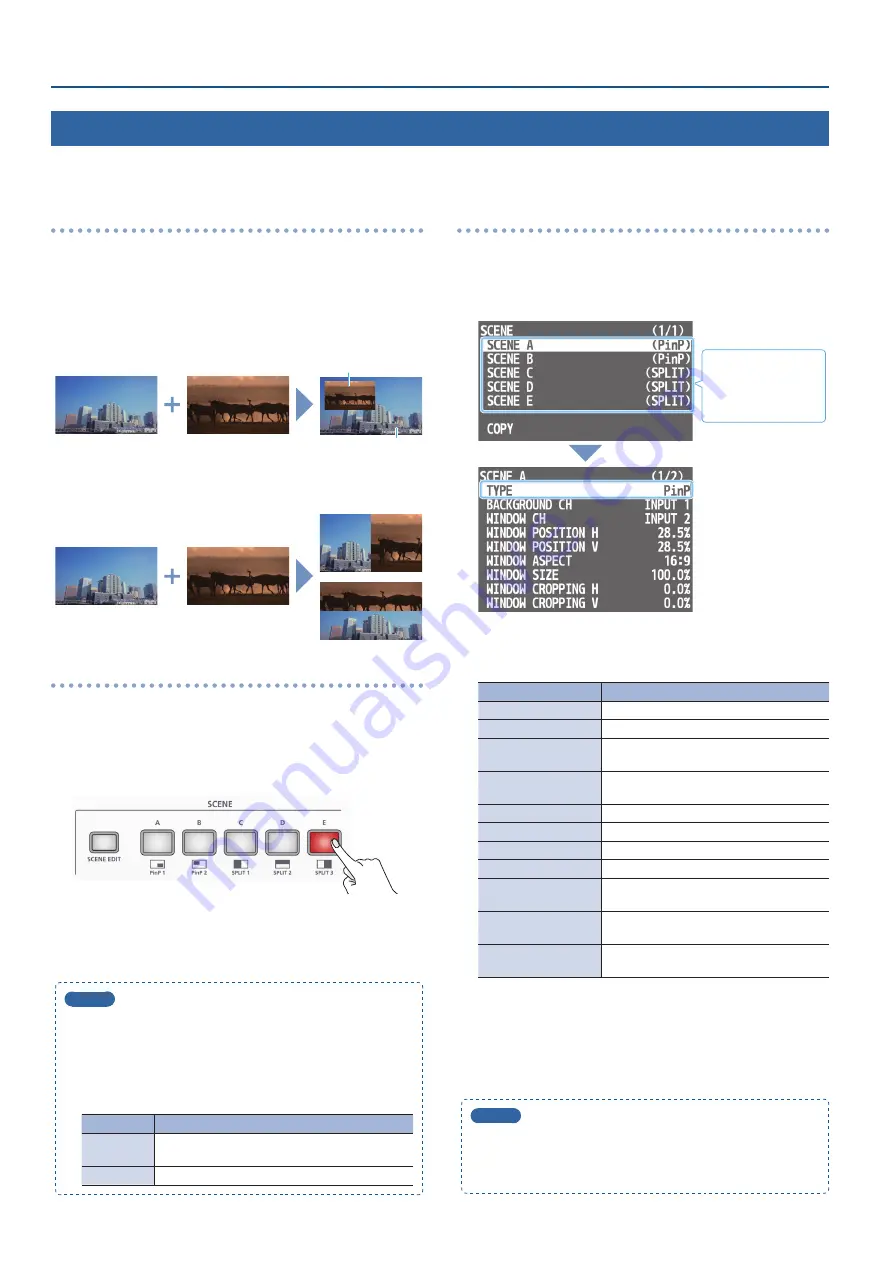
Types of screen configuration
There are two types of screen configuration that can be registered
in a scene: “picture-in-picture” overlays an inset screen onto a
background video, and “split” divides the screen horizontally or
vertically.
7
Picture-in-picture (PinP)
This overlays video of an inset screen (a small separate screen) onto
the background video.
Inset screen
Background video
7
Split
This divides the screen into left/right or upper/lower halves, and
shows two videos.
Split left/right
Split upper/lower
Recalling
With the factory settings, the screen configurations printed on the
operating panel are registered in the SCENE [A]–[E] buttons.
1
Press the SCENE button of the screen configuration that
you want to recall.
The scene is recalled, and the screen configuration changes. The
selected button is lit red.
* When you select INPUT 1–3, the scene selection is cleared.
MEMO
5
The scene transition time is shared with the video transition
time. The setting of [MENU] button
0
“TRANSITION”
0
“TIME”
applies.
5
You can change the scene transition effect.
To make these settings, use the [MENU] button
0
“TRANSITION”
0
“SCENE TRANSITION.”
Value
Explanation
BLACK FADE
A fade effect enclosing a black screen is applied.
All screens switch simultaneously.
MIX FADE
A fade effect is applied. Screens switch individually.
Registering
7
Picture-in-picture (PinP)
1
[SCENE EDIT] button
0
“SCENE A”–“SCENE E”
0
select
“TYPE.”
Shows the type of
screen configuration
that is currently
registered.
2
Turn the [VALUE] knob to select “PinP,” and press to confirm.
3
Use the [VALUE] knob to select a menu item.
Menu item
Explanation
BACKGROUND CH
Specifies the background video.
WINDOW CH
Specifies the inset screen video.
WINDOW POSITION H
Adjusts the horizontal display position of
the inset screen.
WINDOW POSITION V
Adjusts the vertical display position of the
inset screen.
WINDOW ASPECT
Specifies the aspect ratio of the inset screen.
WINDOW SIZE
Adjusts the size of the inset screen.
WINDOW CROPPING H
Adjusts the horizontal size of the inset screen.
WINDOW CROPPING V
Adjusts the vertical size of the inset screen.
VIEW POSITION H
Adjusts the horizontal position of the video
shown in the inset screen.
VIEW POSITION V
Adjusts the vertical position of the video
shown in the inset screen.
VIEW ZOOM
Adjusts the zoom of the video shown in the
inset screen.
4
Turn the [VALUE] knob to edit the value of the setting,
and press to confirm.
5
Press the [SCENE EDIT] button several times to close the
menu.
MEMO
A still image loaded into the unit (p. 15) cannot be made smaller.
If the still image is shown in the inset screen, a portion of the
still image is cut out and shown, instead of making it smaller to
match the size of the inset screen.


