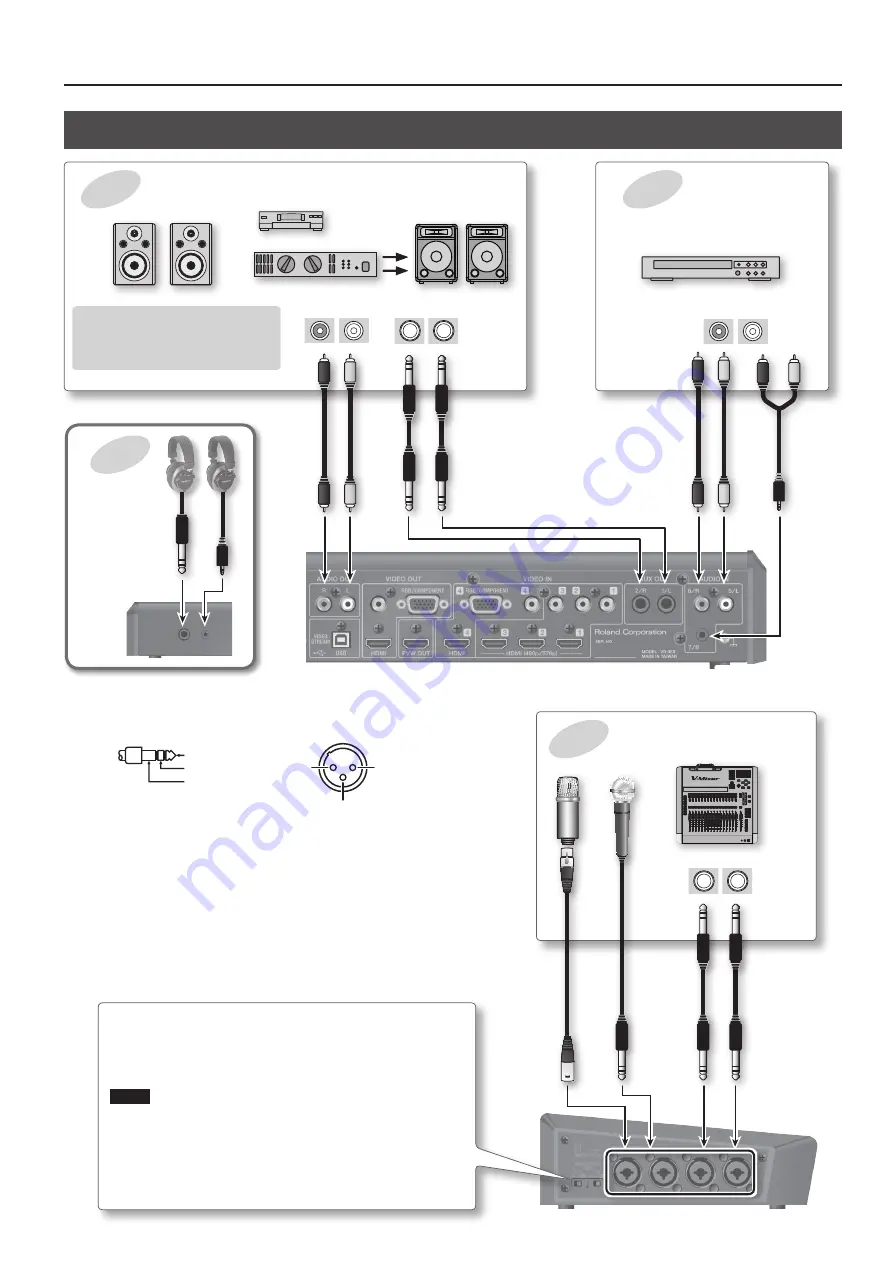
Connecting External Equipment
15
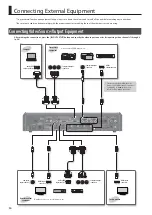
Audio output
equipment
Amplifiers, speakers, recording units, etc.
Audio source
equipment
Video decks,
CD players, etc.
Connecting Audio Source/Output Equipment
Audio input connectors
Audio output connectors
* The VR-3EX has two internal audio buses
(the MAIN bus and the AUX bus), and you
can select the audio bus to output for
each individual connector (p. 39).
Audio source
equipment
Microphones, audio mixers, etc.
Audio output connectors
Using Phantom Power
The VR-3EX supports phantom power. When using a condenser
microphone that requires phantom power, set the [PHANTOM] switch
to “ON.”
NOTE
Always turn the phantom power off when connecting any device other than
condenser microphones that require phantom power. You risk causing dam-
age if you mistakenly supply phantom power to dynamic microphones, audio
playback devices, or other devices that don’t require such power. Be sure to
check the specifications of any microphone you intend to use by referring to
the manual that came with it.
(This instrument’s phantom power: 48V DC, 10 mA Max)
Headphones
Front Panel
* AUDIO INPUT connectors 1 through 4 are balanced-type (XLR/TRS) input
jacks, and are wired as shown in the figure below. Make connections after first
checking the wiring diagrams of other equipment you intend to connect.
1: GND
2: HOT
3: COLD
TIP: HOT
RING: COLD
SLEEVE: GND
* When connection cables with resistors are used, the volume level of equipment
connected to the AUDIO INPUT connectors may be low. If this happens, use
connection cables that do not contain resistors.
* Acoustic feedback could be produced depending on the location of micro-
phones relative to speakers. This can be remedied by:
•
Changing the orientation of the microphone(s).
•
Relocating microphone(s) at a greater distance from speakers.
•
Lowering volume levels.


