11
Rollerdor RD77 Installation Guide, Edition 2022/01
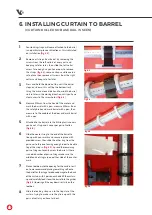
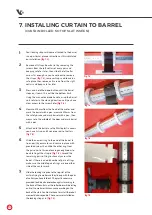
6. INSTALLING CURTAIN TO BARREL
(CURTAIN ROLLED SO BASE RAIL IS SEEN)
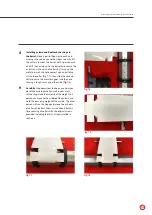
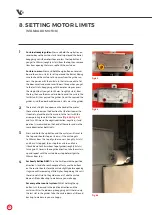
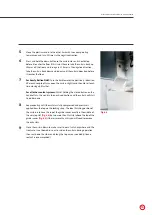
1
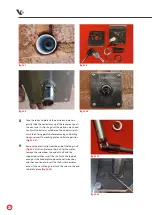
Your locking straps will come attached to the barrel
in no particular place or direction as this is dictated
on installation
(fig.6.1)
.
2
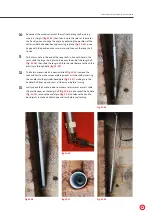
Remove all straps from barrel by removing the
screws from the left collars of every pair and
keeping safe for later, then slide the left collar
across far enough so you have room to remove
the straps
(fig.6.2)
, remove straps and leave in a
safe place then remove all screws from the right
collars and keep safe for later.
3
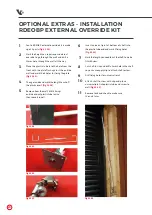
Press and hold the down button until the barrel
stops on its own, this will be the bottom limit.
Using the manual override handle, wind the barrel
so it rotates in the closing direction until you have
clear access to the screw holes
(fig.6.3)
.
4
Measure 250mm from the head of the motor and
mark the barrel with a pen, measure 250mm from
the safety brake and mark barrel with a pen, then
measure to the middle of the door and mark barrel
with a pen.
5
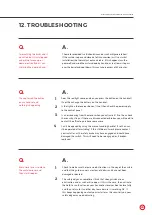
Attached to the barrel are the White plastic covers,
you have 1 strap and 1 cover per pair of collars
(fig.6.4)
.
6
Slide the nearest ring to the end of the barrel to
line up with your marks and secure in place with
provided screw, then slide the other ring from the
pair over to this one leaving enough room to be able
to get the strap in
(fig.6.3)
. Spread the remaining
pairs of rings out evenly across the barrel, if there
is an odd number of pairs of rings make sure the
middle pair of rings are one either side of the center
mark.
7
Place a tool box into the opening for the curtain to sit
on to, we recommend placing something soft onto
the barrel for this stage to reduce damage to the back
of the curtain. with 1 person each side lift the curtain
up and carefully feed it over the barrel into the guides
(fig.6.5)
lowering all the way down so it sits on the
tool box.
8
Slide the locking straps on to the top slat of the
curtain trying to make sure they line up with the
pairs of collars you have laid out.
fig.6.1
fig.6.4
fig.6.2
fig.6.3


