13
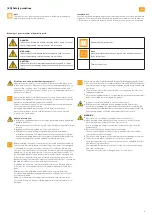
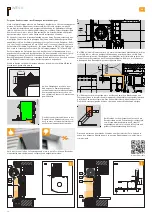
For thermal insulation composite systems, elements need to be insulated with a
thickness of approx. 40 mm using stepped profiles. If this is not possible, approp-
riate measures must be taken to reduce the risk of fissures appearing in the render.
Ideally, this is done from the outset in agreement with a building professional and
in coordination with the planners as this potentially has a big impact on the overall
planning and building process.
At the installation stage, before rendering, the area between the cover frame and
the guide rail needs to be sealed to meet the same resistance-to-driving-rain class
as required by the window. This can be done using sealing tape or foil, an appropri-
ate rail, or other appropriate arrangements.
At the installation stage, before rendering, it must
be ensured that rainwater drains off onto the win-
dow sill. Ideally, the edge profile is notched and
the rails run down to the window sill (be aware of
lengthwise expansion!).
The following points must be considered when planning:
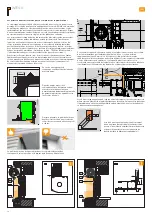
After successful installation, the plaster baseboard should be rendered within
three months. In the event that rendering is not performed within three months,
Roma recommends weather-protecting the Styrodur boards using appropriate
means (however, do not seal airtight). Danger of overheating! Please also note that
depending on the installation location, rendering the Styrodur boards directly may
not be possible. In this case, please read the following instructions:
The following information is a short summary of the most important points that
you will find described and illustrated in current German guidelines and guidance
documents (such as the guidelines for joints between windows and roller shutter,
venetian blind or textile screen boxes on render, thermal insulation composite
systems or dry constructions (= „GemRi“ joint guideline or the rendering guideline);
the windowsill guidelines – for installing a windowsill in thermal insulation composite
system façades and rendered façades, as well as suspended façades; RAL-Montage
guidance documents; and TR105 published by the BVRS):
To avoid fissures forming in the render, the boxes should be tightly secured in place
to prevent them from moving. Foam filling can be used on the sides. However, non-
expanding foam should be used to avoid damaging any elements. Please ensure
that no foam gets onto the controls or penetrates inside the box.
If a box is installed after rendering, it should be mounted using a sealing Kompri
band on interstices.
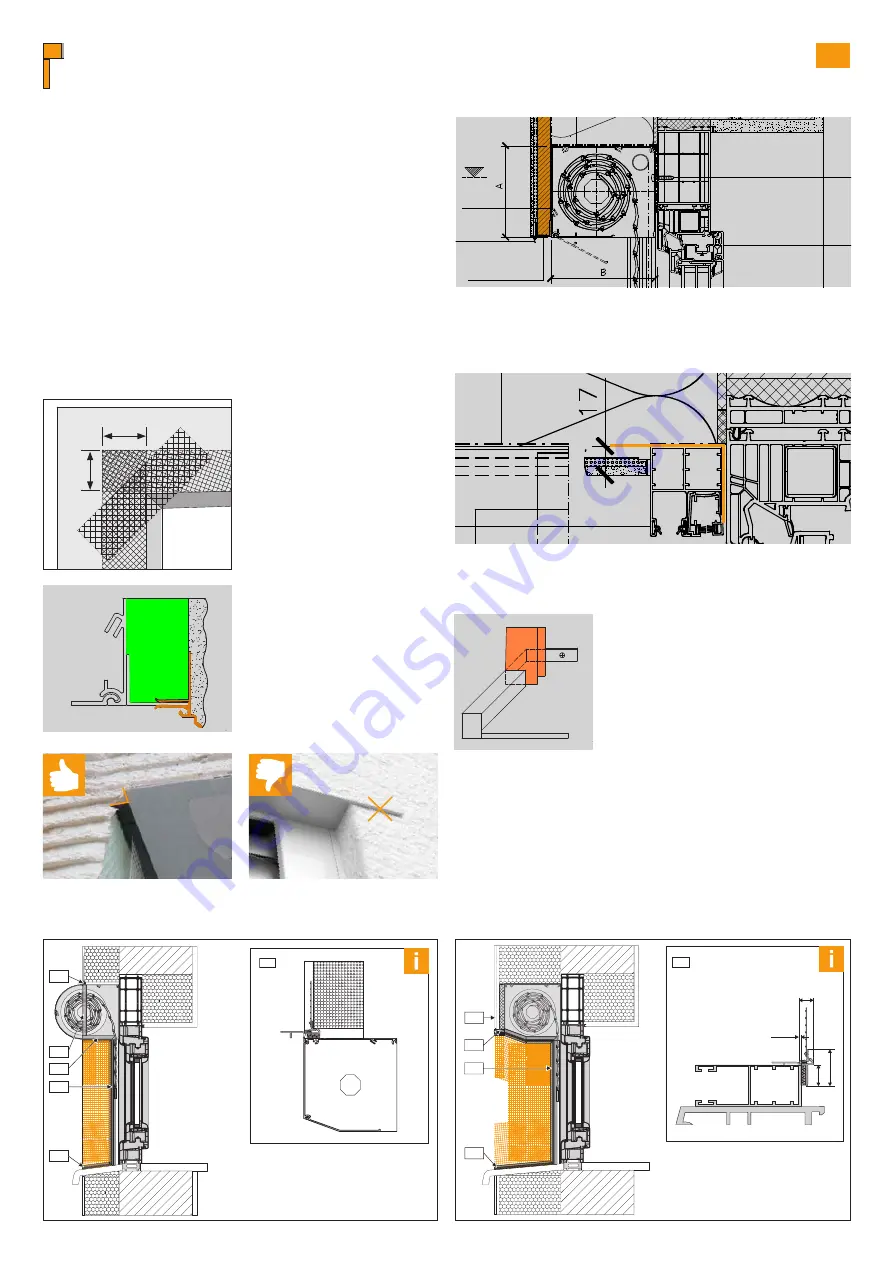
Where different elements join together,
in addition to placing reinforcement
fabric vertically and horizontally, it can
also be placed diagonally for extra
strength to provide optimum protection
against fissuring.
As a rule, the box’s bottom profile
cannot be used as a render edge and
needs to be decoupled from the render
using a clip-on profile.
Additionally, it should not extend into the render and needs to be notched as per
the position and width of the installed fabric guide rail.
INTEGO
275
275
270
1 mm
8 mm
12 mm
20,6 mm
275
270
270
275
275
270
270
275
275
275
270
1 mm
8 mm
12 mm
20,6 mm
275
270
270
275
275
270
270
275
275
275
270
1 mm
8 mm
12 mm
20,6 mm
275
270
270
275
275
270
270
275
275
275
270
1 mm
8 mm
12 mm
20,6 mm
275
270
270
275
275
270
270
275
TD
01366
Fensterbank
Fensterelement
Mauerwerk
Mauerwerk
Fensterelement
XP-Zusatz-
befestigung
nach Erfordernis
Tropfkante
APU-Aufsteckprofil
24.09.2015
Kastenprofil
INTEGO.XP
B259.XP
INTEGO.XP
Rollladenanschluss bei Mauerwerk mit Wärmedämm-Verbundsystem,
Kasten verputzt, mit Sturz.
1
Schnitt 1-1
INTEGO.XP
Kastengrösse 138
Kasten -
Abschlusswinkel
Führungsschiene
P-XP-DiFS 53x42
Führungsschiene
P-XP-DiFS 53x42
Dichtebene
Schlagregendicht
Armierung mit
Glasfasergewebe
Decke
Sturz
Das schematisch dargestellte Detail ist als unverbindlicher Lösungsvorschlag zu sehen.
Die Schlagregendichtheit wird zwischen Fenster und Baukörper hergestellt.
WDV-System nach Herstellerangaben.
1
Putzträgerplatte
20mm, vollflächig mit
WDVS verklebt und
Zusatzbefestigung.
Überstand seitlich
über Leibungskante
min. 15cm
Putzträgerplatte
20mm, vollflächig mit
WDVS verklebt und
Zusatzbefestigung.
Überstand seitlich
über Leibungskante
min. 15cm
Dichtebene
Schlagregendicht
1:5
Stand
Aussenputz
Klebemasse
Index
Detail Nr.
Masstab
ROMA KG
Dämmung
WdVs
ma
x.
TD
02586
Fensterbank
Fensterelement
Mauerwerk
Mauerwerk
Fensterelement
XP-Zusatz-
befestigung
nach Erfordernis
Tropfkante
APU-Aufsteckprofil
24.09.2015
Kastenprofil
INTEGO.XP
B259.XP
INTEGO.XP
Rollladenanschluss bei Mauerwerk mit Wärmedämm-Verbundsystem,
Kasten verputzt, mit Sturz.
1
Schnitt 1-1
INTEGO.XP
Kastengrösse 138
Kasten -
Abschlusswinkel
Führungsschiene
P-XP-DiFS 53x42
Führungsschiene
P-XP-DiFS 53x42
Dichtebene
Schlagregendicht
Armierung mit
Glasfasergewebe
Decke
Sturz
Das schematisch dargestellte Detail ist als unverbindlicher Lösungsvorschlag zu sehen.
Die Schlagregendichtheit wird zwischen Fenster und Baukörper hergestellt.
WDV-System nach Herstellerangaben.
1
Putzträgerplatte
20mm, vollflächig mit
WDVS verklebt und
Zusatzbefestigung.
Überstand seitlich
über Leibungskante
min. 15cm
Putzträgerplatte
20mm, vollflächig mit
WDVS verklebt und
Zusatzbefestigung.
Überstand seitlich
über Leibungskante
min. 15cm
Dichtebene
Schlagregendicht
1:5
Stand
Aussenputz
Klebemasse
Index
Detail Nr.
Masstab
ROMA KG
Dämmung
WdVs
ma
x.
TD
01
45
7
[
EN ]
200 mm
20
0 m
m
Summary of Contents for MODULO.P
Page 5: ...05 1 2 3 0 4 0 ...
Page 7: ...07 15 mm 8 mm 15 mm 8 mm min 20 mm ca 30 mm 8 10 mm 15 mm 13 mm 13 mm ...
Page 9: ...09 DE Probelauf EN Test run FR Test NL Test run DE Prüfen EN Check FR Vérifier NL Controleren ...
Page 15: ...15 Notes ...
Page 19: ...3 2 0 DE Montage EN Assembly FR Montage NL Montage 1 0 1 2 3 0 4 0 ...
Page 20: ...4 15 mm TD01526 TD01527 TD01525 min 25mm 8 mm 15 mm 8 mm 8 ...


