Installation Instructions 1619-2D / 3D Bracket Kit
Step 6:
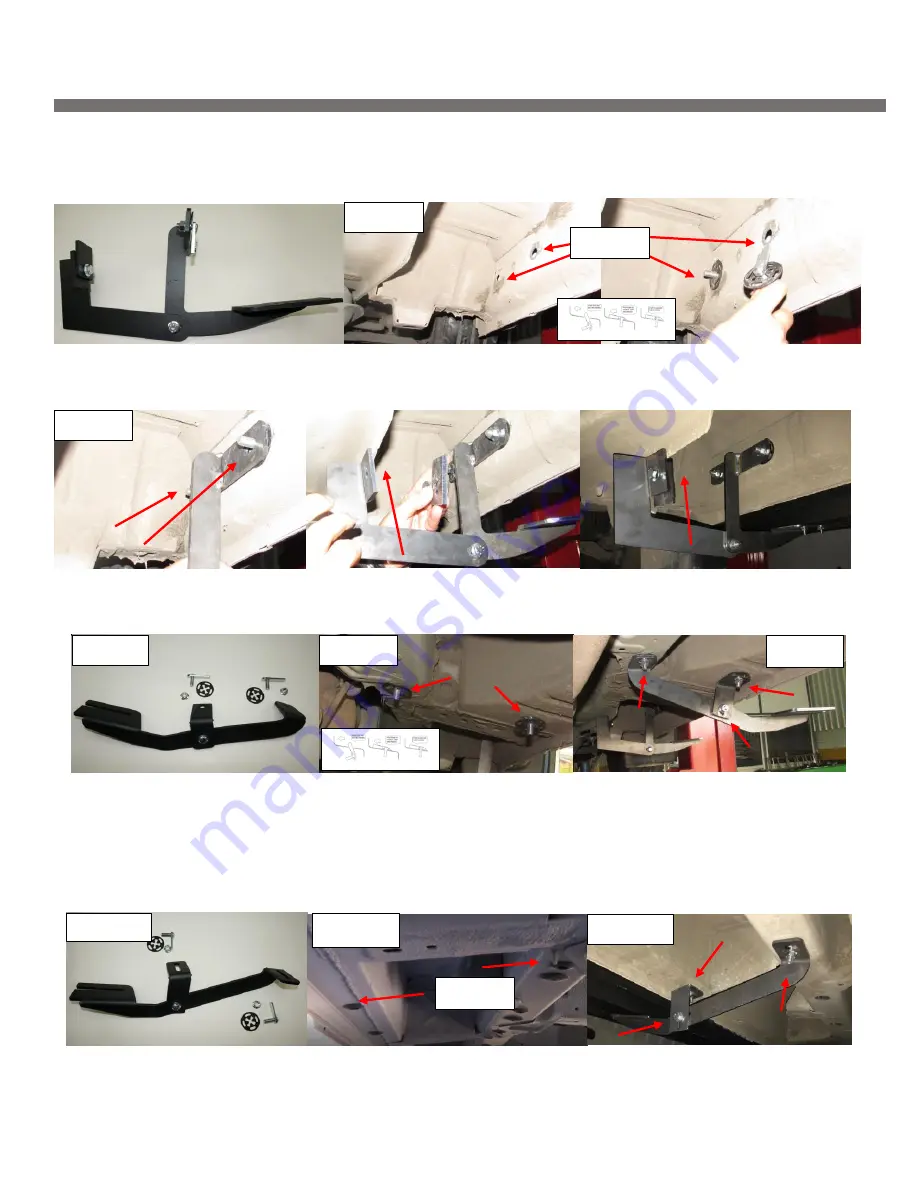
Pass Front, remove factory rubber plugs as shown on Figure 5
pre-assemble the bracket for easier
placement.
Install provided HTC 243
Step 7:
Bring pre-assembled bracket and install onto HTC 243
and secure, push clamp end onto the vehicle
chassis lip push up and secure Figure 6. Do not tighten at this time since the board will help level the bracket.
Step 8:
Pre-assemble bracket as shown on Figure 7, install provided HTC 243 as shown on Figure 8. Install
pre-assembled bracket as shown on Figure 9. Do not tighten
NOTE: If you are only installing front driver and front passenger running boards please proceed to
Step 10 and install the running boards.
Step 9:
Pre-assemble Pass 3rd bracket Figure 10, install HTC 243 on shown locations Figure 11. Attach pre-
assembled bracket as shown on Figure 12. Do not tighten
Please note bracket positioning for Long Wheel
Base 5,8,2,1 and Short Wheel Base models 5,8,1,2.
HTC 243
Figure 5
Figure 6
Figure 10
Figure 11
Figure 12
HTC 243
Figure 7
Figure 8
Figure 9


