background image


Unplug the projector. 


Loosen the wingnut, and carefully remove the projector, putting it somewhere safe. 


Remove the screws in the lid using the Allen key provided. 


Carefully put the lid to one side. 


Summary of Contents for Manhattan II 21774

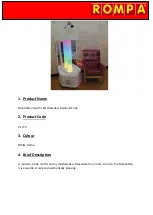
Page 1: ...with LED Waterless Rainbow Tube 2 Product Code 21774 3 Colour White frame 4 Brief Description A modern sleek multi sensory masterpiece Moveable from room to room the Manhattan II is versatile sturdy...

Page 2: ...Use Move from room to room to allow many different people to enjoy this product 8 Compatible ROMPA Products Wi Fi compatibility This unit is Wi Fi compatible and therefore will respond wirelessly to t...

Page 3: ...aramount 11 Safety Always supervise the use of this product When moving this product use the handles and move the unit with care Do not stand or sit on the unit it is not intended to take a person s w...

Page 4: ...immediate view but where it can be seen when looked for Keep the keys in a safe place and make a note for all users where this is You could keep one key from each ring in each lock but this is not re...

Page 5: ...in the middle of the plate and then through the top of the Manhattan Fasten with a wing nut 2 Put the effect wheel supplied onto the wheel rotator 3 Slide the wheel rotator into the rear gate of the...

Page 6: ...D A CD is included but you can use your own CD 3 Use the PLAY PAUSE button to start and pause your CD 4 Use the STOP button to stop your CD 5 Use the NEXT button to fast forward to the next track 6 Us...

Page 7: ...Unplug the projector Loosen the wingnut and carefully remove the projector putting it somewhere safe Remove the screws in the lid using the Allen key provided Carefully put the lid to one side...

Page 8: ...odels may vary slightly but essentially look like the units below Locate the dials below Turn up the control to desired level You can also adjust the Bass and Treble if required Test the unit is at th...

Page 9: ...rophones can be plugged in as desired Use the Volume 1 control for microphone 1 and use Volume 2 control for microphone 2 These volume dials are for the microphones only and not the CD facility for ex...

Page 10: ...and light source can be controlled at the same time The 8 Colour Wirefree Controller is not compatible with the projector supplied Please refer to the separate instructions required for the 8 Colour...

Page 11: ...g your waterless tube Check that you have selected the correct product in the display on the underside of the 8 Colour Wirefree Controller make sure it is set to all Wi Fi products Problem The music s...

Reviews: