background image

- 5 - 


Maintenance 

  Incomplete cleaning could cause function failures and a degradation of the fan form. 

Proper cleaning is the best way to ensure trouble free performance from your spray gun. If your gun is not 

thoroughly cleaned, damage and poor spraying will result. Problems caused by improper cleaning will not 

be covered by the warranty. Clean the spray gun immediately after each use. 

To clean your spray gun: 

1.    Spray a small amount of solvent through the spray gun. 

Note:  Check  with  local  laws  regarding  this  practice.  If  you  are  spraying  on  a  regular  basis,  spraying 

solvents into the air may be illegal. A cabinet style spray gun cleaner may be required. 

2.   

Disconnect the gun from the compressed air!


3.    Unscrew the cup. 

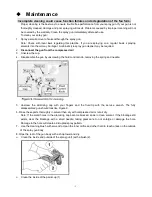
4.    Disassemble the gun by unscrewing the fluid control knob, removing the spring and needle. 


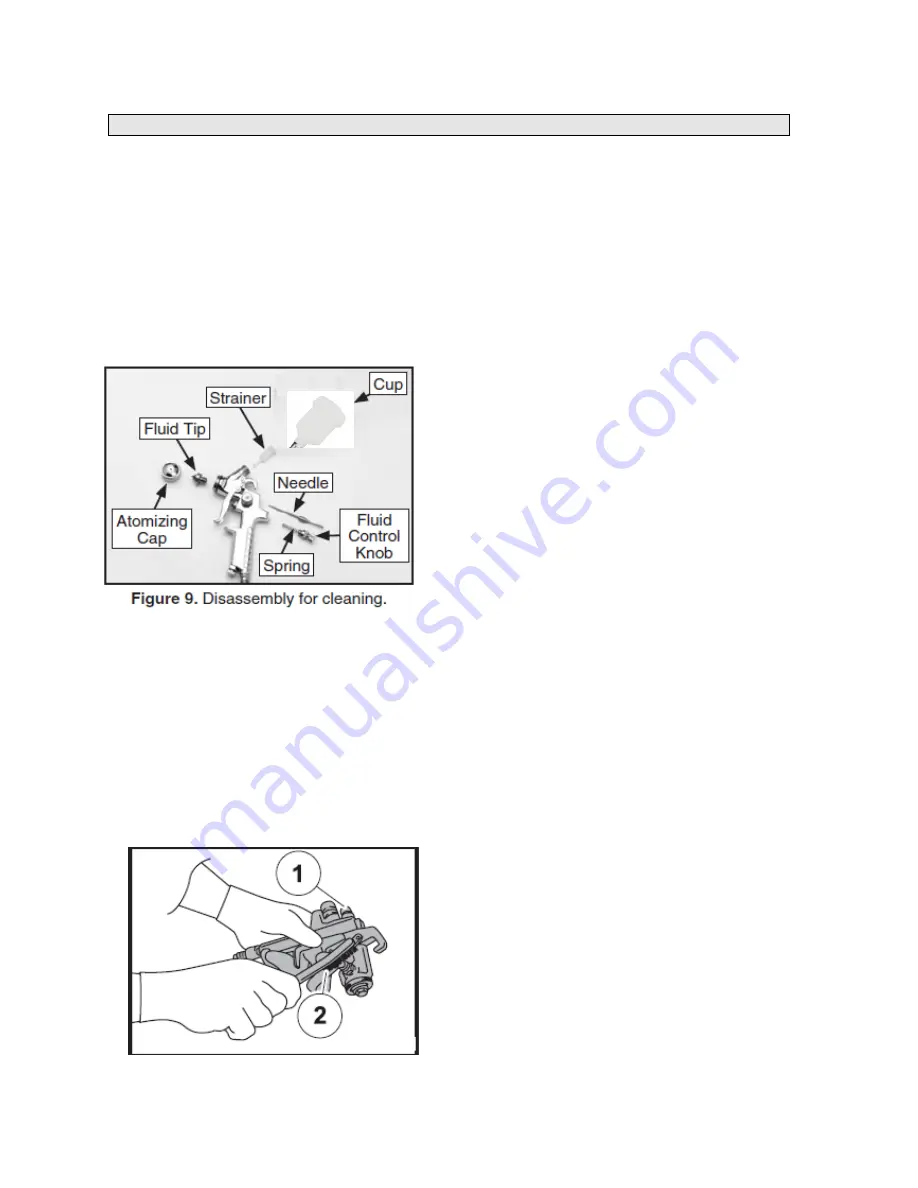
5.  Unscrew  the  atomizing  cap  with  your  fingers  and  the  fluid  tip  with  the  service  wrench.  The  fully 

disassembled gun should look like Figure 9. 

6. Rinse these parts thoroughly in solvent then dry with compressed air or let air dry. 

Note: If the small holes in the atomizing cap become blocked, soak in clean solvent. If the blockage still 

exists,  clear  the  blockage  with  a  small  needle,  taking  great  care  to  not  enlarge  or  damage  the  hole. 

Damage to the hole will create a disrupted spray pattern. 

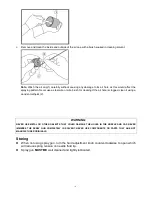
7.    Use the cleaning brush with solvent to clean the inner orifice and other hard to reach areas on the outside 

of the spray gun body. 

8. Wipe the rest of the gun body with a shop towel and dry. 

  Clean the inside and outside of the spray gun(1)with a brush(2). 


  Clean the inside of the paint cup (1). 

Summary of Contents for R805

Page 1: ...uctions carefully before starting the product Keep this Manual for future reference Residual Risks Even when the tool is used as prescribed it is not possible to eliminate all residual risk factors Th...

Page 2: ...r skin see fig 1 2 Never use oxygen combustible or any other bottle gas as a power source or would cause explosion and serious personal injury see fig 2 3 Fluid and solvent can be highly flammable or...

Page 3: ...up onto the top of the body 3 Install the barbed hose fitting into the base of the gun handle and tighten in place with the lock nut 4 Secure the air hose to the barbed fitting with a hose clamp 5 Att...

Page 4: ...e painting This will cause a build up of paint in the center of the stroke and an insufficient coating at each end 3 Trigger the gun properly Start the gun moving at the beginning of the stroke BEFORE...

Page 5: ...air 3 Unscrew the cup 4 Disassemble the gun by unscrewing the fluid control knob removing the spring and needle 5 Unscrew the atomizing cap with your fingers and the fluid tip with the service wrench...

Page 6: ...If the air hole is clogged clean it using a wooden toothpick 2 WARNING NEVER USE METAL OR OTHER OBJECTS THAT COULD DAMAGE THE HOLES IN THE NOZZLE AND CAP NEVER IMMERSE THE SPRAY GUN COMPLETELY IN SOLV...

Page 7: ...sure 3 Thin material Narrow center pattern 1 Volume control turned in too far 2 Inlet air pressure too high 3 Fluid pressure is too low 4 Material is too thin 1 Increase volume 2 Reduce inlet air pres...

Page 8: ...1 23 Sealing Ring 1 39 Bolt 1 8 Trigger Stem 1 24 Depress Spring 1 40 Pattern Adjustment Nut 1 9 Foam Gasket 1 25 Trigger Pin 1 41 Pattern Adjustment Knob 1 10 O ring 4 9x1 5 1 26 Trigger Pin 1 42 O...

Reviews: