background image

Summary of Contents for B9458B0

Page 1: ...Numbers i _ IN THE BOX BELO Model and Serial numbers are on a plate behind the oven door on the front frame If you call for service or with a question have this information ready Keep this book your installation guide your warranty and the sales slip toget her Model No Part No 338973 ...

Page 2: ...Broiling Tips l Postionrng Broiler Pan l Choosing Oven Cookware l Common Bakrng Problems and Causes 394 5 7 5 6 7 7 7 7 8 10 8 8 9 9 10 10 CLEANING AND CARE 11 15 l Oven Cleaning 11 12 Cleaning Chart 13 l Removable Oven Doors 14 Removable Oven Racks 15 Replacing the Oven Light 16 l Removable Oven Control Knob 16 Adjusting Oven Temperature 17 PREVENTING SERVICE CALLS 18 ...

Page 3: ...trols Never use your oven for warming or heating a room Such use can be dangerous and hurt oven parts Y Never heat unopened food containers Pressure z build up may make container burst and cause z injury u Never wear loose clothing while using your oven Such clothes could catch fire Always use care when opening oven door Let hot air or steam out before moving food Always move oven racks whrle oven...

Page 4: ...ou may start a fire Never use aluminum foil tdline oven bottoms On ly use foil as shown on page 8 of this book Im proper use of foil could start a fire SELF CLEANING OVEN ONLY Always take the oven racks the broiler pan and other pots and pans out of the oven before a self clean cycle Never use any kind of oven cleaner or oven liner coattng Do not use any spray cans near your oven The gas used to m...

Page 5: ...ning the SET knob 1 Push the CLOCK button 2 Turn SET knob to correct time of day Clock is now set Note To display the lime of day during tlmed baking push the CLOCK button Thus will show the time but will not cancel any oven operation TO SET THE TIMER 1 Push TIMER button 2 Turn SET knob to desired amount 01time The Timer WIIIimmediately begin lo count down 3 When time is up the end 01 cycle tone w...

Page 6: ...Ihe oven WIIIturn off Push and hold the COOK TIME button to find but when the oven wrll turn on When a function has been entered you can recall what has been pro grammed by pushing the corresponding function button The messages in the display show you which Iunction IScurrently being dlsplayed While the function ISdisplayed you can change It with the SET knob You can change any programmed function...

Page 7: ...on programmed Pushrng the OVEN CANCEL button wtll clear all functrons except Ihe clock and Trmer The oven lrght switch is located on the left srde of the control panel See page 16 for more Informalron s OVEN VENT When the oven IS on heated air moves through a vent below the control panel C The vent area could get hot dunng oven use g The vent is needed for proper air flow in the oven and good baki...

Page 8: ...f arr Improper arr movement causes uneven brown rng and cookrng A Do not cover the oven bottom or an entrre oven rack wrth 1011 The fool can block normal heat flow cause cookrng farlures and damage Ihe oven rnlenor Normally there should be 1 to 2 Inches of air soace on all srdes of each pan In the oven See 11 sbelow For Roasting For slow browning place a fool lent loosely over the meat ThusISespec...

Page 9: ...ck Rare Medrum Well Done l Always pul the lood berng brorled on the proper rack see chart al right Food placed too close lo the broiler may spalter smoke or calch fire l For maxrmum furcrness sall the frrst side fust belore turnrng the meal Salt the second side JUSIbelore serving Ground Beef Padres Medium 1 Thrck Medrum 12 Thtck l Brush chicken and fish with butter several times as they broil When...

Page 10: ... MIDDLE l Too much flour l Oven temperature loo high CAKE NOT DONE IN CENTER l Wrong s12e pan l Oven loo hol l Pan no centered In oven v CAKE FALLS 2 l Too much shortenrng llquld or suga l Temperature loo low I l Pan 100 small l Oven door opened too often l Too much leavening or stale leavening l Overmlxlng aHer addlng flour BOTTOM PIE CRUST SOGGY l Fllkng too JUICY l Fllllng allowed lo stand In p...

Page 11: ... the seal Do not use any collon materrals lo clean IL rub a hole e seal An intact and well lrnrng oven door sea IS essenlral lor energy etircrenl Oven operatron and good baking results II you nolrce the seal becomrng worn frayed or damaged In any way or 11II has become drsolaced on lhe door you should reolace the seal mow mAML DO NOT use commercral oven cleaners or oven oroleclors rn or near Ihe o...

Page 12: ... 1 Press the OVEN CANCEL button 2 Wail unlll the oven has cooled below locking temperature and the word LOCK IS off in the display You 111 not be able to open the door unless the oven temperature IS al a sale level If you cannot open the oven door immediately after the word LOCK goes off wall about one minute and try agaln WHEN A CLEAN CYCLE IS FINISHED 1 When a clean cycle IS flnlshed the word CL...

Page 13: ...ated rinse the lnsde of the wlndow wtlh vinegar and water lhen dry scratch the surface oven Traces of the cleaner could put statns on the frnrsh when heated To make sure this does not happen give a final rinse of vinegar and waler Caution Do not coal heatin a element and thermostat bulb oven ever use oven cleaner on outs1d in upper part of aluminum chrome or baked enamel e oven surfaces Self Clean...

Page 14: ... up with the hinges The hmge arms must shll be In the stop postion STOPPOSITION 2 Slide the door down onto the hinges as far as II will go and close the door REMOVABLE OVEN DOOf models with removable rack guides The oven doors can be removed for cleaning 2 To remove ii 7 Open Ihe door lo the brad stop poslfton and grasp the door at each side see Illustration 2 u Lift the door up a bit then pull st...

Page 15: ... Ihe rack a btr and push Ihe rack all the way In To remove 1 Pull the oven rack out then up In one motion 2 Llh lhe front of the rack guide to unhook II from the oven wall and pull OUI See the cleaning lnstructlons on page 13 RACK HOOK RACK BUMP 15 REMOVABLE OVEN RACKS some models 0 Be careful nol lo scratch the oven fmlsh when mstallmg or removing the oven rack F al To install z 1 Se the raised b...

Page 16: ...lb GLASS RETAINER I SOCKET GASKET b c I GLASS 0 COVER SCREW BULB SELF CLEANING OVENS BULB SOCKET _ b t J i u NON SELF CLEANING OVENS REMOVABLE LOWER OVEN CONTROL KNOB All control knobs may be removed for easy cleaning by pullrng the knob L straight off the stem See the cleaning chart on page 13 3 Caution Read these instructions carefully before replacing the knobs Replacing the knobs improperly WI...

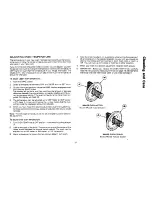
Page 17: ...er means lhal the oven WIII be cooler by displayed amount of i grees When you have made the desrred adtustment push the CLOCK but ton to go back to the time of day drsplay or use your oven as you would normally Note The self clean temperature WIIInot be changed by above describ ed adjustment To adjust lower oven temperature 1 Turn OVEN TEMP knob to OFF and re ve the knob by pullrng straght Off 2 L...

Page 18: ...Broiler pan lull of grease lefi In range from the last time you brolled food Dirty broiler pan must not be left In the range or smoking and a broiler fire can result the next ttme the oven IS used l Aluminum foil not used properly and grease can not drain correctly See page 8 COOKING RESULTS ARE NOT WHAT YOU EXPECTED l Are you using a tested recipe from a reliable source Are you follow ing all the...

Reviews: