background image

Dehumidifier Use (cont.)

6

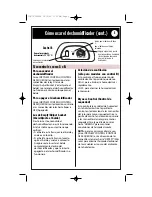
To turn dehumidifier on 

Press the ON/OFF button. If the
Empty/Adjust Bucket light comes on, the
dehumidifier will not operate. Empty or
adjust bucket.

Each time you unplug the dehumidifier
or power is interrupted, the control will
return to your previous settings.

To turn dehumidifier off

Press the ON/OFF button. The
dehumidifier will retain your last
settings.

Empty/Adjust bucket light

If this light is on, the dehumidifier is not
running. This light indicates that you
need to check:

• 

If the bucket is full, empty bucket and

replace.

• 

If the bucket is not in position, remove

bucket and replace. Make sure the
bucket fits all the way into the
dehumidifier and the light is off, or
dehumidifier will not run.

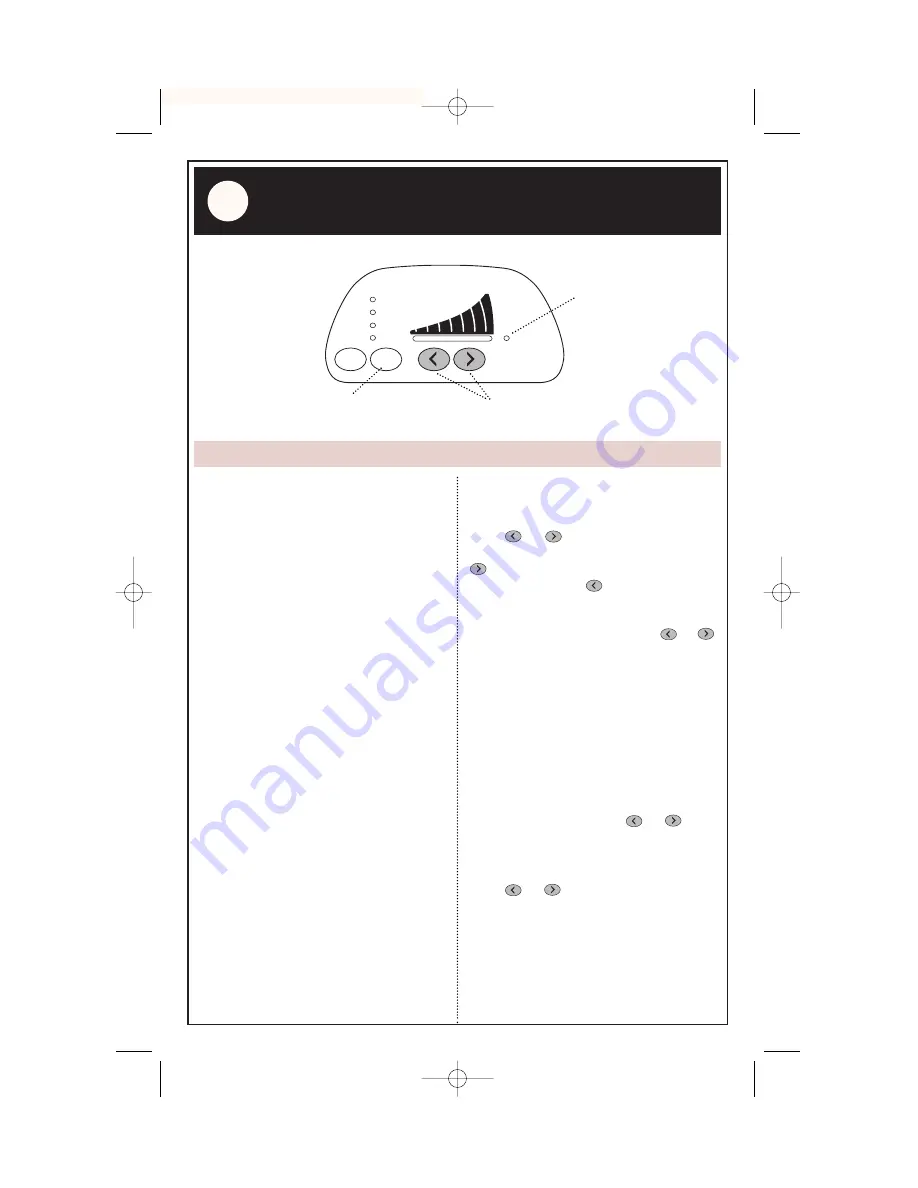
Mode selection

Press MODE button to select fan speed.
Choose LOW, HIGH, CONTINUOUS or
AUTO DRY. High speed will give a faster
response time to reach the humidity set
point. Low speed will give a slower

response time to reach the humidity set
point, but at a lower sound level.

If you have selected LOW or HIGH:

Press 

or 

to set the amount of

moisture you want removed. Pressing

increases the amount of moisture

removed; pressing decreases 

the

amount of moisture removed. The
indicator light will change according to
the number of times you press

or

.

If you have selected CONTINUOUS:

You cannot select the amount of
moisture you want removed. In
Continuous mode, the dehumidifier will
run continuously regardless of the
humidity level.
The dehumidifier will shut off only if the
bucket is full or removed.

NOTE:

The Deicer will turn the

compressor off if a low temperature
condition exists. Pressing 

or 

will

not increase or decrease the amount of
moisture removed.

If you have selected AUTO DRY:

Press 

or 

to set the amount of

moisture you want removed. AUTO DRY
provides the best humidity control of all
the modes by automatically adjusting
the fan speed and/or turning the
dehumidifier on and off to maintain your
settings.

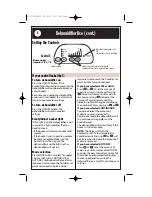
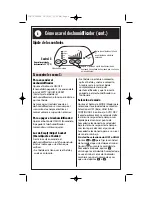
If your control looks like C:

MODE

ON / OFF

CONTINUOUS

HIGH

LOW

EMPTY /ADJUST

BUCKET

AUTO DRY

MOIST

DRY

selects mode

Control C

adjusts humidity removal set point 
(amount of moisture removed from room)

indicates the bucket is full 
OR
the bucket is not in position

Minimum operating
temperature is 44°F (7°C)

Setting the Controls

1187730ENv10  12/3/03  1:11 PM  Page 6

Summary of Contents for RD50CBM2

Page 1: ...s 3 Location Requirements 4 Dehumidifier Use 5 8 Setting the Controls 5 Removing and Emptying Water Bucket 7 Water Level Float and Automatic Shutoff 8 Dehumidifier Care 9 If You Need Assistance or Ser...

Page 2: ...njury or sickness when using your dehumidifier follow these basic precautions Plug into a grounded 3 prong outlet Do not remove ground prong Do not use an adapter Do not use an extension cord Unplug d...

Page 3: ...ock hazard the cord must be plugged into a mating 3 prong ground type outlet grounded in accordance with local codes and ordinances If a mating outlet is not available it is the personal responsibilit...

Page 4: ...des of the dehumidifier Keep all outside doors windows and other openings closed when operating dehumidifier Humid outdoor air will increase dehumidifier workload Installation Instructions cont 12 18...

Page 5: ...urn dehumidifier off Turn DRYNESS CONTROL counterclockwise to OFF Empty Adjust bucket light If this light is on the dehumidifier is not running This light indicates that you need to check If the bucke...

Page 6: ...the amount of moisture you want removed Pressing increases the amount of moisture removed pressing decreases the amount of moisture removed The indicator light will change according to the number of t...

Page 7: ...of drain hose connector 3 Attach a garden hose to drain hose connector The garden hose should not be longer than 8 ft 2 4 m Run other end of garden hose into a floor drain Check that the hose lies fl...

Page 8: ...low position Both settings will turn off the dehumidifier automatically To adjust water level push float left or right until it snaps into place High setting Water Level Float is preset to the high p...

Page 9: ...int with a good grade enamel paint to prevent rust 3 Have an authorized servicer clean and service the interior coils of your product annually Water bucket cleaning Every few weeks rinse the inside of...

Page 10: ...ompressor turns off and on and when the Automatic Shutoff Switch is working Air movement from the fan Normal operating conditions Dehumidifier will put out heat If you need service or call with a ques...

Page 11: ...spond properly to your request Direct service branches BRITISH COLUMBIA 1 800 665 6788 ALBERTA 1 800 661 6291 ONTARIO Ottawa area 1 800 267 3456 except 807 area code Outside the Ottawa area 1 800 807...

Page 12: ...1187730 11 03 2003 All rights reserved Printed in U S A 1187730ENv10 12 3 03 1 12 PM Page 12...

Page 13: ...ci n 4 C mo usar el deshumidificador 4 9 Ajuste de los controles 4 C mo sacar y vaciar el balde de agua 7 Flotador de nivel del agua y apagado autom tico 8 Cuidado del deshumidificador 9 Si necesita a...

Page 14: ...rga el ctrica lesi n o enfermedad al usar su deshumidificador siga estas precauciones b sicas Ench felo en un contacto de pared de conexi n a tierra con tres terminales No quite la terminal para conex...

Page 15: ...pared con tres terminales del mismo tipo conectado a tierra de acuerdo con todos los reglamentos y normas locales Si no se dispone de un contacto de pared del mismo tipo es responsabilidad personal y...

Page 16: ...aseg rese de que El balde est debidamente insertado en el deshumidificador El balde est vac o Temperatura m nima de funcionamiento 65 F 18 C Instale el deshumidificador en un piso a nivel lo suficien...

Page 17: ...balde est lleno vac e el balde y vuelva a colocarlo Si el balde no est bien colocado quite el balde y vuelva a colocarlo Aseg rese de insertar el balde completamente dentro del deshumidificador y que...

Page 18: ...ta luz indica que usted tiene que verificar Si el balde est lleno vac e el balde y vuelva a colocarlo Si el balde no est bien colocado quite el balde y vuelva a colocarlo Aseg rese de insertar el bald...

Page 19: ...d desea eliminar AUTO DRY Secado autom tico provee el mejor control de humedad de todos los modos al ajustar autom ticamente la velocidad del ventilador y o encender y apagar la unidad para mantener s...

Page 20: ...ies 2 4 m Haga pasar el otro extremo de la manguera de patio por un desag e de piso Verifique que la manguera est plana y en el desag e No da e el exterior para que la conexi n no tenga fugas Centro d...

Page 21: ...balde de agua con un detergente suave para evitar la formaci n de moho mildiu y bacterias MILD DETERGENT Cuidado del deshumidificador C mo usar el deshumidificador cont La posici n Alta el Flotador d...

Page 22: ...cesita servicio t cnico o llamar para hacer alguna pregunta tenga lista esta informaci n N mero del modelo N mero de serie Fecha de compra N mero de tel fono Tienda El n mero del modelo y el n mero de...

Page 23: ...pra Esta informaci n nos ayudar a atenderle mejor Sucursales de servicio directo COLUMBIA BRIT NICA 1 800 665 6788 ALBERTA 1 800 661 6291 ONTARIO rea de Ottawa 1 800 267 3456 excepto c digo de rea 807...

Page 24: ...1187730 11 03 2003 Todos los derechos reservados Impreso en los EE UU 1187730SPv08 12 3 03 1 24 PM Page 12...

Reviews: