background image

Installation

Page 16

RES-403

5.12.2 Replacing the heatsealing band

All power supply leads must be disconnected
from the RESISTRON temperature controller

in order to replace the heatsealing band.

The heatsealing band must be replaced in
accordance with the instructions provided by

the manufacturer.

Each time the heatsealing band is replaced, the zero
point must be calibrated with the AUTOCAL function
while the band is still cold, in order to compensate pro-
duction-related resistance tolerances. The burn-in pro-
cedure described above should be performed for all
new heatsealing bands.

5.13

Startup procedure

Please also refer to section 1 "General information" on
page 3 and section 2 "Application" on page 4.

Installation and startup may only be per-
formed by technically trained, skilled per-

sons who are familiar with the associated risks and
warranty provisions.

5.13.1 Initial startup

Prerequisites: The controller must be correctly installed
and connected (

ª

section 5 "Installation" on page 5).

Proceed as follows to start up the controller for the first
time:
1. Switch off the line voltage and verify that all circuits

are de-energized.

2. The supply voltage specified on the nameplate of

the controller must be identical to the line voltage
that is present in the plant or machine. The line fre-
quency is automatically detected by the tempera-
ture controller in the range from 47…63Hz.

3. In the case of controllers manufactured up to Sep-

tember 2005, the settings of the DIP switches on the
controller are indicated in the ROPEX Application
Report and depend on the heatsealing band that is
used (section 5.11 "Controller configuration" on
page 13).

4. Make sure that no START signal is activated.
5. Switch on the line voltage.
6. When the voltage is switched on, the yellow

"AUTOCAL" LED lights up for approximately 0.3
seconds to indicate that the controller is being

powered up correctly.

As of SW-Revision 106:
If the red "ALARM" LED lights up for 0.3s in

addition to the yellow "AUTOCAL" LED when the
voltage is switched on, the configuration of this
controller has been changed in the visualization
software (

ª

section 6.10 "Diagnostic interface/

visualization software (as of October 2005)" on
page 25). In order to avoid malfunctions, please
check the controller configuration before
continuing the startup procedure.

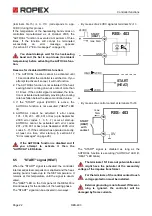
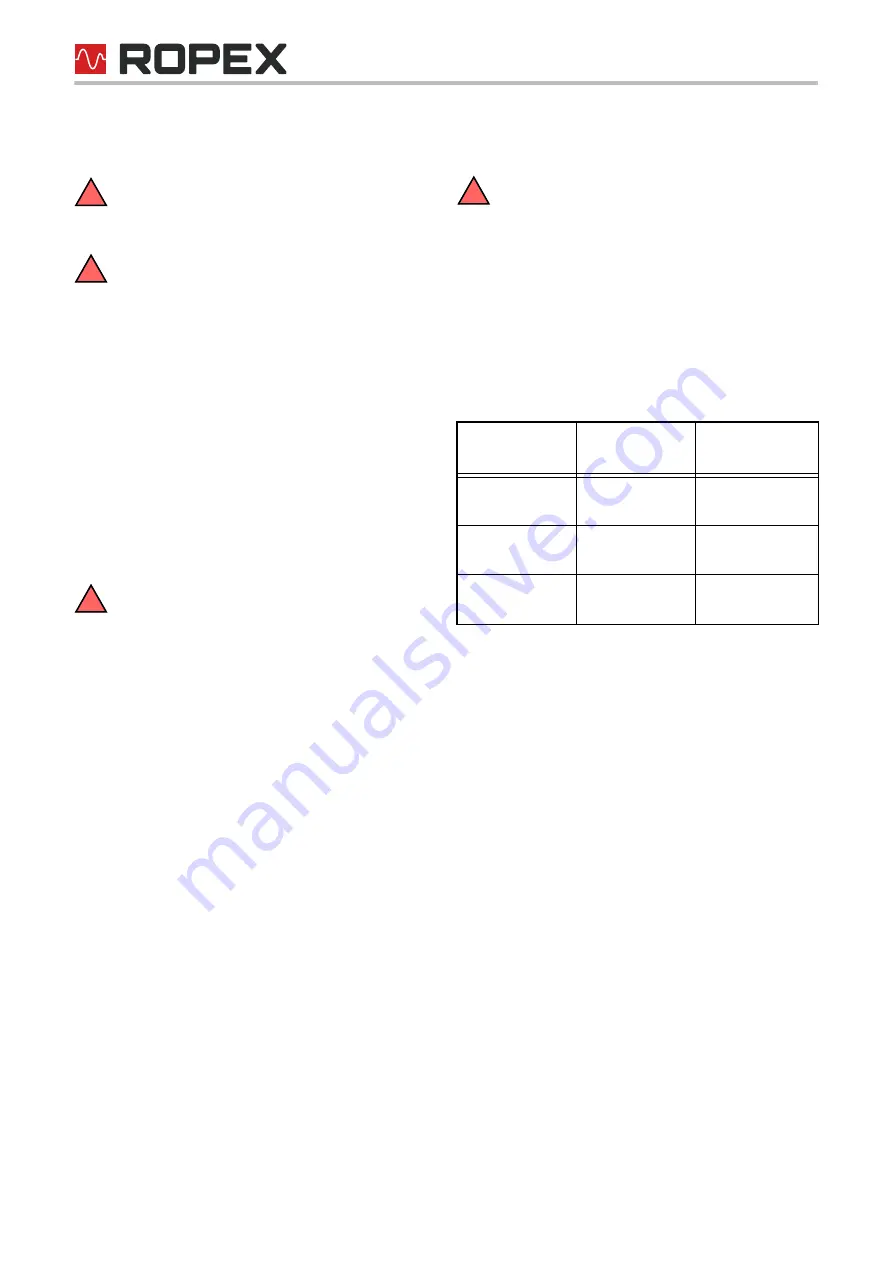
7. One of the following states then appears:

Activate the AUTOCAL function while the heatse-
aling band is still cold (either with the manual button
on the controller or by applying an external signal to
terminals 8+13). The yellow "AUTOCAL" LED lights
up the duration of the calibration process (approx.
10…15s). A voltage of app. 0VDC appears at the
same time at the actual value output (terminals
14+15). If an ATR-x is connected, it indicates
0…3°C.
When the zero point has been calibrated, the
"AUTOCAL" LED goes out and a voltage of
0.66VDC (300°C range) or 0.4VDC (500°C range)
appears at the actual value output instead. If an
ATR-x is connected, it must be set to "Z".
If the zero point has not been calibrated suc-
cessfully, the red "ALARM" LED blinks slowly (1Hz).
In this case the controller configuration is incorrect
(

ª

section 5.11 "Controller configuration" on

page 13 and ROPEX Application Report). Repeat
the calibration after the controller has been confi-
gured correctly.

8. When the zero point has been calibrated suc-

cessfully, set a defined temperature on the set point
potentiometer and activate the "START" signal
(HEAT). The "HEAT" LED then lights up. The hea-
ting and control process can be observed at the

!

!

!

"ALARM" 

LED

"OUTPUT" 

LED

ACTION

OFF

Short pulses 
every 1.2s

Go to 7

BLINKS fast
(4Hz)

OFF

Go to 7

Lit
Continuously

OFF

Fault diagnosis
(

ª

sec. 6.12)

!

Summary of Contents for RESISTRON RES-403

Page 1: ...CAL Automatic optimization AUTOTUNE Automatic configuration of the secondary voltage and current ranges AUTORANGE as of October 2005 Automatic phase angle compensation AUTOCOMP as of October 2005 Automatic frequency adjustment Set point selection with potentiometer 0 10VDC analog output for ACTUAL temperature Activated with contact or 24VDC signal Alarm function with fault diagnosis Heatsealing ba...

Page 2: ...0 View of the controller 13 5 11 Controller configuration 13 5 12 Replacing and burning in the heatse aling band 15 5 13 Startup procedure 16 6 Controller functions 18 6 1 Indicators and controls 18 6 2 Temperature setting set point selection 19 6 3 Temperature indication actual value output 20 6 4 Automatic zero calibration AUTOCAL 21 6 5 START signal HEAT 22 6 6 Measuring impulse duration as of ...

Page 3: ...mperature controller must be set and coded according to the temperature coefficient of the heatsealing band The use of incorrect alloys with a too low temperature coefficient and incorrect coding of the RESISTRON temperature controller leads to uncontrolled heating of the heatsealing band which will ultimately burn out The original heatsealing bands must be clealy identified by means of suitable m...

Page 4: ...r 1 8 Disposal This device is subject to Directive 2012 19 EU concerning the reduction of the increasing amount of waste electrical and electronic equipment and the dis posal of uch waste in an environmentally sound way It must not be disposed of as residual wase To guarantee proper disposal and or the recover of reusable material please take the device to adesignated municipal collectin point and...

Page 5: ...ynamic response of the control system thanks to AUTOTUNE which adapts automatically to the controlled system High precision thanks to further improved control accuracy and linearization of the heatsealing band characteristic High flexibility The AUTORANGE function as of October 2005 covers a secondary voltage range from 0 4V to 120V and a current range from 30A to 500A Automatic adjustment to the ...

Page 6: ...he electrical cabinet on a standard top hat rail DIN TS35 rail according to DIN EN 50022 If several controllers are installed on one top hat rail the minimum clearance specified in section 8 Technical data on page 34 must be allowed between them 4 Wire the system in accordance with the instructions in section 5 3 Power supply on page 8 section 5 6 Wiring diagram Standard on page 10 and the ROPEX A...

Page 7: ...uitable temperature coefficient 20mm clearance if several controllers installed on one top hat rail Note polarity No additional resistance in secondary circuit Dimension transformer correctly Secondary voltage Power Duty cycle Configure DIP switches correctly Sufficient wire cross section No push on connectors Twisted Current measuring wires IR R Connect U measuring wires directly to heatsealing b...

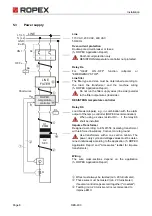
Page 8: ...res load side RESISTRON temperature controller Relay Kb Load break all pole e g in combination with the alarm output of the temp controller ROPEX recommendation When using a series resistor RV 1 the relay Kb shall be installed Impulse Transformer Designed according to EN 61558 isolating transformer with reinforced insulation Connect core to ground Use transformers with a one section bobbin The pow...

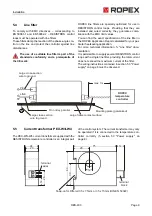
Page 9: ...cation For more technical information ª Line filter docu mentation It is permissible to supply several RESISTRON control loops with a single line filter providing the total current does not exceed the maximum current of the filter The wiring instructions contained in section 5 3 Power supply on page 8 must be observed 5 5 Current transformer PEX W3 W4 The PEX W3 W4 current transformer supplied wit...

Page 10: ...1 GND 13 12 5 6 8 Contact closed or opened by ALARM see configuration 11 9 10 7 START HEAT with contact 14 15 18 17 16 cw 2K SET POINT POTENTIOMETER PD 3 or PD 5 Cable shielded C ATR _ ANALOG OUTPUT 0 10VDC 2 1 4 3 Current transformer twisted Impuls transformer Heat sealing band LINE Line filter LF xx480 sec U2 prim U1 0V Internnal ground No external grounding allowed 0V Internal ground No externa...

Page 11: ...6 8 Contact closed or opened by ALARM see configuration 0V Internnal ground No external grounding allowed R Current transformer Impuls transformer 11 9 10 7 IR UR Heat sealing band START HEAT with contact 14 15 18 17 16 cw 2K SET POINT POTENTIOMETER PD 3 or PD 5 Cable shielded C ATR _ ANALOG OUTPUT 0 10VDC LINE Booster NC NC 2 2 4 IN OUT 1 1 3 Line filter LF xx480 4 3 sec U2 prim U1 twisted 20 19 ...

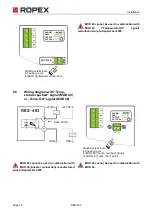
Page 12: ...annot be used in combination with MOD 26 booster connection manufactured prior to September 2005 MOD 46 cannot be used in combination with MOD 40 Additional terminals in housing cover for MOD 26 Booster connection BOOSTER 19 20 4 3 2 1 AUTOCAL OUTPUT HEAT ALARM RES 403 Imax 50mA 24VDC GND GND 24VDC 4 3 2 1 Additional terminals in housing cover for MOD 40 Temp reached signal or MOD 46 Temp OK signa...

Page 13: ...by the automatic calibration function AUTOCAL The voltage is configured in the range from 0 4VAC to 120VAC and the current in the range from 30A to 500A If the voltage and or the current is outside the permissible range an detailed error message appears on the controller ª see section 6 12 Error messages on page 26 Configuration with coding switches up to September 2005 Set the DIP switches for ma...

Page 14: ...temperature ranges and alloys can be selected by means of the ROPEX visualization software ª see section 6 10 Diagnostic interface visualization soft ware as of October 2005 on page 25 3 2 1 4 5 ON OFF 1 10V 6 60V 20 120V ON OFF OFF OFF ON OFF OFF OFF ON 30 100A 60 200A 120 400A OFF ON ON OFF OFF ON DIP switch DIP switch 1 2 U2 I2 3 4 5 3 2 1 4 5 4 3 ON OFF U V 2 1 10 SWITCH ON Factory settings 2x...

Page 15: ...CR Too low a TCR leads to oscilla tion or uncontrolled heating When heatsealing bands with a higher TCR are used the controller must be calibrated for this The first time the heatsealing band is heated to appro ximately 200 250 C the standard alloy undergoes a once only resistance change burn in effect The cold resistance of the heatsealing band is reduced by appro ximately 2 3 However this at fir...

Page 16: ...ltage 6 When the voltage is switched on the yellow AUTOCAL LED lights up for approximately 0 3 seconds to indicate that the controller is being powered up correctly As of SW Revision 106 If the red ALARM LED lights up for 0 3s in addition to the yellow AUTOCAL LED when the voltage is switched on the configuration of this controller has been changed in the visualization software ª section 6 10 Diag...

Page 17: ...age is displayed please proceed as described in section 6 12 Error messages on page 26 9 Burn in the heatsealing band ª section 5 12 Replacing and burning in the heatsealing band on page 15 and repeat the AUTOCAL function 5 13 2 Restart after replacing the heatse aling band To replace the heatsealing band proceed as described in section 5 12 Replacing and burning in the heatse aling band on page 1...

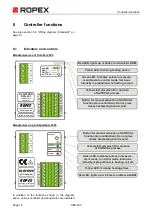
Page 18: ...sealing band is cold Yellow LED remains lit for duration of AUTOCAL process Green LED indicates pulses in measure ment mode In control mode luminous intensity is proportional to heating current Yellow LED lit during heating phase Red LED lights up or blinks to indicate ALARM 4 3 2 1 9 8 6 5 10 11 7 12 13 14 15 16 17 18 Button for manual activation of AUTOCAL function zero calibration Do not press ...

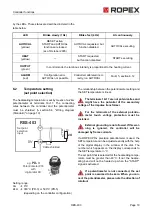
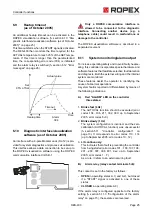
Page 19: ...is used the SET temperature can be adjusted exactly with the help of the digital display in the window of the dial The number which appears on the display corresponds to the SET temperature in C The set point that is selected for the heatsealing tempe rature must be greater than 40 C If not the heatse aling band will not be heated up when the START signal is activated If a potentiometer is not con...

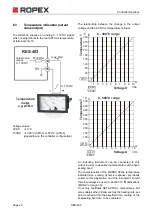
Page 20: ...tics of the ROPEX ATR x temperature indicator size scaling dynamic response are ideally suited to this application and this instrument should therefore always be used ª section 10 Modifications MODs on page 36 It not only facilitates SET ACTUAL comparisons but also enables other criteria such as the heating rate set point reached within the specified time cooling of the heatsealing band etc to be ...

Page 21: ... down to ambient temperature before activating the AUTOCAL func tion Variable initial temperature On controllers manufactured as of April 2005 the initial temperature for the AUTOCAL function can be set in the 0 40 C range in the visualization software ª section 6 10 Diagnostic interface visualization soft ware as of October 2005 on page 25 This setting is remembered if the controller is switched ...

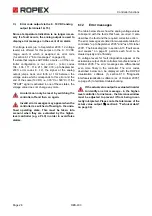
Page 22: ... 7 occur at start up AUTOCAL cannot be activated with error codes 201 203 801 or 9xx up to September 2005 error codes 5 7 If the controller has operated correctly at least one time after start up ª section 6 12 Error messages on page 26 If the AUTOCAL function is disabled and if you attempt to activate it then the AUTOCAL LED blinks 6 5 START signal HEAT When the START signal is activated the cont...

Page 23: ...applications ª ROPEX Application Report The AUTOCOMP function is provided for this purpose The AUTOCOMP function must be activated in the ROPEX visualization software ª section 6 10 Dia gnostic interface visualization software as of October 2005 on page 25 The following settings are possible 1 OFF Factory settings The AUTOCOMP function is deactivated 2 ON The AUTOCOMP function is executed whenever...

Page 24: ... the corresponding error code 307 or 308 is indicated and the alarm relay is switched ª section 6 12 Error mes sages on page 26 If the temperature diagnosis is not activated by the time the START signal is deactivated i e if the ACTUAL temperature does not exceed the upper or lower tolerance band limit the corresponding error code 309 310 is indicated and the alarm relay is switched An additional ...

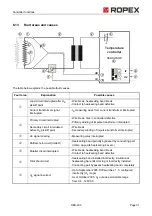
Page 25: ...is controller incorporates special hardware and software features that facilitate selective fault detection and diagnosis Both the external wiring and the internal system are monitored These features assist the operator in identifying the cause of abnormal operations A system fault is reported or differentiated by means of the following indications A Red ALARM LED on the controller three states 1 ...

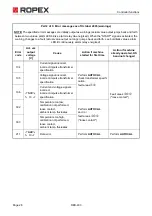
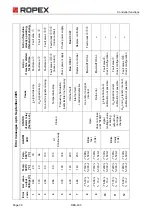
Page 26: ... state This must be taken into account when they are evaluated by the higher level controller e g a PLC in order to avoid false alarms 6 12 Error messages The table below shows how the analog voltage values correspond with the faults that have occurred It also describes the fault and the required corrective action The error messages are listed in two separate tables for controllers up to September...

Page 27: ...age signals Fault area d Fault areas dk 107 2 66 Temperature step down Fault areas fgh loose contact Fault areas fgh loose contact 108 Temperature step up 307 Temperature too high low ª section 6 8 308 309 310 201 3 33 No line frequency line fre quency fluctuates Check power supply Check power supply 202 Line frequency too high fluctuates 203 Line frequency too low fluctuates 304 4 00 Heatup time ...

Page 28: ...chine started for first time Action if machine already operated HS band not changed 104 5 33 ª 10 Current signal incorrect incorrect impulse transformer specification Perform AUTOCAL check transformer specifi cation fault areasij Fault areas fgh loose contact 105 Voltage signal incorrect incorrect impulse transformer specification 106 Current and voltage signals incorrect incorrect impulse transfo...

Page 29: ... possible Fault area j check configuration Fault areas fgh loose contact 112 7 33 ª 10 Voltage signal incorrect no calibration possible Fault area i check configuration Fault areas fgh loose contact 113 8 00 ª 10 Current voltage signals incor rect no calibration possible Fault area ij check configuration Fault areas fgh loose contact 114 8 66 ª 10 Temperature fluctuates no calibration possible Per...

Page 30: ...Temperature step Frequency fluctuation inadmissible line frequency Internal fault Internal fault controller defective U R and or I R signal incorrect Data error I R signal incorrect calibration not possible U R signal incorrect calibration not possible U R and I R signals incorrect calibration not possible STATUS of alarm relay factory set Closed Open does not close until START signal voltage valu...

Page 31: ...e transformer interrupted Secondary circuit interrupted before UR pickoff point Wire break Secondary winding of impulse transformer interrupted e UR signal missing Measuring wires interrupted f Partial short circuit delta R Heatsealing band partially bypassed by conducting part clamp opposite heatsealing bar etc g Parallel circuit interrupted Wire break heatsealing band break Contact to heatsealin...

Page 32: ...ncorrectly connected Fault area Explanation Possible causes DIP switches for secondary voltage U2 and current I2 up to September 2005 U2 6 60VAC I2 30 100A DIP switches 2 ON 1 3 4 5 OFF These switches are automatically set by the AUTORANGE function on all controllers manufactured as of October 2005 Rotary coding switch for heatsealing band alloy and temperature range Heatsealing band alloy Alloy A...

Page 33: ...th ROPEX visualization software only Measuring impuse duration X Measuring impulse length 1 7ms Temp OK signal as of October 2005 With MOD 46 only X Tolerance band 10K 10K Temperature diagnosis X Temperature diagnosis OFF Heatup timeout X Heatup timeout OFF ...

Page 34: ...tured as of October 2005 The temperature range and temperature coefficient settings can also be specified by means of the ROPEX visualization software ª section 6 10 Diagnostic interface visualization software as of October 2005 on page 25 in addition to the rotary coding switch see below Temperature range 200 C 300 C 400 C or 500 C Temperature coefficient 400 4000ppm variable setting range Five d...

Page 35: ... top hat rail DIN TS35 rail a clearance of at least 20mm should be allowed between them The moving clip required for fastening must be facing down for mounting on a horizontal top hat rail End holders to mechanical fix the controller must be fitted at both ends for moun ting on a vertical top hat rail Weight Approx 0 7kg incl connector plug in parts Housing material Plastic polycarbonate UL 94 V0 ...

Page 36: ...he modifications described here are just a few of the large number available Separate documents are sup plied for all modifications The modifications must be ordered separately MOD 01 Amplifier for low secondary voltages UR 0 25 16VAC This modification is necessary for example for very short or low resistance heatse aling bands MOD 26 Additional terminal for connecting an external switching amplif...

Page 37: ... section 6 10 Diagnostic interface visualization software as of October 2005 on page 25 If the actual temperature is inside the specified tolerance band when the START signal is activated the output signal is activated as well see graph below If the actual temperature leaves the tolerance band the output signal is deactivated again The output signal then remains deactivated even if the actual temp...

Page 38: ...ease indicate the article numbers of the controller and the required modifications optional in all orders e g RES 403 400VAC MOD 26 controller for 400VAC power supply with booster connection P N 740303 800026 must be ordered Current transformer PEX W4 P N 885106 Line filter LF 480 06 Continuous current 6A 480VAC P N 885500 35 Continuous current 35A 480VAC P N 885506 Impulse transformer See ROPEX A...

Page 39: ...How to order RES 403 Page 39 For more accessories ª Accessories leaflet Booster B 400 075 Max pulse load 75A 400VAC P N 885301 100 Max pulse load 100A 400VAC P N 885304 ...

Page 40: ...to order 38 I Impulse heatsealing method 4 Impulse transformer 8 38 Installation 5 35 Installation procedure 6 Installation regulations 6 L Line filter 4 8 9 38 Line frequency 5 34 Line voltage 34 M Maintenance 4 Measuring impulse duration 23 Modifications 11 12 36 38 MODs 11 12 36 38 O Over current protection 8 Overheating of heatsealing band 5 P PEX W3 W4 3 9 PEX W4 38 Phase angle compensation 2...

Page 41: ...ex RES 403 Page 41 Temperature reached signal 12 37 Temperature setting 19 Transformer 3 8 38 Type of construction 34 V View of the controller 13 Visualization software 25 W Wiring 6 8 Wiring diagram 10 11 ...

Reviews: