REMOTE OCEAN SYSTEMS
SEASTAR OPERATION AND MAINTENANCE MANUAL
10-01313 REV D
11
4.
Operation
4.1.
Pre-Operation
Prior to operating the Seastar, perform the following.
1.
Verify the bezel cannot be rotated by hand.
2.
Verify the window is tightly held by the bezel.
3.
Verify the window o-ring is evenly compressed by the window.
4.
Verify the connector is clean, dry (if dry mate) and in good repair.
5.
Verify the power cable is securely connected.
4.2.
Post Operation
After operating the Seastar, perform the following.
1.
Rinse the light with clean water and remove any salt or fouling.
2.
Inspect the exterior light for overt signs of damage.
4.3.
AC Operation
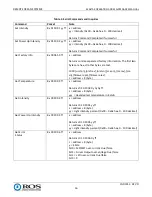
Check the part number of the Seastar unit and see below for proper operation.
10-01310 (-03)
This version is
only
compatible for operation with a Schilling Light Control Unit (LCU). The dimming mechanism
of the light takes advantage of the rectified AC output from the LCU to achieve low light levels at the lower end
of the dimming range. Use LCU application to turn on the light, the corresponding slider will determine the light
output intensity.
DO NOT PLUG DIRECTLY INTO WALL OUTLET,
the unrectified AC sine wave will damage the
driver board.
10-01310 (-01, -02,-04)
These versions are compatible for operation with a standard phase control dimmer such as a TRIAC or Crydom
dimmer, they can also be plugged directly into a 120VAC wall outlet for 100% light output.
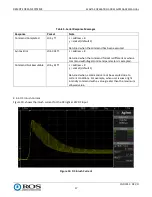
10-01317 (-03,-06)
These versions will only operate when using an isolated 0-10VDC voltage supply to control the light output
intensity. Light output will be at 0% if only load, neutral, or earth ground are connected, or if the voltage supply
is set to 0VDC. To change the light output intensity adjust the voltage supply between between 0-10VDC, with
10VDC setting the light output to 100% intensity.
4.3.1.
AC Triac Dimming
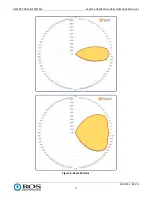
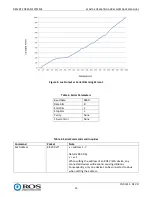
Figure 5 shows the Seastar light output when used with a triac dimmer. The test was performed using a Lutron
DVCL-153P-WH dimmer.

