CHAPTER 5 – MAINTENANCE – REPAIRS
13
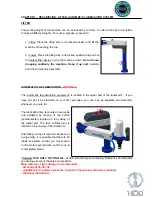
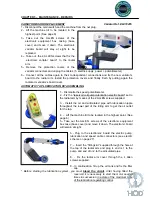
VARIATOR BOARD REPLACEMENT
Variator
Ref. EL010416
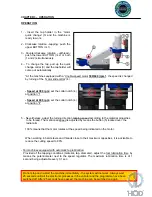
1.- Disconnect the main switch and the machine from the net plug.
2.- Lift the machine till to be located in the
highest point. (See page 6)
3.- Take out the ALLEN screws of the
electronic equipment box casing (base
cover) and move it down. The electronic
variator board will stay at sight to be
replaced.
4.– Take out the 4 ALLEN screws that fix the
·electronic variator board” to the radial
arm.
5.- Remove the protection covers of the
variator connectors and unplug the cables (5, electric supply, power + potentiometer)
6.– Connect all the cables again to their correspondent connections and fix the new variator’s
board to the radial arm. Install the protection covers and finally finish by putting again the
radial arm variator’s board cover.
AUTOMATIC TAP LUBRICATION KIT ASSEMBLING
1. - Dismantle the speed potentiometer.
2. - Fix the “reoil pump+lubrication electric board” set to
the radial arm by means of the 2 ALLEN screws supplied.
3. - Install the oil and articulated pipe with lubrication nipple
throughout the lower part of the tilting arm to get the oil outlet
for the tap.
4. – Lift the machine till to be located in the highest point. (See
page 6)
5.- Take out the ALLEN screws of the electronic equipment
box case (base cover) and move it down. The electronic board
will remain at sight.
6.- Plug to the electronics’ board the electric pump,
lubrication and speed cable connectors (see electric
scheme on page 27).
7. – Insert the “fittings kit” supplied through the hole at
the top of the radial arm and plug it, end nr.1 to the
pump and end of nr.2 to the articulated pipe.
8. - Fix the radial arm cover through the 4 Allen
screws supplied.
9.- In continuation, fill up the oil tank and fix the filler
cap.
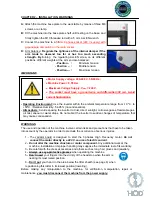
*
Before starting the lubrication system, you must
bleed the circuit
. Alter having filled the
reservoir it is necessary to start the motor several
times in succession in a state of the maximum time
of the lubrication regulating control
.
Summary of Contents for MOSQUITO
Page 20: ...20 ...
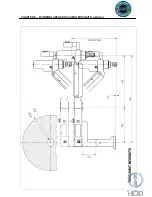
Page 23: ...CHAPTER 8 WORKING AREAS ROSCAMAT MOSQUITO vertical 23 ...
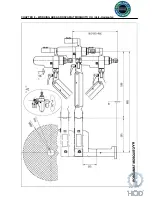
Page 24: ...CHAPTER 8 WORKING AREAS ROSCAMAT MOSQUITO V H Vert Horizontal 24 ...
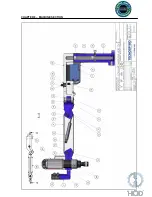
Page 25: ...CHAPTER 8 MACHINE SECTION 25 ...
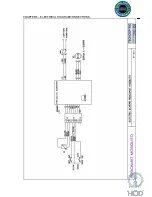
Page 27: ...CHAPTER 8 ELECTRICAL DIAGRAM CONNECTIONS 27 ...
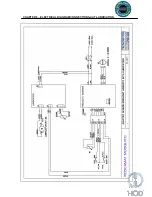
Page 28: ...CHAPTER 8 ELECTRICAL DIAGRAM CONNECTIONS AUT LUBRICATION 28 ...
Page 29: ...CHAPTER 8 NOTES 29 DATE DESCRIPTION Date of creation September 2009 ...


