UltraVista Installation and Operations Manual
23
Note
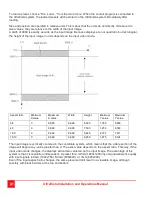
The units are equal in the vertical and horizontal directions, and are relative to the
horizontal resolution.
For example, if the input signal has a resolution of 1920x1200, then a width of 9999 U will be 1920 pixels
(a height of 9999 U will be also be 1920 pixels, resulting in black borders at the top and bottom of the
image).
The simplest analogy for the units is to think about them as percentage values of the input signal
width. 5000 U would be 50% of the input image width, for example, or 7278 U would be 72.78%.
Note
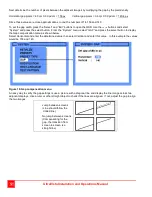
The values for size and position specify the coordinates of the section from the input image a display
shows. This means that reducing the width and height of a rectangle in the Edit View will cause the display
to zoom in and show a smaller portion
SETTING UP A VIDEO WALL –
FREE PRESETS
To set up a video wall with a free setup, follow the steps below.
When you have decided the video wall layout, that is, the size and location of the displays, connect all
components, including input sources, UltraVista units, displays, and the external control PC with the
UltraVista Control program.
1. Set input aspect ratio.
Find out the aspect ratio of input channels 1 and 2.
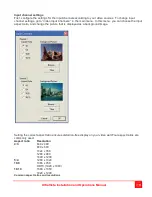
Refer to section Input channel settings for a table of common resolutions and their aspect ratios.
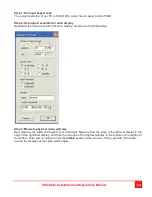
In the UltraVista Control program, go to “Video . Input Channels...” in the main menu. In the window, set
the aspect ratios for the input channels.
2. Set output resolution for each display.
Find out the native resolution for your displays. Open the Edit window from the context menu for each
display, and set the output resolution to the native resolution of your display.
3. Measure physical video wall size.
Measure the width and height of your video wall. Measure from the edge of the leftmost display to the
edge of the rightmost display, and from the top edge of the topmost display to the bottom of the display at
the bottom. When measuring, take care to measure only the visible section of the screens, that is,
exclude the frames around the displays at the video wall’s edges.
Calculate your video wall’s aspect ratio to help you define the section of the input image you want
to display on your video wall. Usually, the ratio will differ from the input aspect ratio.
Note:
Up to this point, the settings you have obtained apply to the video wall, and are the same for all presets
you will create for that particular wall. Steps 4-8 apply to one particular preset. Repeat these steps for
each preset you want to set up.
4. Define size of input image section to display
This step describes settings to show as much as possible of the input image on a video wall, without black
bars at the sides or top and bottom.
First, compare the aspect ratio of your video wall to the aspect ratio of the input image. The fastest way to
do this is to divide the width by the height for the video wall and for the input image, and compare the
results. If the resulting value for the video wall is higher than the input image, the video wall is wider than
the input image. In this case, choose the width of the input image section as 9000 units. The input image
section is intentionally smaller than the full width of 9999 units, to leave some space for corrections. If the
aspect ratio of the video wall is less than that of the input image, the video wall is higher than the input
image.
In this case, look up the height of the input image in units in the table in section Units .

