


18
CRYSTALVIEW PLUS USB INSTALLATION AND OPERATIONS MANUAL
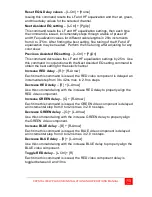
In summary, adjusting the video consists of:
1. Enter the Command Mode
2. Select the video channel to adjust
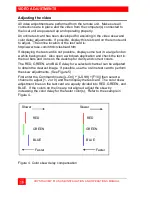
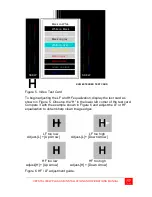
3. Display the test card or a created straight line graphic that is equally
divided into three color parts, RED, GREEN, and BLUE
4. Adjust the RED, GREEN, and BLUE delay to align the three colors
5. Observe the “H” in the lower left corner of the test card or display
some text on a white background.
6. Adjust the LF and HF Equalization to eliminate smearing or bright
streaks
7. Save the settings
8. On the dual and quad models, select the next video channel to
adjust and perform steps 3 – 7 on this and all other channels.
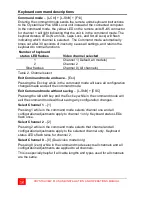
When you enter the “Command Mode” to adjust a channel’s video, the
yellow LED on the Rj45 connector for channel one will light (Not blink).
When you are adjusting the video, keyboard commands are directed to the
CrystalView Plus USB remote unit. Mouse activity is temporarily halted until
you exit the command mode. When you select a channel to adjust the
video, the status LEDs on the keyboard will blink, indicating which channel
is selected.
(See Table 2)


