background image

SATA 4 Port PCI Adaptor with RAID RC209

User Manual 

Summary of Contents for RC-209

Page 1: ...SATA 4 Port PCI Adaptor with RAID RC209 User Manual...

Page 2: ...ep by step photo installation of Magic Switch Hardware installation Important message for user RAID introduction RAID 0 RAID 1 RAID 0 1 RAID 5 optional BIOS configuration Driver installation Quick gui...

Page 3: ...rroring RAID5 Parity RAID RAID 0 1 mirroring striping and Concatenation modes HDD functions normally when not in RAID sets un RAID mode Supports SATA up to 150MB Sec Supports Windows 98SE Me 2000 XP 2...

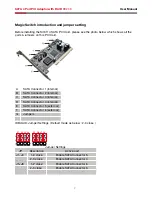
Page 4: ...1 internal B SATA Connector 2 internal C SATA Connector 3 internal D SATA Connector 4 internal E SATA Connector 5 external F SATA Connector 6 external G Jumpers IDE RAID Jumper Settings Default mode...

Page 5: ...this card Please reference our photos below for the proper jumper setting Port A and B are always active With different jumper setting you can active port C D E and F by referencing the following pho...

Page 6: ...PCI Adaptor with RAID RC209 Mode 1 Default ABCD Active Mode 2 ABDF Active Mode 3 ABEF Active C D E F Active 2 3 close 2 close A B Active C D E Active F 2 close 2 close A B Active A B C D E F Active 2...

Page 7: ...g the power cord form the back of the computer 3 Remove your computer s cover 4 Remove the slot bracket from an available PCI slot 5 To install the card carefully align the card s bus connector with t...

Page 8: ...4 If you want to boot from correct HD either from motherboard HD or RC 209 HD please change from BIOS booting sequence 5 Although SATA HD is a hot swap design it is strongly recommended that all user...

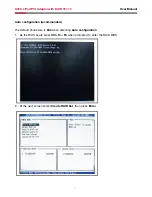
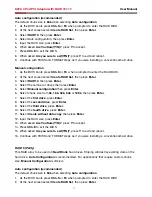
Page 9: ...RAID RC209 Auto configuration recommended The default chunk size is 64k when selecting Auto configuration 1 As the BIOS boots press Ctrl S or F4 when prompted to enter the RAID BIOS 2 At the next scre...

Page 10: ...ng a conventional hard drive Manual configuration 1 As the BIOS boots press Ctrl S or F4 when prompted to enter the RAID BIOS 2 At the next screen select Create RAID Set then press Enter 3 Select RAID...

Page 11: ...conventional hard drive For Existing Hard Drives with Data Recommended for one two original HD with data to mirror with one two fresh empty HD 1 As the BIOS boots press Ctrl S or F4 when prompted to e...

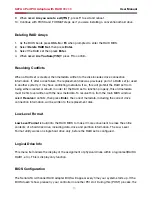
Page 12: ...to rebuild the mirror in the event of a hard drive failure Rebuilding a Failed Mirror Set This function is used when any HD in mirror is failure Your data is still safety System will notice and help y...

Page 13: ...ss Enter 5 Select Manual configuration then press Enter 6 Select chunk size from 8k 16k 32k 64k or 128k then press Enter 7 Select the first drive press Enter 8 Select the second drive press Enter 9 Se...

Page 14: ...second drive press Enter 9 Select the third drive press Enter 10 If applicable select the 4th drive pressing enter after each selection 11 Input the RAID size press Enter 12 When asked Are You Sure Y...

Page 15: ...rebuilt in order for the RAID set to function properly this old metadata must be first overwritten with the new metadata To resolve this from the main BIOS window select Resolve Conflicts then press E...

Page 16: ...09 to a new PC without any OS you need to boot the OS from HD connecting to RC 209 instead of motherboard a Put the driver the driver must fit the OS you want to install to the HD into a floppy disk a...

Page 17: ...15 User Manual SATA 4 Port PCI Adaptor with RAID RC209 Choose the correct OS for your future system Then choose Standard PC with C Step i486...

Page 18: ...with RAID RC209 Keep the floppy disk in floppy drive PC will notice you as below if you take them off from the drive The installation of RC 209 by floppy drive will be completed and the system will de...

Page 19: ...ou will boot our computer from RC209 instead of motherboard Please follow the following instructions a Install RC 209 to an existing OS HD connecting to motherboard b After RC 209 install complete tur...

Page 20: ...t warning pops up click Yes Our driver has passed Microsoft compatibility testing this message appears during new installation For An Existing Installation 1 Setup the RAID Array prior to driver insta...

Page 21: ...indows 2000 XP Server 2003 Installation 1 Right click My Computer and click Manage 2 Select Device Manager 3 Double click SCSI and RAID Controller then double click Silicon Image SiI 3114 SoftRaid 5 C...

Page 22: ...ove the driver CD close all open Windows then restart Windows to complete the installation For Windows Me For New Installation 1 Setup the RAID array prior to Windows installation 2 Follow Microsoft p...

Page 23: ...SiI 3114 SoftRaid 5 Controller should be displayed 3 Highlight Silicon Image SiI 3114 SoftRaid 5 Controller and click Properties A message this device is working properly is displayed in the dialog b...

Reviews: