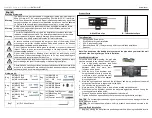
Full Motion Dual Arm, Tilt TV Mount
RHTB-11014FT User Manual
keep it level.
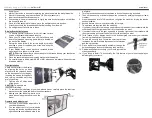
2. Mark off four holes to be used for securing the mount and place the wall plate aside.
3. Next, drill holes using an electric drill and 3/8”(10mm) masonry bit.
4. Insert a concrete anchor into each hole.
5. If necessary, a hammer can be used to lightly tap each anchor into place so that they
are flush with the wall.
6. Once all of the anchors are in place, move the wall plate back into position.
7. Attach the nut onto the threaded shaft that is protruding from the wall.
8. Do not tighten until all nuts are in place.
Display Bracket Installation
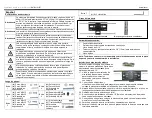
1. To ensure optimal installation, this kit includes various
screws of different diameters and lengths.
2. Place your TV screen down on a soft, flat surface, and
locate the threaded mounting points that are located on
the back of the display.
3. Determine which screw is the correct length by carefully
inserting a straw or toothpick, and mark how deep the
mounting point is.
4. If your display has a curved back or a recessed thread
mounting point, a spacer must be used.
NOTE:
Select the spacer that is closest in depth to the recess to keep your bracket as
close to the display as possible.
5. Place the spacer between the mounting bracket and the display.
6. If a smaller screw is being used(M4,M5 or M6), please use a washer with each screw
for added stability
Final Installation
Attach each bracket to the display
by aligning the holes on each
bracket, with the threaded inserts
on the back panel of your display,
inserting the screws through both
and turning clockwise until they
are fully inserted.
1. Tighten with a Phillips head
screw driver.
CAUTION:
Two people are
required for this step.
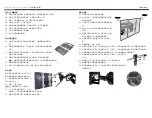
2. To complete the installation of your new plasma mount, carefully place the television
brackets over the upper and lower mounting crossbars.
3. Making sure that the safety-bar is not in
place when placing the television on the
mount
Operation and Adjustment
1. Your new mount can be adjusted to fit
your individual needs.
2. You can adjust the tilt of your television
by using the tension knob located on the
right-hand side and left-hand side of the
wall plate.
3. Turn the tension knobs counter-clockwise to loosen the mounting crossbars.
4. Then tilt the mount up or down to the position you want by pushing the upper or lower
crossbar.
5. Once the desired level of tilt is achieved, retighten the mount by turning the tension
knobs clockwise.
6. Second feature of your mount is swiveling left or right.
7. Two persons are required to do the swiveling.
8. If you want to swivel to the left, one need to push the left end of the crossbar while the
other need to pull the right end of bar till to the position you want.
9. If you want to swivel to the right, one need to push the right end of the crossbar while
the other need to pull the left end of bar till to the position you want.
10. Third feature of your display mount is the lock designed to prevent your television
from being removed from the crossbar.
11. To use the security lock, locate the small metal tabs
located on the arm brackets that attach to the television
and line up the holes.
12. Place a padlock (commercially available) through the
holes and engage to secure the locking tabs in place.
13. Cable management hooks help you to route your cables
orderly and neatly.
14. If you failed to install TV horizontally, the fifth feature of your mount can help you
adjust slightly to correct it.


