4-2
4.1 Removing the System Unit Cover
Caution: Make sure that power to your system unit is turned off. The power cord must remain plugged into
the system unit and to the power source to ensure a proper ground.
To remove the cover from the system unit:
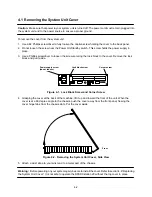
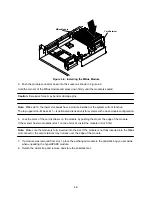
1. Use a #2 Phillips screwdriver to fully loosen the captive screw holding the cover to the back panel.
2. Do not loosen the screw near the Power On/Standby switch. This screw holds the power supply in
place.
3. Use a Phillips screwdriver to loosen the screw securing the lock block to the cover. Remove the lock
block and put it aside.
Lock block screw
Corner screw
Power supply screw
(do not loosen)
Figure 4-1. Lock Block Screw and Corner Screw
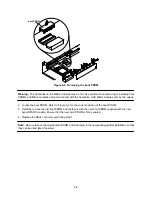
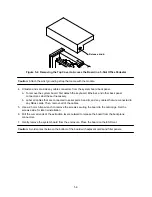
4. Grasping the cover at the back of the machine, lift it up and toward the front of the unit. When the
cover is at a 60 degree angle to the chassis, push the cover away from the front panel, freeing the
cover hinge tabs from the chassis slots. Put the cover aside
Front
Figure 4-2. Removing the System Unit Cover, Side View
5. Attach a wrist strap to your wrist and to a metal part of the chassis.
Warning: Before powering on your system again, be sure to install the cover. Refer to section 4.6 “Replacing
the System Unit Cover.” It is not safe to operate the SPARCstation 20 without the top cover in place.
Summary of Contents for hyperSPARC
Page 2: ...hyperSPARC Module Installation Guide TM...
Page 9: ...1 4...
Page 21: ...2 12...
Page 55: ...5 10...


