4-3
4.2 Removing a Module
Warning: The heatsinks on MBus modules may be hot. Use caution when removing or installing MBus
modules and avoid contact with the heatsinks. Hold MBus modules only by the edges.
Caution: Printed circuit boards are made of delicate electronic components that are extremely sensitive to
static electricity. Ordinary amounts of static from your clothes or work environment can destroy the boards.
Wear a grounding wrist strap when handling the boards. Attach the wrist strap to the metal casing of the power
supply at the rear of the unit top. Handle boards only by the edges. Do not touch the components themselves
or any metal parts.
Do not disconnect the power cord from the system unit power outlet or from the wall socket. This connection
provides the ground path necessary to safely remove and install the printed circuit boards and components.
In addition, keep the internal power supply cable connected to the MLB.
Caution: Make sure that the system unit power is turned OFF by checking that the green LED at the front
of the chassis is not lit and the fan in the power supply is not running.
To remove an MBus module from the system unit:
1. Check that the green LED at the front of the chassis is not lit.
2. Check that the system power cord remains connected to the system and the wall outlet.
3. Remove the system unit cover.
Caution: Place the antistatic mat (shiny side up) on a work surface near the system. Attach the wrist
grounding strap as described on page 1-3.
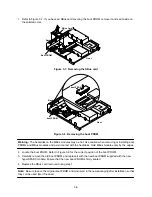
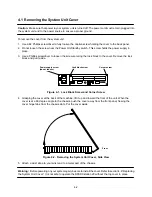
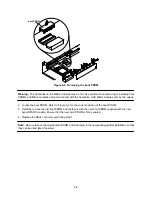
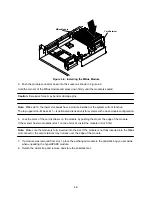
4. Push back both card retainers for the module.
Refer to Figure 4-3. If the system has two modules (slot 1 on top of slot 0), remove the top module first.
MBus Module
Main Logic Board
Card Retainer
Figure 4-3. Removing the MBus Module
Summary of Contents for hyperSPARC
Page 2: ...hyperSPARC Module Installation Guide TM...
Page 9: ...1 4...
Page 21: ...2 12...
Page 55: ...5 10...


