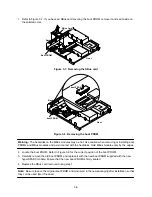
4-8
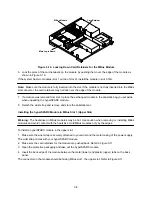
MBus Module
Card Retainer
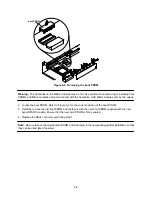
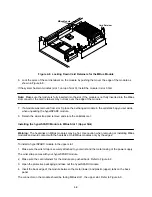
Figure 4-8. Locking Down Card Retainers for the MBus Module
6. Lock the arms of the card retainers on the module by pushing them over the edge of the module as
shown in Figure 4-8.
If the system has two modules (slot 1 on top of slot 0), install the module in slot 0 first.
Note: Make sure the module is fully inserted into the slot. If the module is not fully inserted into the MBus
slot connector, the card retainers may not lock over the edge of the module.
7. If a module was removed from slot 0, place the exchanged module in the antistatic bag you set aside
when unpacking the hyperSPARC module.
8. Detach the wrist strap and remove and store the antistatic mat.
Installing the hyperSPARC Module in MBus Slot 1 (Upper Slot)
Warning: The heatsinks on MBus modules may be hot. Use caution when removing or installing MBus
modules and avoid contact with the heatsinks. Hold MBus modules only by the edges.
To install a hyperSPARC module in the upper slot:
1. Make sure the wrist strap is securely attached to your wrist and the metal casing of the power supply.
The wrist strap comes with your hyperSPARC module.
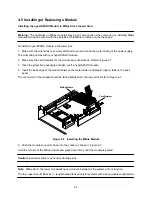
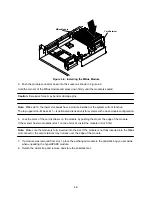
2. Make sure the card retainers for the module are pushed back. Refer to Figure 4-9.
3. Open the protective packaging and take out the hyperSPARC module.
4. Insert the back edge of the module between the metal (lower) and plastic (upper) tabs on the back
panel.
The connector on the module should be facing MBus slot 1, the upper slot. Refer to Figure 4-9.
Summary of Contents for hyperSPARC
Page 2: ...hyperSPARC Module Installation Guide TM...
Page 9: ...1 4...
Page 21: ...2 12...
Page 55: ...5 10...

