OGX-FR Series User Guide (v1.0)
Using DashBoard • 27
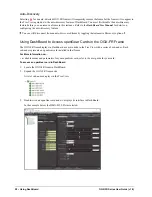
The interface for the Network Controller Card displays in the DashBoard window.
In the following example, the interface for an MFC-OG3-N displays.
3. Select the
Network
tab.
4. Enter a new name for the OGX-FR frame in the
Frame Name
field.
5. Press
Enter
.
6. Click
Apply
.
Removing an OGX-FR Frame from the Tree View in DashBoard
This section outlines how to remove an OGX-FR frame from a Tree View in DashBoard. Once a frame is removed,
DashBoard no longer reports the status in the Tree View and you are no longer able to monitor or control the
affected devices. If communication with a frame is disconnected via the Disconnect option, the status indicator is
light gray until the frame is re-connected. If the status indicator is dark gray, with the rest of the node displaying as
normal, a connection cannot currently be established to the device.
If the OGX-FR frame you are removing is in a Custom Folder, you must first delete the frame from the Custom
Folder before it can be removed from the Tree View.
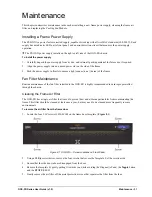
To remove an OGX-FR frame from the Tree View
1. Right-click the OGX-FR frame you wish to remove.
2. Select
to remove the OGX-FR frame from the Tree View.
To disconnect an OGX-FR frame from the Tree View
1. Toggle
to off.
2. Right-click the OGX-FR frame status indicator.
3. Select
or toggle
to on.

