8-Keyer Module Installation • 5
8-Keyer Module Installation
To install the 8-Keyer module for the Vision control panel, you must power
down the control panel, disconnect the communications cables, remove the
Keyer module, install the new module, and then connect the power and
communications cables.
A single 8-Keyer module can be installed in the control panel.
Use the following procedure to install the 8-Keyer module:
1.
Power down the control panel. The frame can remain on during this
procedure. Refer to your switcher documentation for information on
shutting down the switcher.
2.
Unplug the Primary and Redundant (if installed) power from the
control panel.
Warning Hazardous Voltage
— Hazardous voltages are
present in the control panel as long as any of the power supplies
are connected to the AC power.
3.
Lift up on the control panel lid to gain access to the control panel tub.
4.
Identify the Keyer module that you want to replace with the 8-Keyer
module. This should be the control panel row that is assigned as the
Program/Preset row.
5.
Disconnect the
Module Power Cable
from the Keyer module you
). This 4-conductor ribbon cable delivers
power to all the modules in the row. When removing it, ensure that
you do not accidently unplug it from any neighboring modules.
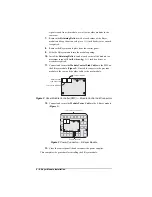
Figure 1 Power Connector — 6-Keyer Module
6.
Disconnect the
Module Control Link Cables
from the Keyer module
you want to remove. These CAT5e cables deliver all the command
PMC Board
To Front of Control Panel
Power Connector


